Leatherworking 101: An Easy Pouch for Beginners
This post contains a super easy leatherworking tutorial for beginners. You don't have to have a ton of tools and you don't have to cut out anything tricky here. You'll end up with a cute little bag/clutch. After buying some leather at Lorraine Fabrics, I wanted to try out some hand sewn leather crafting projects, but I wanted to start with something really simple, just to get the hang of things. See also my post on tips for sewing leather on a sewing machine.
Disclosure: This post contains affiliate links, which means I may receive a percentage if you make a purchase using these links. This won’t cost anything extra to you. I only link to things I like and use, and the proceeds help me to run this blog. Thank you for supporting me!
Materials used:
- Chisel Punch Tool
(this set will help you evenly space the stitching holes in your leather, but if you don't want to invest in it, you can use an awl to punch holes in your leather.)
- Leathercraft Nylon Hammer
(use this to hammer your punches into the leather. You could also use a rubber/rawhide mallet)
- Adjustable Groover
(this will help you create a shallow groove along the edge of your leather to guide your stitching holes and for your thread to settle into when sewing.)
- Waxed Thread
(waxed thread works best for sewing leather)
- Leather Needles
- Upholstery Leather Scraps (2 LB)
(I got a good mix of small- to medium-sized pieces when I bought this scrap bag.)
- KAMsnaps Starter Pack (I used a metal snap for one bag, but the setting tool by Dritz was, in my opinion, poorly designed, and it attached the snaps crookedly. I used a plastic snap for the second bag. Plastic isn't quite as nice as metal, but at least it's solidly attached.)
Leatherworking Basics
See this tutorial for information on how to prepare your leather for sewing using the groover and punch sets mentioned above.
See this tutorial for information on how to saddle stitch. This is the type of stitch most often used when hand-sewing leather.
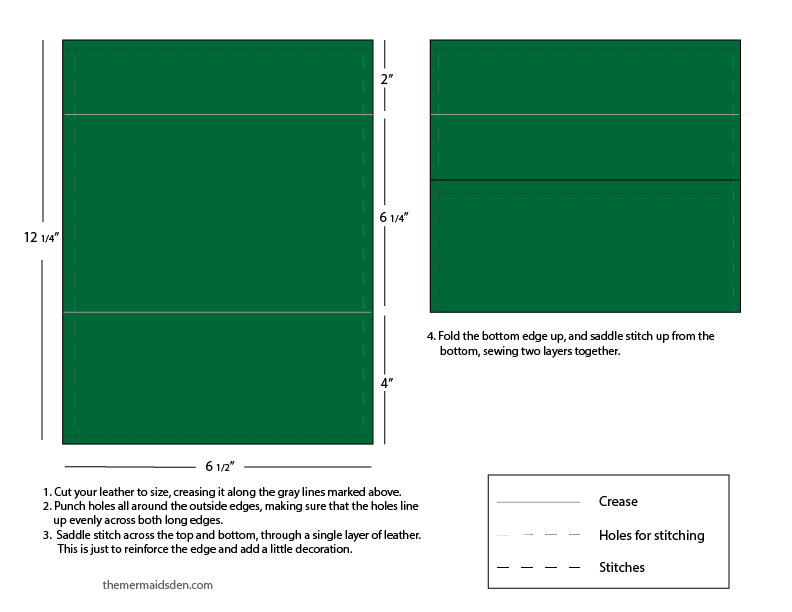
Easy Leatherworking Tutorial
How It Looks in Real Life
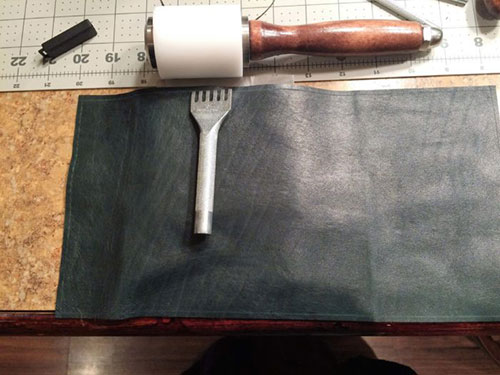
You can see the groove along the edge of the leather, and the holes that have been punched around part of the piece.
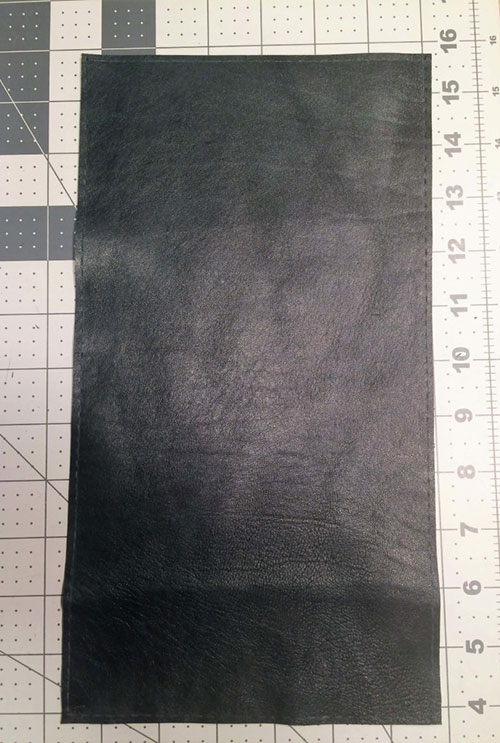
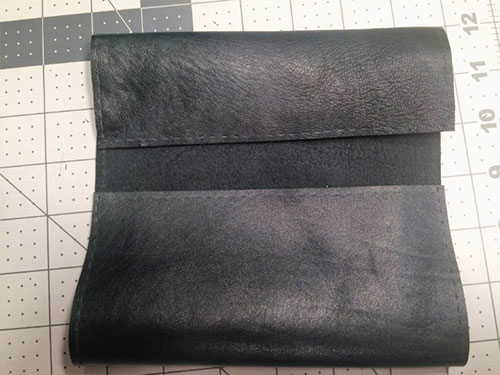
Here's the entire thing after punching holes for stitching. Note also where it has been creased for later folding.
Here's a test fold to show what it will look like:
And another test fold showing what the complete, closed bag will look like.
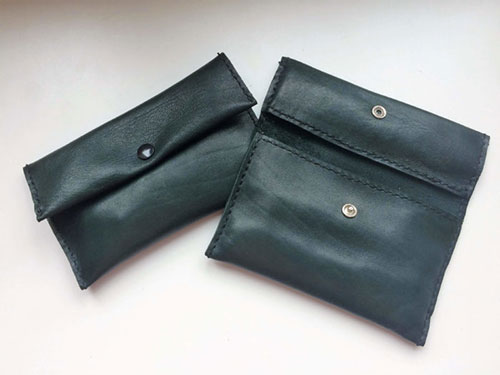
And here's the finished bag!


