Leather Tote Bag Tutorial: Beginner Leatherworking Project

In this post, I'll show you how to make a leather tote bag using simple beginner leatherworking skills. This tutorial will show you how to prepare and hand-stitch each part of your bag, as well as which tools you'll need for basic leathercrafting. You'll learn how to make the bag, pockets, lining, and corded straps.
Disclosure: This post contains affiliate links, which means I may receive a percentage if you make a purchase using these links. This won’t cost anything extra to you. I only link to things I like and use, and the proceeds help me to run this blog. Thank you for supporting me!
Materials used:
- Chisel Punch Tool
(this set will help you evenly space the stitching holes in your leather, but if you don't want to invest in it, you can use a needle tool to punch holes in your leather.)
- Leathercraft Nylon Hammer
(use this to hammer your punches into the leather. You could also use a rubber/rawhide mallet)
- Adjustable Groover
(this will help you create a shallow groove along the edge of your leather to guide your stitching holes and for your thread to settle into when sewing. You could also use a needle tool
for scoring your leather)
- Purple Waxed Thread
(waxed thread works best for sewing leather)
- Leather Needles
- Upholstery Leather Scraps (2 LB)
(I got a good mix of small- to medium-sized pieces when I bought this scrap bag. These pieces would work for the accent pockets on this tote)
- KAMsnaps Starter Pack (I used these for the snap on the outside pocket. They're plastic, but I like the color variety that comes with them.)
- Quilt Clips
(you don't want to use pins to hold leather pieces together because they'll leave holes. Quilt clips will hold pieces together without damaging the leather.)
- Leather piece at least 34" x 21" (I recommend getting this at a local store if at all possible. It's tough to pick your leather without seeing it.)
- 2 yards of 1/2" round braided cord or rope for the handles
- 1/2 yard of fabric for the lining
Leatherworking Basics
See this tutorial for information on how to prepare your leather for sewing using the groover and punch sets mentioned above.
See this tutorial for information on how to saddle stitch. This is the type of stitch most often used when hand-sewing leather.
See my previous posts on making an easy leather pouch The outside pocket on this bag follow the same pattern as the pouch from my previous post.
Preparing Your Materials
The following image shows you the size of each piece of the bag. You'll also need rope for the handles and snaps for the pockets of the bags, as well as the leathercrafting tools mentioned in the materials section.

This image shows where the creases and holes will go in each piece. I'll describe this in more detail below.

Here are all of the pieces cut out and laid out according to the diagrams above. I reversed the shape of the inside pocket here, but it doesn't really matter which way you do it.

What do do about creases?
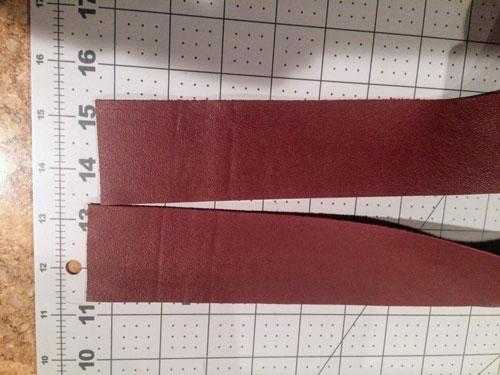
If you find that your leather has some creases or imperfections, you can try to cut around them, or you can try to even them out. For example, the straps I cut for this bag had some creases that I wanted to flatten out.

Wet the back of the leather with water and let some heavy books sit on these creases overnight.

It's not perfectly flat, but the creases are much less noticeable now!
Scoring and punching
For each piece of leather that needed to be punched, I used a needle tool to score a line about 1/4" from the edge (or you can use the adjustable groover that I linked to above). This will help you punch your holes consistently the same distance from the edge.

Use your punches and the hammer to add holes to each piece. You could also use the needle tool if you don't have the punches.

Here's what each piece looks like once the holes have been punched. For the top of the main bag piece, I scored lines 1/4" from each other. You'll need four rows of holes here.

Making the Pockets
See my previous posts on making an easy leather pouch for a tutorial on how to make the outer pocket for this bag.
The inside pocket is quite similar, but it has a few more areas to sew. The two narrower slots will hold pens/pencils, and the larger open slot will comfortably hold most phones. Complete the foldover portion as you did the outside pocket. Sew the up the two narrower slots and the larger slot to the left.
The Main Body of the Bag
Figure out where you want the outside pocket to go on your bag and attach it. I didn't punch holes for this ahead of time--I just positioned the pocket and pushed the needle tool through each spot as I went along. Remember to only sew the non-flap portion of the pocket to the bag--the flap needs to be able to open and close.
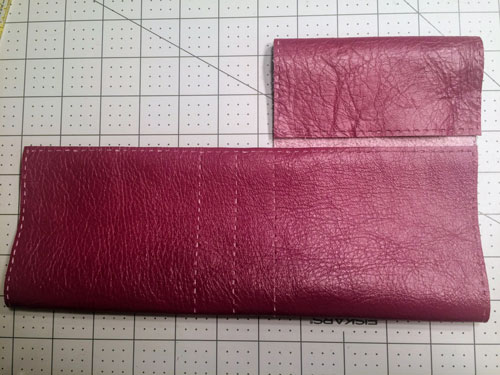
For the main body of the bag, first fold down the top flaps where you punched four sets of holes. You'll have two sets of holes facing each other now. Sew together the uppermost layer of holes, leaving two rows of holes open beneath. You'll eventually add the lining in here and sew through the last two rows of holes, but don't do that just yet. The image below is just to show you what it should look like when you're done.
Now fold the main piece of your bag in half, right sides together. Sew up both sides to create the bag. Once you've done this, box your corners. I used 3" boxed corners on this bag. You can punch through both layers of leather here to make holes to sew, or you can use a sewing machine for this. The stitching won't be visible from the outside of the bag, so it doesn't have to be pretty. I tacked up the points to the side of the bag, but you could also trim them off.

The Lining
Decide where you want your inside pocket and sew it in place. This is easier than the outside pocket because you don't have to punch any holes.

Sew the sides and innermost layer of the pocket to the lining.

Fold over the top edges of the lining and create a 1/2" hem. Now fold your lining fabric in half, right sides together. Sew up the sides with a sewing machine, but leave about 3/4" open at the top of each side.

Box the corners, the same as you did for the outside of your tote.
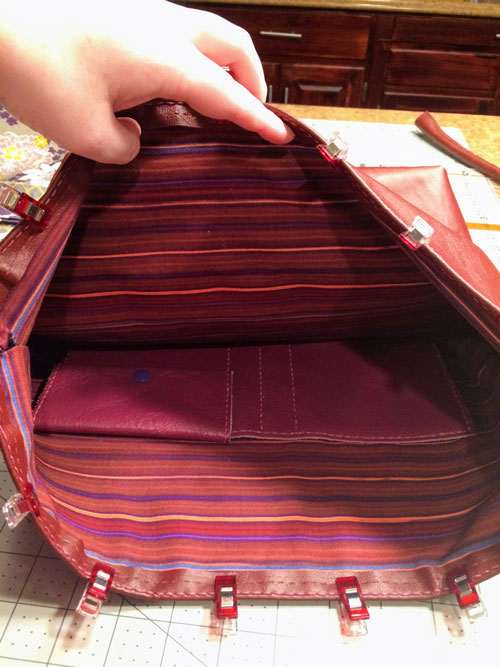
Attaching the Lining
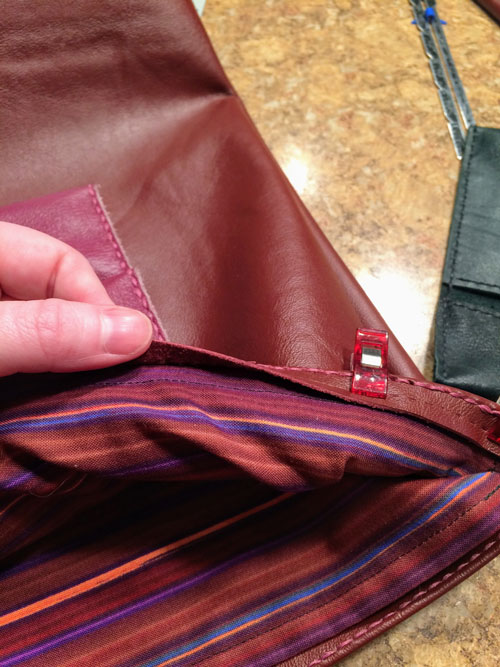
Using your quilt clips to hold everything in place, clip the lining in the open flap at the top of the bag. At the side seams, angle the openings at the seams of the lining under each side of the leather flap. Stitch around the top of the bag to attach the lining to the body of the tote bag.
Making the handles
For each handle, cut a length of rope that is 3" shorter than the strap. Mold the leather around the rope, wrong sides together. Stitch down the length of each handle, minus 1 1/2" on each end--leave that open for now.

Spread out the opening at the end of the strap and attach it to the main part of the bag. Again, I didn't punch the holes in the bag ahead of time, but rather positioned each strap where I wanted it and punched through the body of the bag/lining as I went.
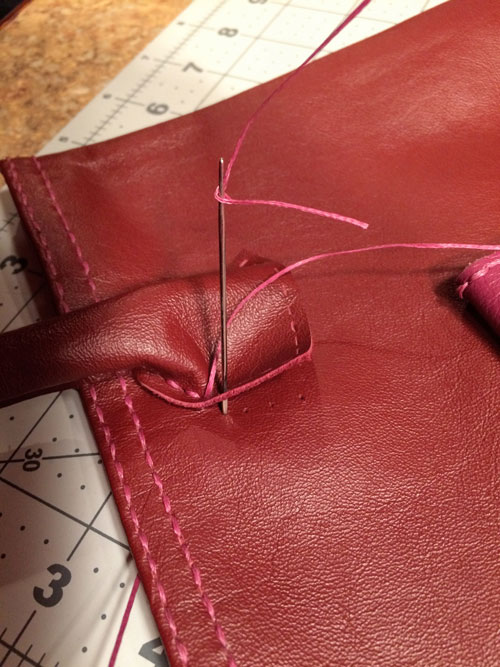
Here's what it looked like once I was done:

The Finished Leather Tote Bag
And here's the finished bag! Have you tried this leather tote bag tutorial? What did you think? Let me know in the comments!