Vintage Singer 99k Sewing Machine: Cleaning, Restoring, and Troubleshooting
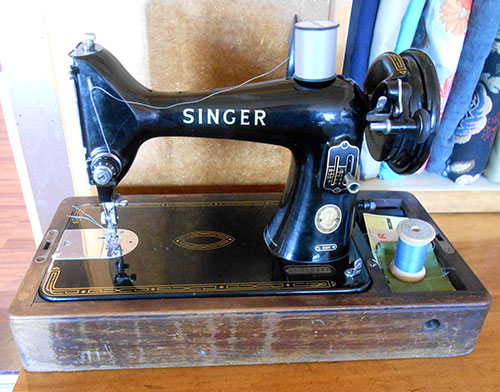
A few months ago, I found this lovely Singer 99k. The "k" just denotes that it was made in Scotland, and otherwise it's the same as other Singer 99s, which were made from 1911 to the 1960s. The one I got was from 1958. The Singer 99 was meant to be a smaller, more portable version of the classic Singer 66. It's made of cast iron, though, so it's still fairly heavy compared to most modern machines.
The nice thing about vintage Singer sewing machines is that they almost always use bobbins and needles that are still in production today. This one uses a class 66 bobbin and a normal 15x1 needle. You can also still find parts for these machines fairly easily.
This was my first vintage sewing machine, so I'll walk you through the process of cleaning, restoring, and troubleshooting. As a beginner, I knew nothing going into this, and I made lots of mistakes, so I should be able to explain this to someone else who is at the novice level, too. I'll try to explain all terms and processes thoroughly, and I'm including links to all of the resources I used along the way. See also my posts on converting the 99k to a hand crank and my post on restoring a second 99k.
Disclosure: This post contains affiliate links, which means I may receive a percentage if you make a purchase using these links. I only link to things I like and use!
Resources used:
- Information on Singer Model 66, 99, and 185k
- How to clean and oil a vintage sewing machine Part 1
- How to clean and oil a vintage sewing machine Part 2
- How to use a Singer 99k
- How to convert a Singer 99 to a hand crank
- Singer 99 and 99k Manual
- Refurbishing Sewing Machines, including the 99k
- Illustrated list of parts for Singer 99k
- Taking the handwheel apart and putting it back together
- Timing and adjusting the Singer 66
How to find parts for a Singer 99k
It's not that difficult to find people selling vintage Singer parts (or new parts that fit vintage Singers), but it can be difficult to know exactly what you need. See this Illustrated list of parts for Singer 99k to help you find the right search terms. I bought parts from eBay seller The Treasure Cellar and Sewing Parts Online (this is a link to all parts compatible with the Singer 99k that are sold by Sewing Parts Online).
Cleaning a Singer 99k
First, I opened it up to clean and oil it. I followed these two videos by Lizzie Lenard. She's not using a Singer 99 as her example, but much of what she says applies across all vintage Singers.
- How to clean and oil a vintage sewing machine Part 1
- How to clean and oil a vintage sewing machine Part 2
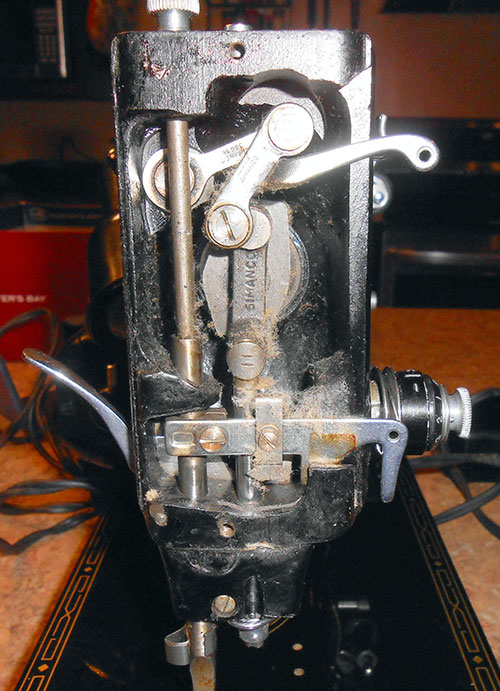
There was quite a bit of build up throughout the machine of dust and lint.
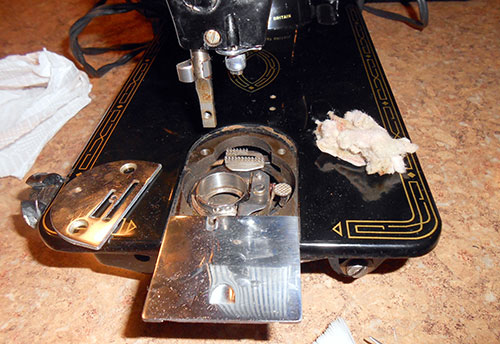
The bobbin/feed dog area was particularly bad.
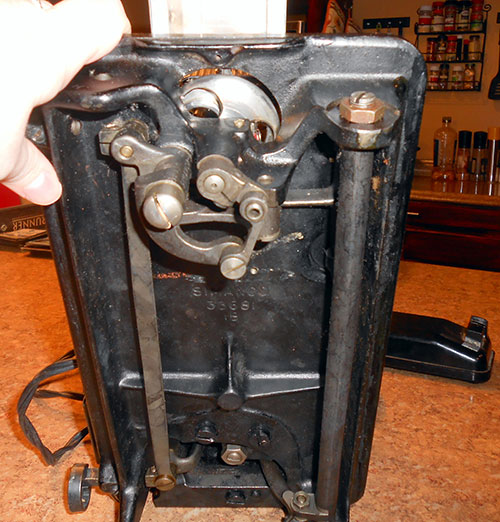
Don't forget to check this same area from underneath as well.
This was the lint ball I collected from all of my cleaning.
Tension issues in a Singer 99k
The tension mechanism (also called a tensioner) had a lot of problems. At first, I thought it was just the take up spring that needed to be replaced, but even after trying a replacement spring and then trying to reshape my initial spring, eventually, I just replaced the entire tension mechanism. This seems to have solved the problem. See this guide on refurbishing sewing machines, which includes adjusting the upper tension mechanism. I bought my tension mechanism here.
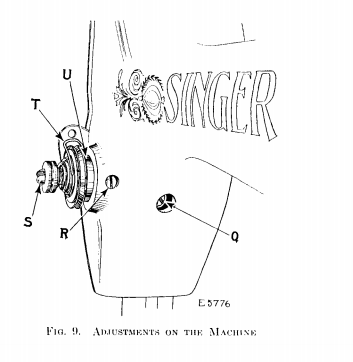
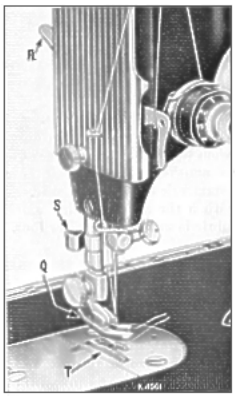
Replacing the entire tension mechanism was pretty easy. You need to loosen the screw noted with the letter R. The whole tension mechanism should come out when you loosen this screw. You can then put the new one in.
Be careful not to lose the tension pin which sits in the middle of the tension mechanism. Adjust the new tension mechanism carefully so that the the presser foot lifter pushes on the tension pin when it's in an upward position. When I first put my new tension mechanism in, I pushed it in too far and secured it there, which didn't allow for the compression/decompression of the tension pin. Tighten screw R to secure the new tension mechanism.
The presser foot lifter is down in this picture. Note that you can see the tension pin.
The presser foot lifter is up in this picture. Note that the tension pin is now compressed.
Timing and Adjusting a Singer 99k
Luckily I didn't have timing issues, but this is another common problem. See this guide for help (it's for a Singer 66, but as we saw earlier, the 66 is very similar to the 99):
Cases for Singer 99ks
Singer 99s can't really be used without a case/table. As you can see, there are a lot of moving parts on the bottom of the machine, and it doesn't sit completely flat.
The cases are surprisingly expensive, so I just bought the bottom half of a case on ebay. You can find more case options here. You could also build your own case.
Thread Cutters
I replaced the thread cutter, which had become too dull to cut thread. Not absolutely necessary, but it's nice to be able to cut thread without having to keep scissors nearby. I constantly lose my scissors, so it's helpful to have something attached to the machine! The thread cutter is noted with the letter S in this image from the Singer 99 and 99k Manual.
Face Plates
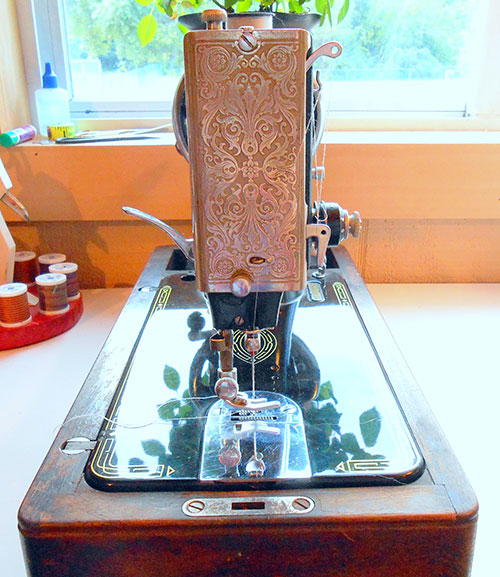
I replaced the face plate. This wasn't necessary--I just liked the more ornate face plates that older 99s had. You can find a new face plate on eBay.
And the new one. You just have to remove two screws on the front to replace it.
How to Thread a Singer 99k
See this video for an overview of how to use a Singer 99k, including threading. I think it helps to see someone actually go through the process of threading the machine, but the Singer 99 and 99k Manual also shows images of the thread path to follow for the upper thread.
And the bobbin:
Where to Oil It
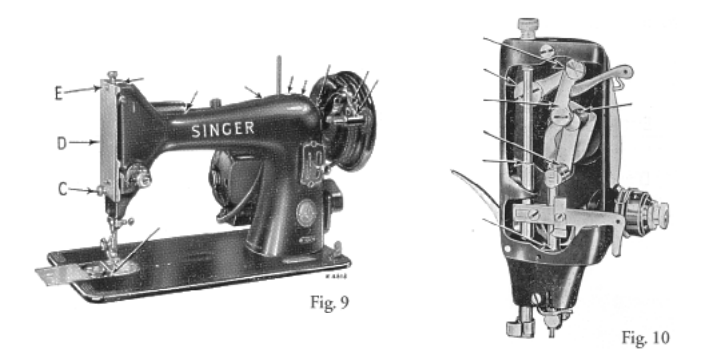
These images are from the Singer 99 and 99k Manual, and all of the little arrows show where you should oil your machine.


