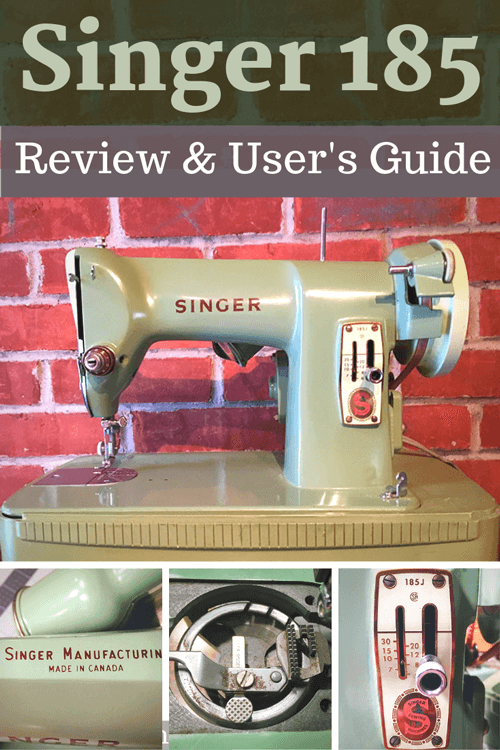
Singer 185 Sewing Machine: How to Restore, Troubleshoot, and Use

In this post, I’ll go over how to use a vintage Singer 185 sewing machine, the cute little mint green cousin to the Singer 99. I’ll cover how to clean and maintain it, as well as how to troubleshoot and get replacement parts as needed. Then I’ll walk you through the process of using this awesome little straight stitch machine!
What’s the Difference between the 185, 185K, & 185J?
You might have a Singer 185, 185K, or 185J, but these are not different sewing machines. They’re all the same model. The letter just indicates in what factory the sewing machine was produced.
According Barbara at the Old Sewing Gear blog, the K stands for the Kilbowie factory in Clydebank, Scotland, and J stands for the St. Jean-sur-Richelieu factory in St. John's, Canada. One surface-level difference is that the 185Ks were tan-colored rather than mint green. Mine is a 185J, made in Canada.

The Singer Sewing Info blog says that some were made in the US as well, and they were marketed as plain old 185s with no letter after the model number. Also according to Singer Sewing Info, 185K sewing machines were made in Kilbowie from 1958 to 1963. They have information on dating a Singer 185K from its serial number, but do not have information on dating an American 185 or Canadian 185J.
I couldn’t find this information anywhere else online either. Still, the production run was fairly short in Scotland, so I imagine all varieties of 185 are from the late 50s to early 60s. Mine has a serial number under the base, but so far, I don’t know what it means. If you know of a site that has info on dating the full range of 185s, please let me know and I’ll add it to this post!

According to Singer Sewing Info again, the Singer 285 replaced the 185 in mid-1963. The inner workings of the 185 were basically the same as the ever-popular Singer 99, but the 285 was redesigned in a way that is now universally disliked when compared to the 185 and 99.
Singer 185 in Comparison to the Singer 99, Singer 66, & Singer 285
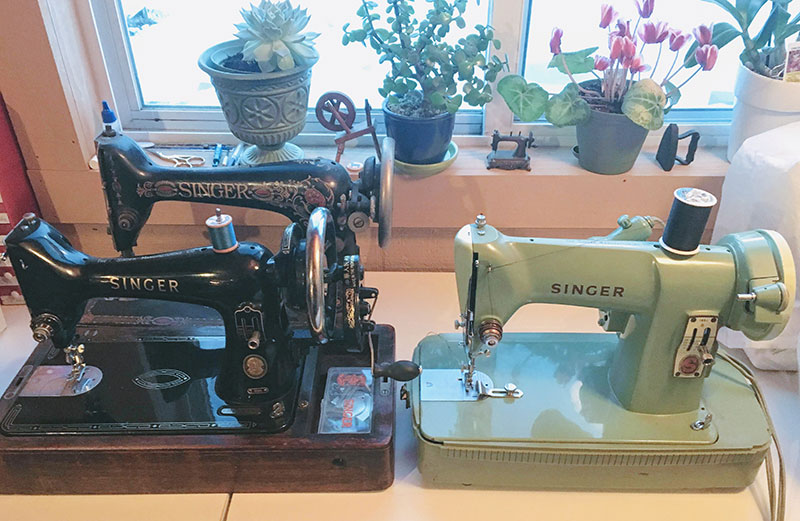
As noted earlier, the Singer 185 (right) was basically just a repackaged Singer 99 (left). The Singer 99, in turn, was a 3/4-sized version of the Singer 66 (back left).
Here are the Singer 99 (front) and Singer 66 (back). Their bases are lined up, so you can see how much shorter the Singer 99 is compared to the Singer 66, which was a full-sized sewing machine. I love how cute the Singer 99 and Singer 185 seem in comparison!
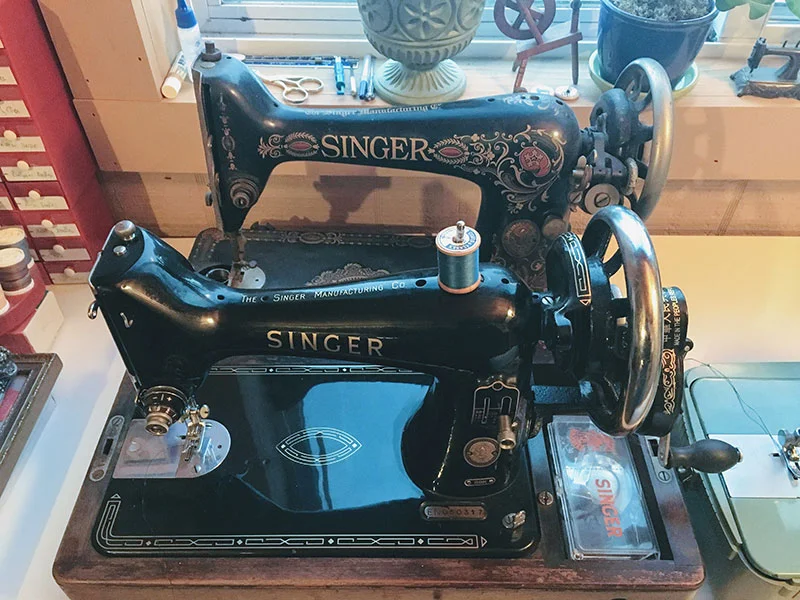
And here are the Singer 185 and Singer 99 together. The body of the Singer 185 is slightly more robust than the sleeker Singer 99, and their hand wheels are different. I removed the motor from the Singer 99 in the back and converted it to a hand crank. It initially had a smaller, solid hand wheel, along the lines of what the Singer 185 has.
Singer 99s were made from 1911 to the 1960s, and this particular Singer 99 is from 1958, so these two sewing machines are basically sisters (see my detailed posts on this Singer 99k and an earlier version of the 99k from 1922 for more info). If you wanted to, you could also convert the 185 to use a hand crank as long as you replaced the solid hand wheel with a spoked one and removed the hand wheel cover, as well as the bobbin winder.

And here they are from the front. The Singer 185 had a slightly different face plate in terms of shape, but they both can be removed by unscrewing the thumb screw toward the bottom of the face plate.

And finally, here’s the Singer 185 (left) in comparison with the Singer 285 (right). They look quite similar, but the 285 is more of a blue-green and the 185 is more of an olive or mint green. You’ll also see the model number displayed on the stitch gauge on the front. It’s best to stay away from the 285, as the redesigned inner mechanisms did not improve upon the previous design. I covered the flaws of the Singer 285 in a little more detail in my post sewing machines I didn’t buy and why.
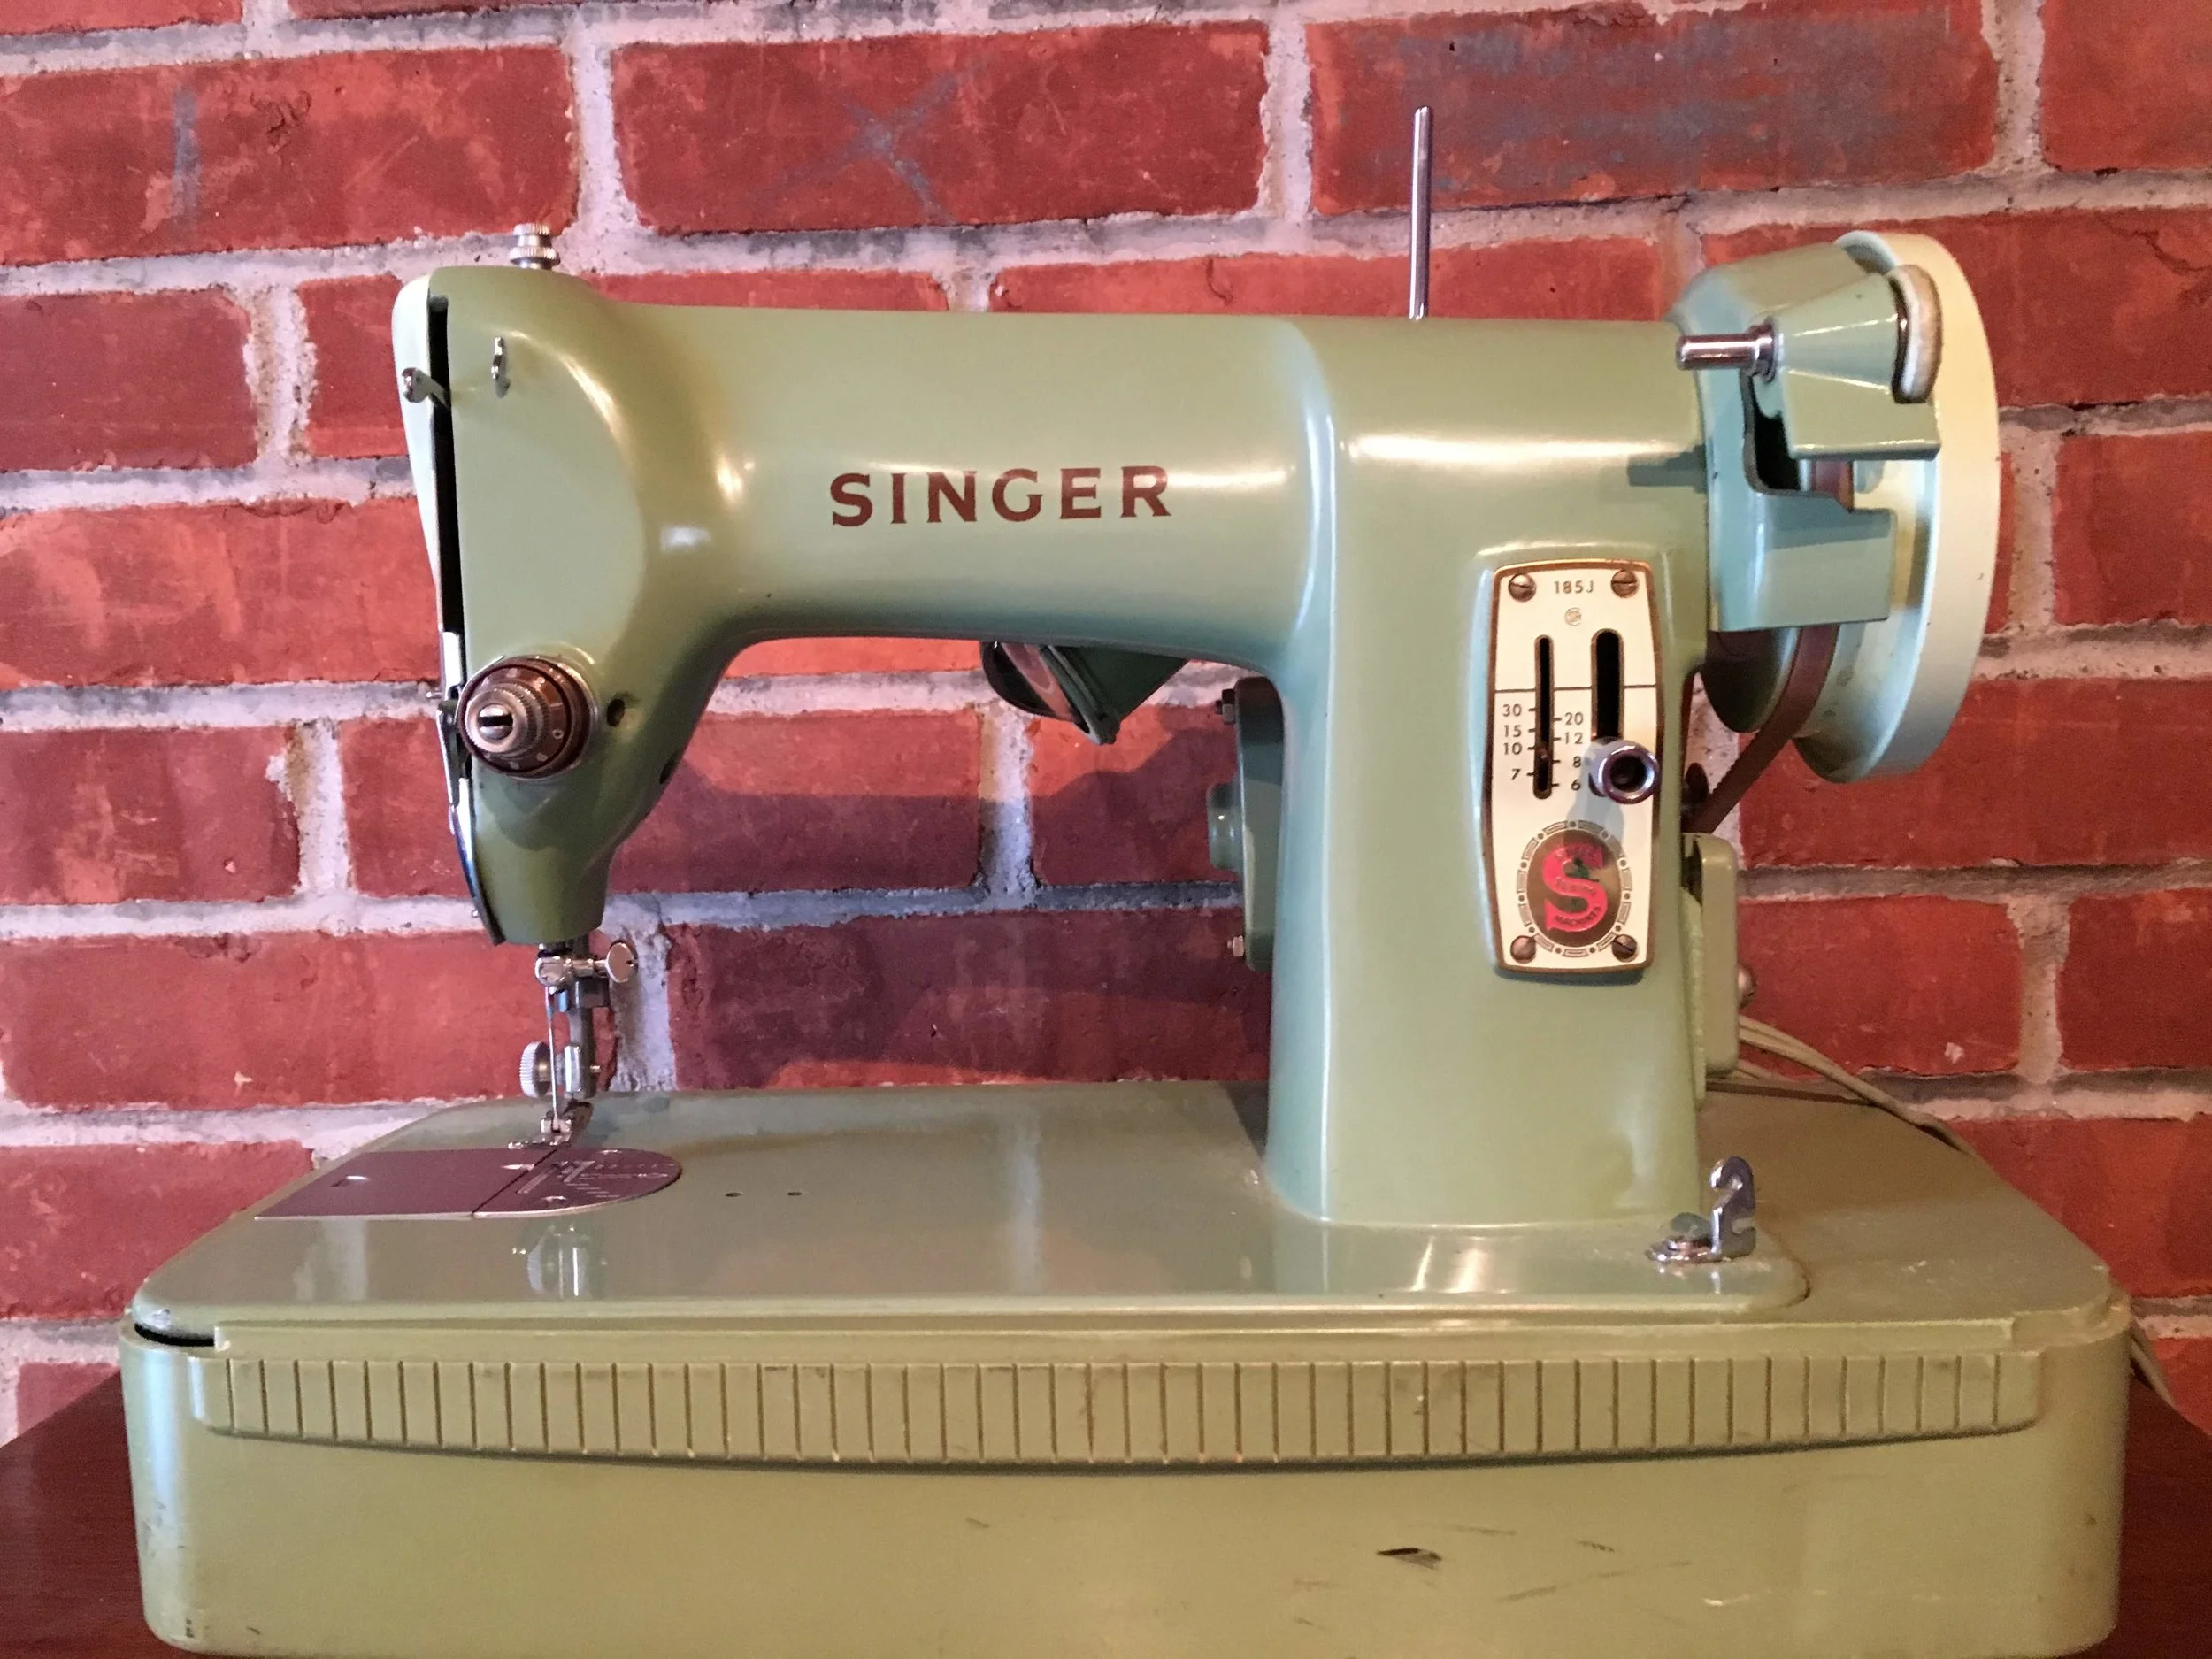
Singer 185 sewing machine

Singer 285 Sewing machine
Singer 185 Maintenance
Here’s a link to a free instruction manual for the Singer 185 from the Singer website. The instruction manual shows useful information on how to thread this machine, wind a bobbin, oil it, troubleshoot common problems, adjust stitch length, and much more. And here’s a service manual for a Singer 66, which, according to the International Sewing Machine Collector’s Society, should also apply to the Singer 185. This shows how to make the most common repairs that a sewing machine technician would have dealt with. Lastly, here’s a parts list for the Singer 185, in case you need to replace any broken parts. If you need any new parts, you can check out all of the parts compatible with the Singer 185 that are sold by Sewing Parts Online. I buy most of my sewing machine parts from them.
See also my post on resources for restoring vintage sewing machines and my post on restoring a Singer 99k, which, as we covered above, is nearly identical to the Singer 185.
I’ve never seen cleaning instructions on a sewing machine before, but this Singer 185J’s case had them! I usually recommend just cleaning with water and maybe a little dish soap, so this is in line with what I’ve been doing. You never know what a stronger soap might do to the surface or decals on some vintage machines.

To remove the sewing machine from the base in order to clean it and oil it, you need to remove the screw in the recessed circle on the bottom of the case. This is the only screw holding the case to the sewing machine.

You can see that there was some fuzz and gunk in the bottom of the tray that needed to be cleaned out.

There are also little rubber grips that create a little cushion between the sewing machine and the plastic base. One of these was missing, but the rest were there and seemed to be in good enough condition.

Here’s the underside of the machine. Use a little lint brush or mini vacuum attachments to remove all of the dust and lint that has accumulated over the years. Oil this area according to the manual. Basically, anywhere you see metal parts moving, you should add a drop of oil.

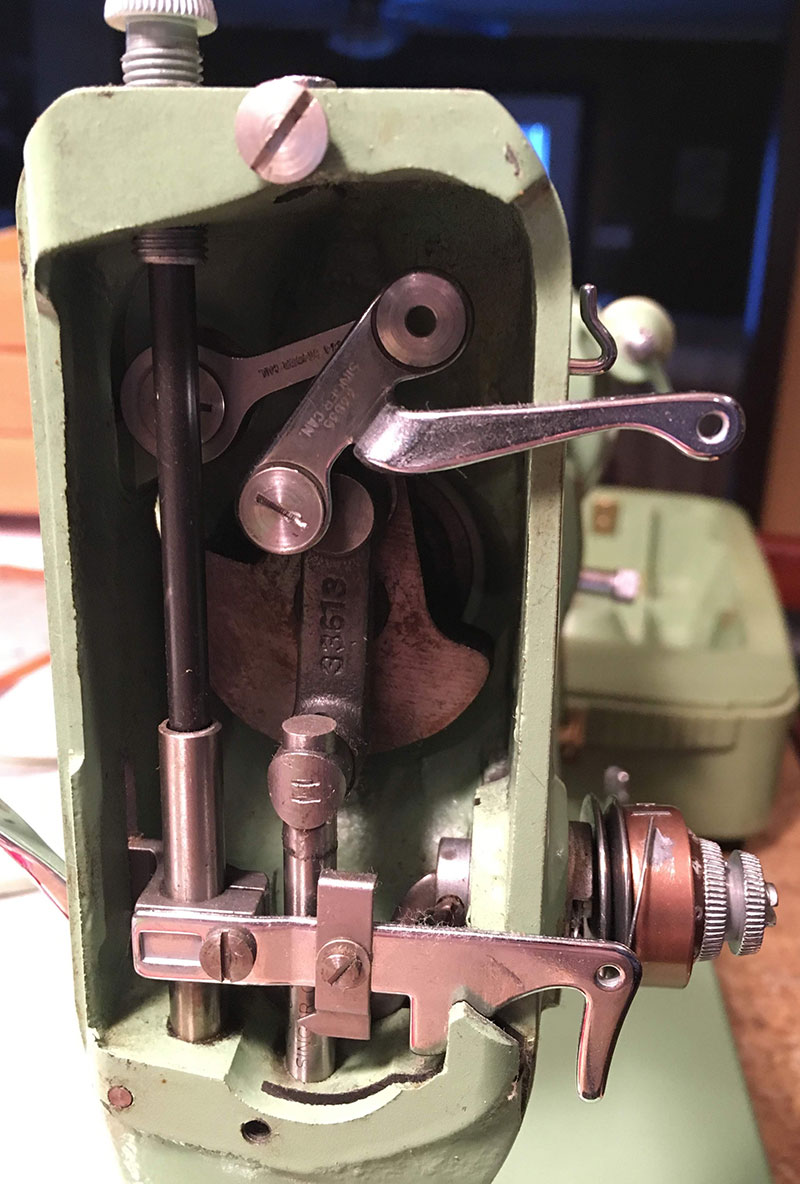
Remove the thumbscrew at the bottom of the face plate and slide it downward to remove. Again, remove dust and lint built up here and oil it according to the manual.
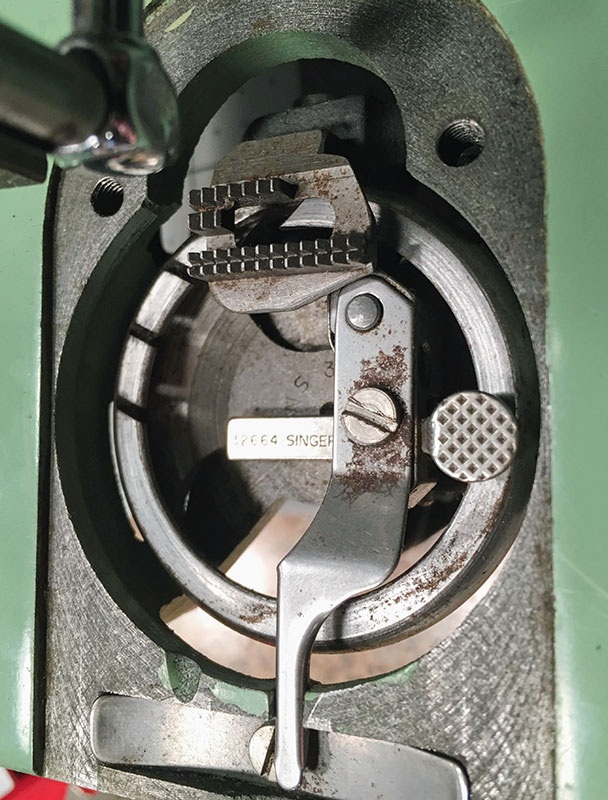
Remove the presser foot and needle to give yourself a little room here. Unscrew the two screws holding the needle plate on and remove it in order to clean the bobbin area. Remove the bobbin and bobbin case to clean more thoroughly. In order to remove the bobbin case, you'll have to move the metal “finger” at the bottom of the photo away from the bobbin case so that the case can be pulled out. This finger lifts up from the groove it normally sits in and can be pushed to the side.
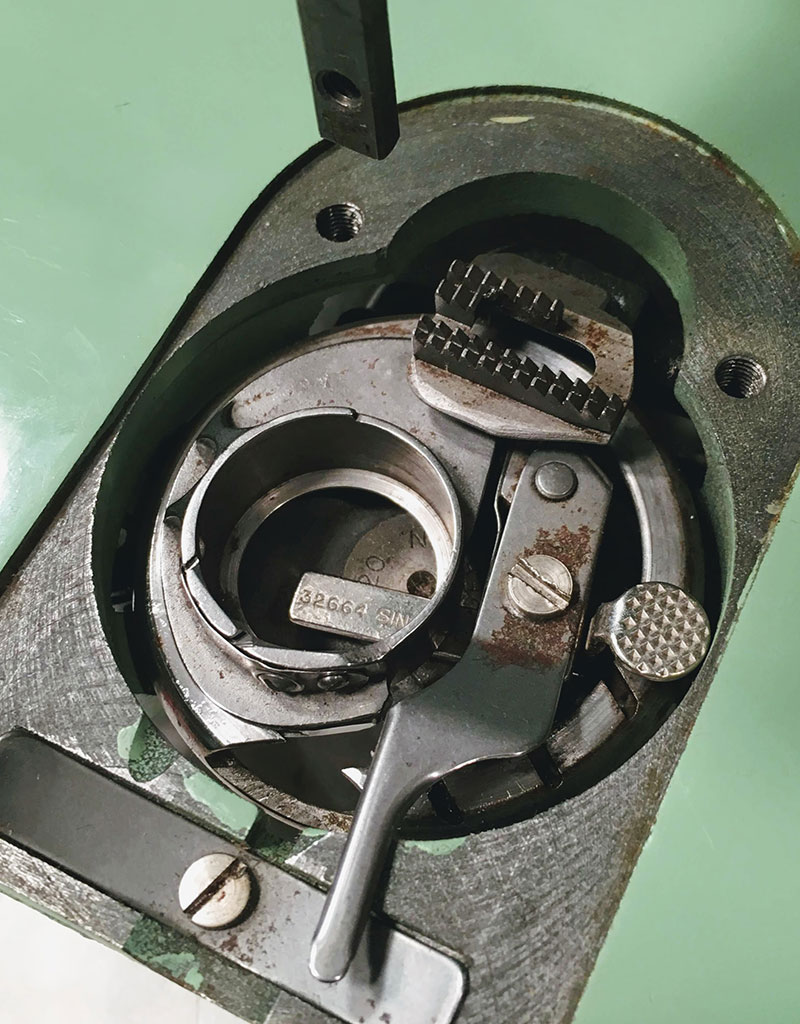
Here’s what it looks like after the bobbin case has been removed and the finger has been moved back into its normal spot. You can see that there’s a bit of rust on some of these parts, but I didn’t want to disassemble everything and sand them down to remove the rust. In fact, the manual for the Singer 99 says not to loosen the screw holding the finger in place because it will “change the clearance for the thread between the bobbin case and the bobbin position bracket.” I thought it might be difficult to get everything back into place, so I’m just going to leave the surface rust for now. It doesn’t seem to affect the way the machine works, so I’m going to leave it be.
Here’s the bobbin case and metal finger back in place.

Here you can see that the belt is a little bit cracked. It seems to be fine for now, but I bought another belt to have as a backup, as well as a new bobbin tire. This one still has some life in it, but it’s worn down in a few areas. Never hurts to keep spare belts and bobbin tires on hand!

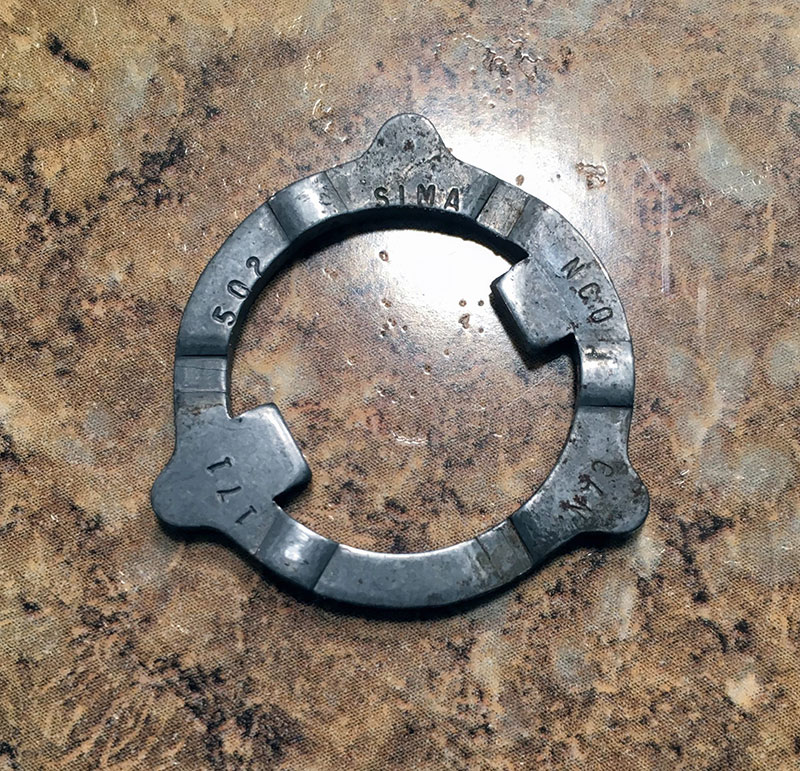
I found that I was not able to disengage the needle bar when trying to wind a bobbin. This usually means that a washer in the hand wheel is not in the correct position and needs to be rotated. See my post on converting the Singer 99 to a hand crank for more detailed information on removing the hand wheel and reassembling it correctly. The washer in this hand wheel had some letters and numbers printed on the side that’s supposed to face outward, so that’s helpful. When I first took apart my Singer 99, I put the washer on backwards and it was not pretty when I tried to sew with it afterward.
The Motor and Electrical Components
On my sewing machine, the motor, cord, and foot pedal were in pretty good condition. If you needed to, you could replace the motor and foot pedal See my post on replacing a motor on a Singer 66 for details on how to do this. Remember that the Singer 66 is just a full-sized version of the Singer 185, so the process for replacing the motor is nearly identical.
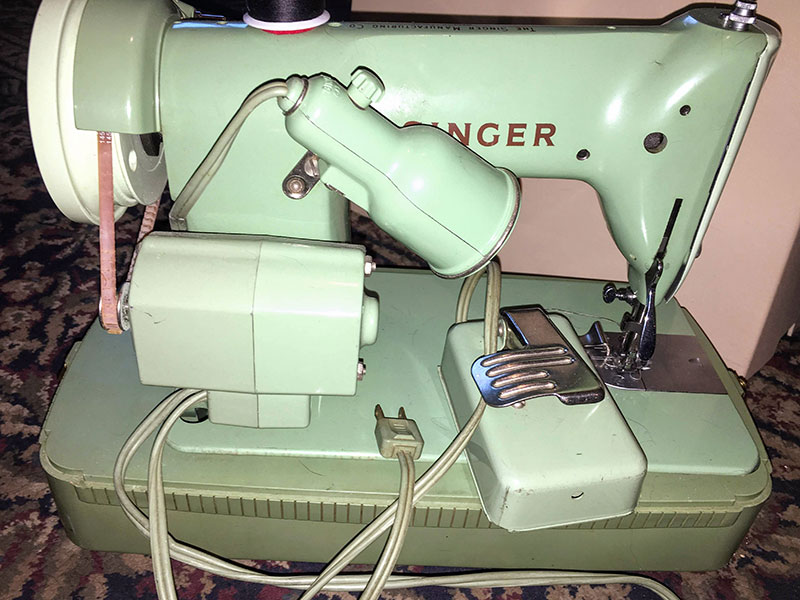
I recommend unplugging this machine when not in use, just to be safe. I do this with all old electrical appliances. The motor on this sewing machine smelled a little bit when I first started using it, kind of like when you turn on baseboard heaters for the first time after they've sat since last winter. The smell went away after using the machine a couple of times.
Be careful, though, if you suspect any electrical issues. It’s better to be safe than sorry! Zorba at the Veiled Male has a great tutorial on disassembling and cleaning the motor on a Singer 185, should you be so inclined to take on that project.
The light on mine worked fine, but you can get a new light here if you need to. And here’s a good post on how to remove and replace the light, as it’s a little tricky to do.
Singer 185 Case
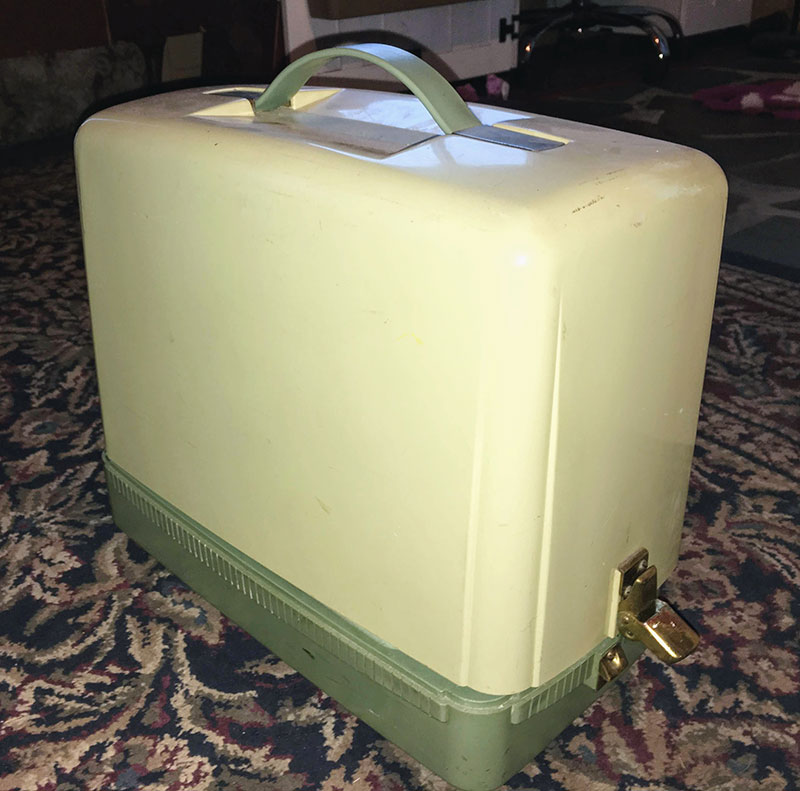
My sewing machine came with a little green plastic case, which was in pretty good shape. You’ll want to have some kind of case for this sewing machine because there are moving parts underneath that you want to have enclosed. If you don’t have a case, you could use a universal plastic case, which you can find at most craft stores or online. Or you could use a 3/4 size case for a Singer 99, which are a little more common than the Singer 185. Sometimes you can find these case on Ebay or Etsy.
Sewing with the Singer 185
It’s pretty easy to get up and running with this sewing machine. It’s a straight-stitch machine, meaning it only sews one type of stitch. The needle bar only has to go up and down. There’s no sideways motion to be factored in. These dedicated straight stitch machines tend to make a very nice stitch, and they’re hard to break, since the mechanisms are fairly simple when compared to sewing machines that do zigzag stitches.
The Singer 185 uses a normal 15x1 sewing machine needle and a class 66 bobbin, still widely available today. I like to use Schmetz needles and I’ve had good luck buying bobbins from Sewing Parts Online. When troubleshooting my Singer 15, I thought my bobbin winder was broken, but it turned out I just had poorly made bobbins. Good bobbins make a big difference!
Basically, the only thing you need to do is set the thread tension, maybe adjust the bobbin tension, and choose your stitch length. If you’ve used a vintage sewing machine before, this will be pretty straightforward. If not, check out the manual for more information. It shouldn’t take much time to get up to speed. You might occasionally need to adjust the presser foot pressure to keep your fabric from creeping to the side while you sew. Use stacked thread instead of crosswound thread to prevent thread tangles and tension problems.
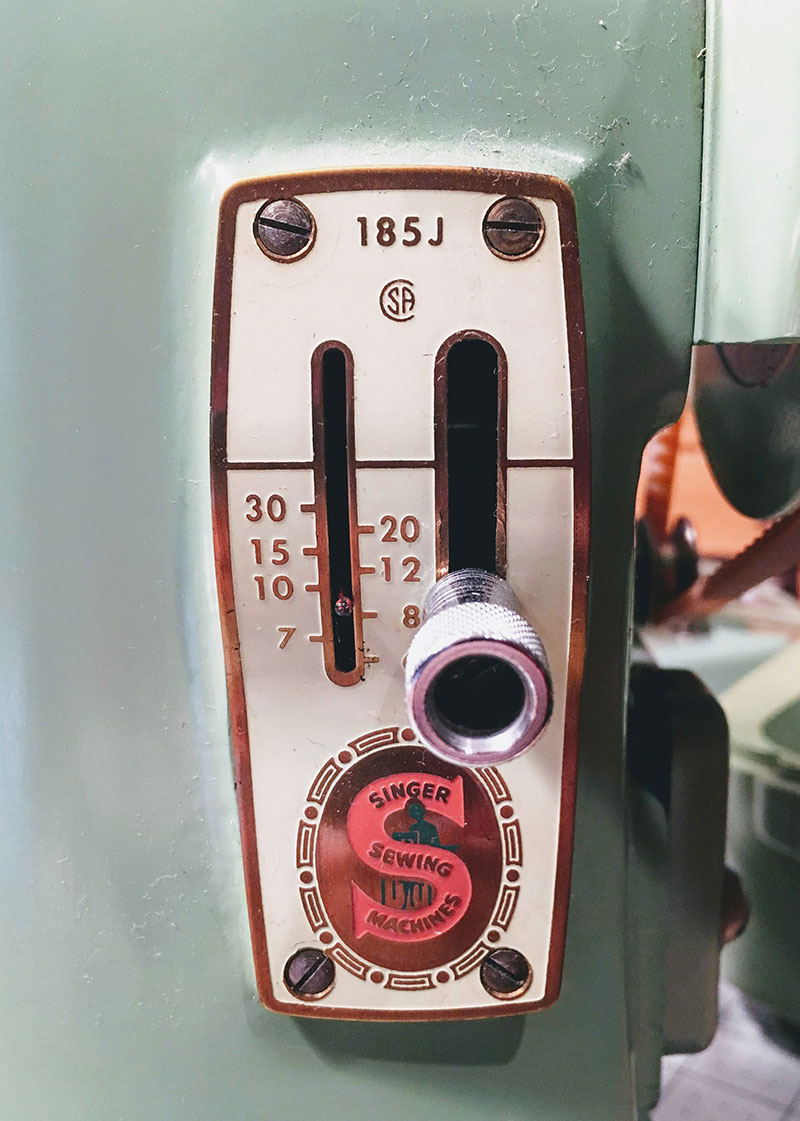
To adjust the stitch length, unscrew the thumbscrew on the stitch indicator plate and move it up or down. The numbers indicate how many stitches per inch the machine sews. I generally leave mine somewhere between 8 to 12 stitches for most projects. If you move the thumbscrew all the way to the top, you can get a reverse stitch to help tack down the ends of seams. You can see this in action in the videos below.
Videos of How to Use a Singer 185 Sewing Machine
Sometimes it’s helpful to see a sewing machine in motion, so I took a couple of videos to demonstrate how this one works. I’m still getting used to having my camera on a harness around my neck, so sorry for the wonky angles at times. It’s hard to see around the camera and also see what I’m doing.
Here you can see me sewing with a doubled-up piece of flannel. Hold onto the needle and bobbin threads for the first couple of stitches, so that they don’t get pulled down under the needle plate. I like to sew the first couple of stitches with the hand wheel. Most problems occur right at the beginning of a seam, and you can feel if there are any hitches or resistance when using the hand wheel. This allows you to stop sewing before the problem gets worse. This can prevent thread tangles and mechanical issues.You can also see me adjust the stitch length several times and sew in reverse.
And here’s a short demonstration of me sewing a hem using the metal seam guide, and also cutting the thread with the little thread cutter on the needle bar. This one might need to be sharpened slightly. Some people like these thread cutters and other people take them off and never use them. I think they’re useful, but if you have some scissors on hand, that works just as well.
Can You Sew Leather with a Singer 185?
I noticed that a lot of people seem to be Googling whether the Singer 185 is a good sewing machine for leather. I talked about this in in more depth in my post on the best vintage sewing machine, but my short answer would be: no.
My longer answer would be: if you use a leather needle and sew a few layers of relatively thin upholstery leather, sure, that would probably work okay. Honestly, you can do that with pretty much any domestic sewing machine, and I cover tips for sewing with leather here. But you’re not going to sew through thick pieces of leather, no matter what those shady Ebay sellers try to show in their listings.
I’m not saying all Ebay sellers are shady—I buy sewing machine parts and sometimes whole sewing machines on Ebay—I’m just saying that there are sellers who will mislead you into thinking that vintage sewing machines are well-suited for sewing through multiple layers of thick leather.
There’s a reason they don’t include videos of their sewing machines making those stitch samples, like a reputable seller would. Vintage sewing machines are often heavier duty than modern sewing machines, but they’re not meant to be dedicated leather sewing machines. That’s why actual leather sewing machines are so expensive.
Further Resources
Stitch Nerd has a good review of the Singer 185.
See also my Pinterest board on Sewing Machine Restoration, Repairs, and Reviews.