How to Replace a Sewing Machine Motor and Foot Pedal
Do you have a sewing machine with questionable electrical cords? In this post, I'll show you how to replace an external motor on a vintage sewing machine with a new motor and foot pedal, so you can get it running again and use it without worrying about electrical fires.
Disclosure: This post contains affiliate links, which means I may receive a percentage if you make a purchase using these links. This won’t cost anything extra to you. I only link to things I like and use, and the proceeds help me to run this blog. Thank you for supporting me!
Materials Used:
- Sewing machine motor: this motor will fit Singer HA1 15, 66, 99, 99K, 27, 28, and many others, per the seller's listing on Ebay. See other motors from the same seller here.
- Motor belt: part 193077, 15 3/8" belt. The motor listed above comes with a 14" belt, but my Singer 66, which had a solid (rather than spoked) hand wheel, needed a slightly larger belt. This will fit Singer 15-90, 27, 66, 99, and 306 machines with solid hand wheels, according to the seller's listing on Amazon.
- Sewing machine light: this magnetic LED light will attach to your machine and replace your old light.
The Sewing Machine in Question
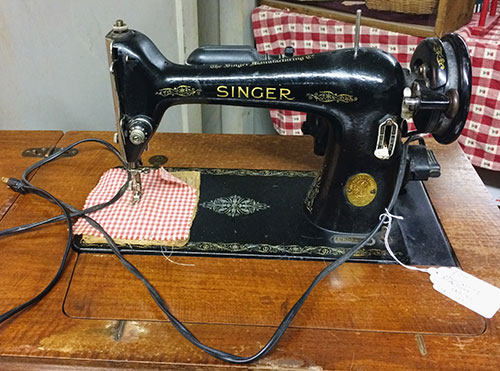
Previously, whenever I got sewing machines with dodgy wiring, I just converted them to have hand cranks, but when I found this lovely Singer 66 (below), I wanted it to be motorized. Its existing cords were held together with electrical tape, so I didn't feel safe plugging it in as is.
Hand cranks are nice, but they're better suited to machines in portable cases, such as the Singer 99k below. It's nice to be able to take your sewing machine anywhere and not need to be near an outlet. You can even sew outside!
But when a machine is in a table, like the Singer 66, there's not as much point to having a hand crank, since you probably don't want to lug your table around the house with you.
For a long time, I thought that putting a new motor on a sewing machine would be really difficult, even though I've removed enough motors to know that it's easy to take them off! It finally clicked for me when I was replacing the motor on my industrial sewing machine that, as long as the motor is outside of the machine, it's not that tough to swap one out. This only applies to vintage sewing machines with external motors and no internal wiring.
Which Sewing Machine Motor Should You Get?
Although the act of replacing the motor isn't difficult, I ended up buying three different motors before finding one I really liked.
When you search Ebay, Amazon, or Sewing Parts Online for, these Alphasew motors are the ones that show up most frequently. I bought the Alphasew motor pictured below, and it seemed to work fine, so I bought a second one for another machine I'm working on.
However, the second Alphasew motor I received was in very poor condition. It looked like it was very poorly made or perhaps refurbished. It rattled when picked up, like the parts inside were loose.
The cord for the foot pedal that plugs into the motor was so loose it would fall out if jostled even slightly. I didn't even plug it into an outlet to test it--I just sent it back. Initially, I wanted a replacement, but the seller said that all of the motors in stock looked similar to the one I'd received, so I requested a refund instead.
Then I bought this sewing machine motor. I told the seller about my previous issues and asked whether she inspected the motors before sending them out. She said she would double check mine, and that the VGK motors were better quality than the Alphasews.
The VGK motor was 1.0 amp compared to .9 for the Alphasew. The cords were a little thicker and sturdier-looking, it came with extra carbon brushes, and the foot pedal was better. There wasn't even much of a price difference from between the VGK motor and the Alphasew motor--both were around $45. After receiving the VGK motor, the first Alphasew started to lose its shine.
They look quite similar, but I much prefer the VGK motor (right) to the Alphasew (left).
The VGK motor comes with a foot pedal that is entirely enclosed (front), while the Alphasew motor comes with a pedal that is open (back).
The Alpahsew foot pedal also falls apart easily, and it can come apart while you're using it if you're not careful. There are two bars on either side of the foot pedal that go through the holes in the top of the pedal, but that's all that's holding it in place, and the top can slide off pretty easily.
In addition, when I tested them out, the VGK pedal was much more responsive than the Alphasew pedal. It was difficult to sew slowly with the Alphasew pedal, while the VGK pedal had the full range of speeds you'd expect.
My Belt Doesn't Fit: What Now?
I also ran into trouble with the belt. As you can see below, the original black belt that came with the Singer 66 is bigger than the 14" red belt that came with each motor.
Although the motor says it is compatible with the Singer 66, the Singer 66 had two different sizes of hand wheel, depending on whether it was solid or spoked, and this changes the size of the belt needed. Mine had a solid hand wheel, and it needed a belt which was 15 3/8".
Initially, I thought that it would be nice to have a black belt, like the original one, but when I bought a new black belt, it did not fit around the motor pulley properly, so I had to order another red belt in the correct size.
Below, from right to left, you can see the original black belt, the 14" red belt, the 15 3/8" red belt, and the 15 3/8" black belt. The black belts are definitely thicker than the red belts.
It's a little difficult to see below, but the black belt did not fit snugly around the motor pulley--it rested on top of the pulley instead.
The red belt was a much better fit.
Replacing the Motor on a Sewing Machine
Getting the right parts took me awhile, but once you have them all on hand, replacing the motor takes less than a minute and only involves tightening one screw.
See my post on converting a sewing machine to a hand crank for info on removing the old light and motor. It's really simple and only involves removing a couple of screws. Be sure to leave the bobbin winder on.
Once you've removed the old motor and light, you can either leave the old belt on, if it's in good condition, or take it off and add a new belt. My belt was falling apart, so I needed to replace it. Adding a new belt isn't hard, but you have to maneuver it under the bobbin winder and make sure it's nestled in close to the hand wheel.
Next, adjust your motor so that the belt is around the pulley. Just hold it in place with your hand, right where the old motor was. There will be a raised area called a boss, with one screw hole in it. Your motor bracket will fit right over this area.
Then tighten the screw included with the motor until it is securely in place.
Here are the instructions that came with the Alphasew motor, but they seem to apply to the VGK motor as well. You can adjust the position of the motor to regulate the tension on the belt. Mine was fine as is, but it's good to know that there is an option to do this.
The instructions also explain maintenance for the motor. The picture in the instructions is a little difficult to see, but I think this is the spot that needs to be oiled every six months (see little hole on pulley below).
What Should You Do about the Light?
The instructions above show that you can wire a new light into the motor's plug connector, but I didn't do that. Instead, I bought this magnetic sewing machine light, which will plug in separately from the foot pedal/motor.
Should You Buy that Sewing Machine with Questionable Electrical Cords?
The Singer 66 that I bought was $20, and it's a good quality sewing machine (see my post on buying a vintage sewing machine). I like having projects, and I wanted to try replacing a motor, so I didn't mind paying for the motor as well, but be sure to factor in the cost of the machine plus the new motor or hand crank when deciding whether to buy one with questionable electrical cords.
There's only one screw holding the motor on, so it should be easy to remove the new motor and put it on another machine as well, so if you have multiple machines that need motors, you could share one motor/pedal between them.
Be sure that the machine you buy has a boss (raised spot) centered below the hand wheel. There will be a hole for mounting the motor with a screw.
This beautiful Singer 27, for example, does not have a boss. I'm hoping to find a treadle table for it at some point, but right now, there's not much I can do with it.
As you can see, it's completely smooth underneath the hand wheel, and there's no easy way to mount a motor or hand crank.
The Finished Project
As I said earlier, if you have the right type of sewing machine and the right motor/belt, it's really easy to add a new motor to your vintage sewing machine. I hope I've covered most of the problems and pitfalls you may run into. Let me know in the comments if you have any questions!
Here's the Singer 66 with its new motor:


