DIY Sewing Kits out of Altoids Tins
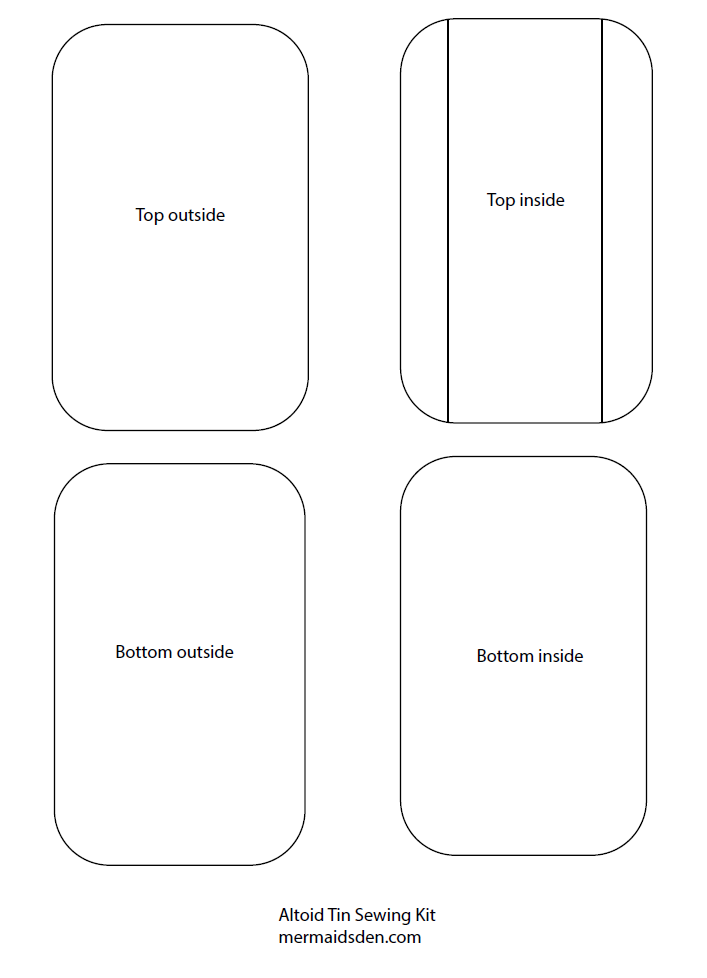
In this post, I'll show you how to make some cute and sparkly Art Nouveau themed sewing kits out of old Altoids tins, paper, washi tape, felt, and metal stampings. You can use these to store small sewing and embroidery projects or just as trinket boxes. I've included a free pdf pattern in the body of the post with templates for the top, bottom, and inside of the Altoids tin.
Disclosure: This post contains affiliate links, which means I may receive a percentage if you make a purchase using these links. This won’t cost anything extra to you. See my privacy policy for more details.
Materials
- Empty Altoids tin
- Art Nouveau reproduction metal stampings: this links to a search listing on Ebay, so you can choose from a variety of reproduction stampings.
- Glitter washi tape
- Double-sided tape
- Glittery paper
- Felt
- Exacto knife
- Self-healing cutting mat
- Glue gun and glue
Get Your Free Printable Template
Altoids Tin Sewing Kit Template
When you print this, be sure to print it at 100%--don't let your printer shrink it or resize it. I'm including an image of the template pieces below for reference, but make sure you print it from the pdf linked above.
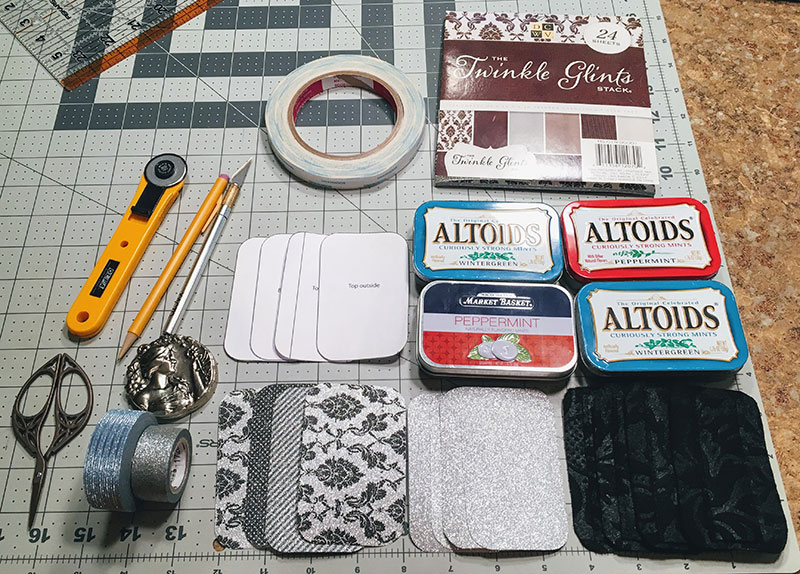
Get Your Supplies Together
Here's everything I used to make these cute sewing kits. I bought the metal stampings years ago for a jewelry-making project, but they turned out to be larger than I was expecting, so I'm glad I finally used them for something. I couldn't find the exact same stampings on Ebay, but I've linked to some similar pieces in the Materials section.
Covering the Edges of the Altoids Tins
Some of my tins had colored edges, so I covered these with glitter washi tape, since I wanted a silver theme overall. The tape was a little bit taller than the side of the tin, but I just trimmed it down, using the top of the tin as a guide for my scissors.
I also added tape between the hinges.
And I added a small piece of glitter tape on top of the hinges. Make sure the box can still open and close freely. Don't let the tape cover the hinge itself.
Covering the Top of the Altoids Tins
I covered the top of the box with strips of double sided tape. You can let it overhang a bit at the sides.
Now turn the box upside down and use an exacto knife to trace around the edges of the box. Be sure to do this on a self-healing mat or a piece of cardboard, so you don't cut into your work surface.
It should look like this when you're done. The left side is a little ragged, so I re-trimmed it after taking this picture.
Now use the template to cut out a piece of paper the right size for the top outside of the Altoids tin. Peel off your double sided tape and adhere the piece of paper.
Covering the Bottom of the Altoids Tins
For the bottom of the tin, I decided to just cover it with strips of washi tape. This glitter tape covers it pretty seamlessly. Let each piece overhang the sides.
It almost looks like one single piece of glitter tape!
Now turn it right side up and trim around the edges with your exacto knife, the same way you did for the top.
Here's what it looks like after being cut down to the right size.
Inside the Altoids Tins and Final Touches
Trace the bottom inside template piece onto a piece of paper. I used silver glitter paper. Cut it out, use strips of your double sided tape to cover this piece, and then trim down the tape to the exact size of the template piece.
Peel the backing off your double sided tape and stick it in the bottom of the tin. I thought about using the hot glue gun for this, but I think it might have ended up being lumpy. This way it's nice and smooth.
Cut the inside top template piece from felt. You'll notice that there's a shorter rectangular piece for the top as well. Cut that out of felt, too, and sew it onto the bigger template piece. You could also glue this if you want a no-sew option.
Using your hot glue gun, glue the felt piece into place on the top of the tin. The felt is thick enough that any glue lumps are not noticeable.
Lastly, center your Art Nouveau stamping on the tin, trace around it in pencil, so you know exactly where it should go, and then glue it in place. Be careful--the metal will get hot when you use the glue gun. You might want to use gloves for this. I just burned my fingers because I was excited to finish these and didn't want to look for gloves.
The Finished Altered Altoids Tins
Here are the finished tins in all their sparkly glory!
I think this is my favorite one.
But the stripes aren't bad either.
And the darker polka dots provide a nice contrast with the silver finding.
Creating Your Sewing Kits
I created a few different sewing-themed kits. I have some bobbins that I can't use with my sewing machine (see my post on Class 15 bobbin woes), so I used them as tiny spools in my sewing kit.
The felt part of the kit can be used for pins, needles, or safety pins. The bottom part can hold thread, scissors, needle cases, needle threaders, and stitch rippers.
Here's another variation on a basic sewing kit.
Here's a small embroidery kit. You could probably fit even more embroidery floss if you put it on long, round bobbins or small spools.
Here's one for bead embroidery with some beads, rhinestones, needles, and Nymo thread.
And here they are all together:
Want More Altoids Tin Crafts?
Check out my Repurposed Metal Crafts board on Pinterest for lots of fun projects.
And be sure to also check out this adorable Child's Sewing Kit from All Free Sewing!


