How to Make Earrings out of Vintage Tins
In this post, I'll show you how to make earrings out of vintage tins from a thrift shop. Vintage tins have all sorts of fun patterns and designs, so they're perfect to use for jewelry-making, and they're much cheaper than buying patterned or enameled sheet metal. I used a disc cutter for this project, but you could also trace the shape you want on the metal and cut it out with metal shears--I've seen some beautiful tin jewelry using that method.
Disclosure: This post contains affiliate links, which means I may receive a percentage if you make a purchase using these links. This won’t cost anything extra to you.
Materials
Background
I've written a few other tutorials on making jewelry from aluminum cans, so I thought it would be fun to try out some vintage tins. Click on the images below to check out my other posts.
Where to Find Vintage Tins
One of my local thrift stores has a giant pile of tins for .50 each. I bought three to experiment with for jewelry-making. I've seen other people make some cool things with vintage tins, and you certainly can't go wrong for the price.
Look for tins with dense patterns or solid colors, since you'll be cutting out small pieces of them for jewelry. I found that round tins were easiest to take apart, and the sides were the best parts to use for jewelry.
The top two tins worked well for jewelry-making. I decided not to cut the bottom one apart because I liked it too much!
How to Break Apart Your Vintage Tins
I struggled with this a bit, but eventually I hit upon the solution of using a can opener on the bottom of the tin. This cuts out a nice long strip of the side metal.
At first, I tried using the can opener on the side of the tin, but it wouldn't cut in a straight line, and I felt like I was wasting too much of the metal.
Once you've used the can opener to cut all the way around the bottom of the tin, pull it apart at the seam on the side of the tin. You could also cut it using metal shears, but I found it came apart easily.
Now you have a long strips of metal from each of your tins.
To make it a little easier to work with, I cut each strip into four smaller pieces with my metal shears. I also cut off the ridges at the top and the bottom of each piece to make them all the same thickness. I flattened them out with my hands. Be careful of any sharp edges!
How to Cut Out Discs and Washers
I have a Swanstrom disc cutter (see link in Materials section), which I really love, but it is a bit pricey. I've included a couple of cheaper options in the Materials section, but you won't be able to cut out washers with them. You can also just trace the shape you want onto the metal and cut it out with metal shears.
With the butterfly tin, I just cut out a bunch of discs. See Rio Grande's instructions for cutting out discs. It's easy to center the design you want within the hole in the disc cutter. I cut out a bunch of butterflies and flowers from this tin.
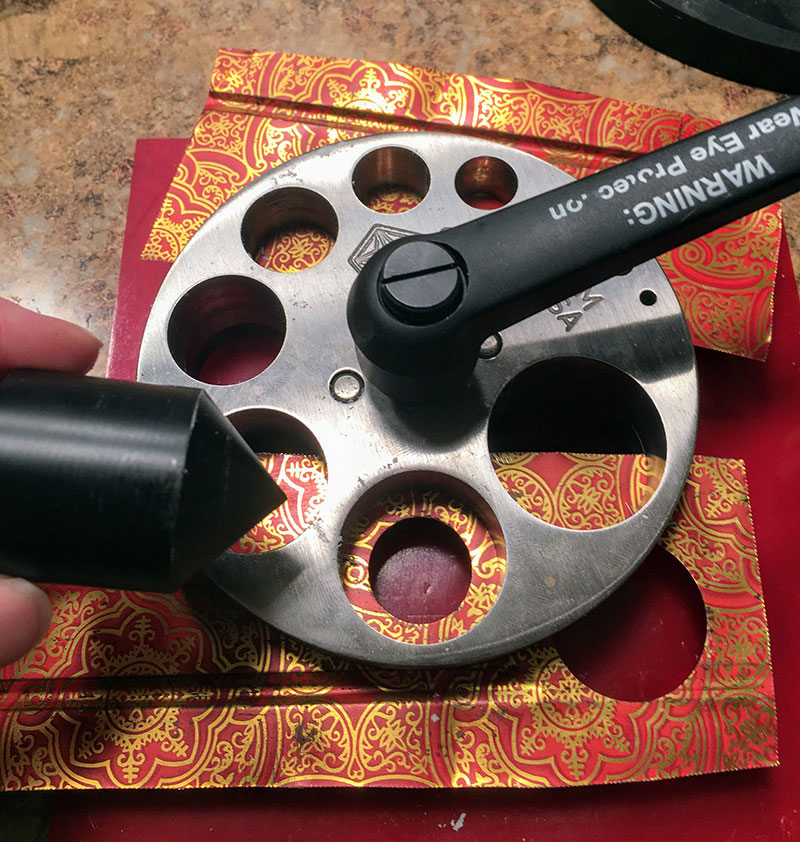
I decided to use the red tin to cut out some washers (see Rio Grande's instructions for cutting out washers). First, cut out a disc of the size that you want the inside of the washer to be. Leave room on all sides of this hole--don't cut too close to the edge of the metal.
Now put the section of metal you just cut under the hole that's the size that you want the full washer to be. Don't clamp the metal in place just yet. Put your centering die into the hole to get the metal centered correctly. Now clamp down on the metal, remove the centering die, and use your metal punch to cut out your washer.
For each washer that you cut out, you'll also get a small disc that you can use. On the top cutout, you can see that I punched through a little too close to the edge of the metal, so one of my washers is slightly flat along the edge.
Putting Your Earrings Together
I love my disc cutter because it's so easy to make earrings once you've punched out some different-sized discs and washers. Layer them up, add some holes for earwires, and you're all set!
Here are all of the components that I cut out from my vintage tins. These tins ended up working well because they had some fun graphics and patterns that were easy to cut out.
I decided to layer a red washer over a butterfly disc to make a frame for it. First, I punched a hole in the red washer with my hole punch pliers. Then layered the red washer over the butterfly disc, lined up their edges, and punched through the hole in the red washer to get a corresponding hole in the butterfly disc.
You can see how the holes line up perfectly here, and the red washer frames the butterfly disc nicely.
For these earrings, I decided to let the smaller butterfly disc hang from the red washer. I punched two holes in the red washer: one for the earwire at the top and one to connect the butterfly disc below with a jump ring.
Here's how they came together:
From here, you can mix and match your components to create different kinds of earrings.
The Finished Earrings
Here are some of the finished earrings that I made out of my vintage tins. I love the vibrant images and patterns that I was able to use, and I have plenty of metal left over for future projects.
Are you planning to make any jewelry out of vintage tins? Let me know in the comments!


