How to Make a Pendant from Soda Cans
In this post, I'll show you how to make an intricate filigree pendant from recycled aluminum soda cans. This pendant has a fun, Art Nouveau-y feel to it. The filigree piece is made using a die-cutting machine and the pendant is finished with micro bolts and a glue-on bail, so you don't need to solder anything.
Disclosure: This post contains affiliate links, which means I may receive a percentage if you make a purchase using these links. This won’t cost anything extra to you.
Materials
- Aluminum cans
- Sizzix big shot cutting/embossing machine
- Spellbinders Arched Elegance Die
- Files to clean up and smooth metal edges
- Hole punch for metal
- Tiny nuts and bolts for jewelry making
- Heavy duty wire cutters
- Mylar Shimmer Sheets
- Iridescent paper
- Craft foam
- Glue on bails
- Faux suede cording
- E6000 glue
How to Prepare Your Metal
See my earlier posts on how to break apart your cans, how to make embossed earrings, and how to make die cut flower earrings. You can make lots of different things with recycled aluminum cans.
Cutting Filigree Pieces
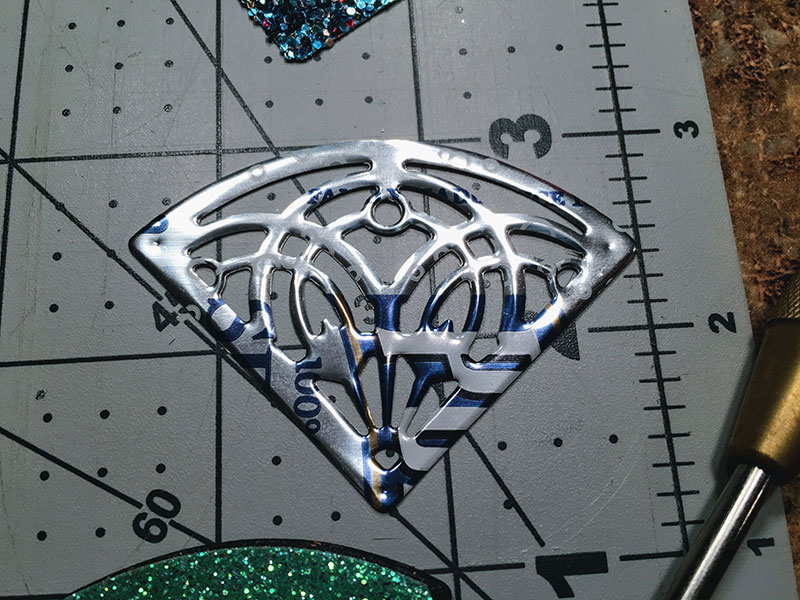
When you run the die through your die cutting machine, make sure the plain side of your aluminum is facing downward toward the die. This will leave the plain side of the metal beveled toward the back.
If you have the plain side of the metal facing up, it looks like this. This is what you wouldn't want to do, unless you like the decoration on your can.
The die worked pretty well with the aluminum. Some of the smaller pieces had to be poked out with a toothpick. There were a few filiments of metal around the edges of the internal cuts that I filed down with a jewelry file. But overall, the cuts were pretty clean.
Here you can see the two pieces of the die that you need to use. The triangular frame can also be used separately to cut out background pieces for the pendant.
Cutting Internal Pieces
I cut frames out of iridescent paper, glitter paper, and mylar sheets. The die had a little trouble getting through the mylar sheet, but I used scissors to cut around the outline left by the die.
Here's how the aluminum filigree piece looked stacked on top of the blue mylar piece.
I cut out a bunch of colorful paper and plastic pieces for inside the pendants. It almost looks like faux dichroic glass or something.
I added a piece of craft foam and a piece of triangular aluminum to go behind the colorful internal frames. I added the foam because the pendants didn't seem substantial enough with just the aluminum and paper/mylar.
Holding It All Together
I used micro bolts to hold together each corner of the pendant. I added a small indentation to mark the spot where I wanted the bolt, and I used my hole punch pliers to create a hole for the bolt to go through. I just eyeballed this, rather than measuring.
On some of the pendants, I trimmed the paper and foam pieces just a hair before bolting it together, as these had a tendency to stick out past the edge of the filigree, which didn't look right.
Here they are all bolted together:
I trimmed down the bolts with wire cutters and filed them down until they were smooth. I also added a bit of glue to the base of the bolt, so that the nut wouldn't unscrew itself.
Here's what the back of the pendant looked like after trimming and filing:
Here's another shot of the pendants. I like how they look in this circular arrangement. Maybe I'll make more with see-through interiors, and turn them into a sun catcher or something.
Adding the Bails
I added glue-on bails to my pendants with E6000 glue. It was a little difficult to keep the glue just on the back of the bail--it had a tendency to blob over the sides of the bail. But it's on the back side of the pendant, so it won't be that noticeable. You can also use an exacto knife to scrape off excess glue once it's dry.
How to Finish Your Necklace
I followed this tutorial on how to make adjustable sliding knots for a necklace. This makes the length of the necklace flexible.
Here's what the adjustable knots look like up close:
The Finished Pendants
Here are all of the finished pendants. I like how they turned out, and I'm already looking for other dies that might make good jewelry components.


