Make a Cute Halloween Dog Collar with Ribbons
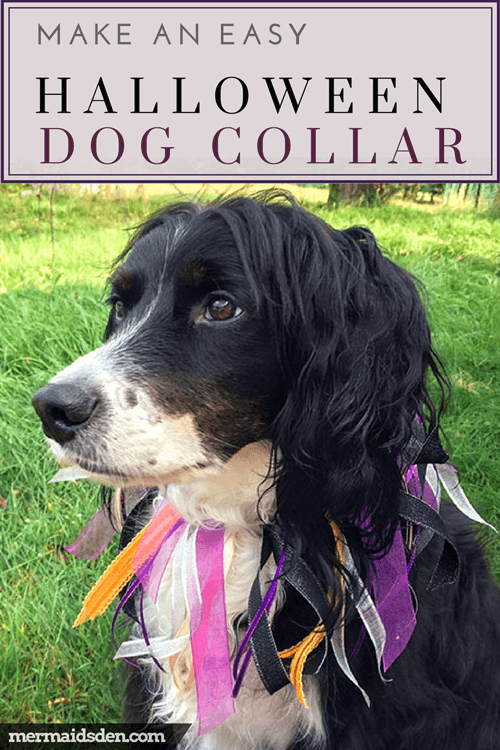
In this post, I'll show you how to make a really quick and easy Halloween dog collar with a pretty ribbon fringe. I saw something similar at a pet store and thought it would be easy to make. My dog doesn't like to wear bulky costumes or have anything on his back, so this fringed collar is a great way to have a let your dog in on the festivities without having it be too much. My dog wasn't bothered by this collar at all, and he didn't even try to eat the ribbons!
Materials Used for Halloween Dog Collar:
- Ribbons: I found that Joann Fabrics had the best selection and variety of ribbons
- Foldover Elastic: Again, Joann's had a great selection of fun foldover elastics
Preparing the Base for Your Halloween Dog Collar
Unroll your foldover elastic from the card and test to see how stretchy it is, as well as how much you need to comfortably fit over your dog's head. Once you have the right fit for your dog's head/neck, add another 2-3" and then cut your foldover elastic. Mine ended up being 16". You want it to fit comfortably--if anything, err on the side of making it too loose. You don't want your dog to be uncomfortable.
Create a circle with your foldover elastic. This will be the base of your collar to which you add the ribbons. Fold one end of the elastic inwards and one end outwards. Nestle them together to hide all of the raw edges and sew all around the little rectangle you just created. I did this by hand, as I find that layers of elastic do not stay stacked in the sewing machine and inevitably slide around.
Adding the Ribbons for Your Halloween Dog Collar
For my collar, I cut each ribbon to a length of 15". Cut the ends of each ribbon at a 45 degree angle to prevent fraying.
Fold your ribbon in half, put it inside the collar, and then pull the two tails through the loop created at the top of your ribbon. Pull it as snug as you can to keep it in place.
Add more ribbons around the collar, alternating colors and widths until you like the design you have. If something doesn't look right, you can always slide a ribbon over and add more in between.
Once you start adding ribbons, the foldover elastic will fold in half and become more compact. The seam will be a little bulky, but it's not that noticeable.
I found that some of my ribbons wouldn't stay in place and had a tendency to unknot themselves, so I sewed around the collar to hold everything in place. Since the collar was a little bulky, I just did this by hand. It's a small piece, so it doesn't take very long to do, and you can tighten each ribbon before sewing through it.
I would recommend supervising any dog wearing one of these, just to make sure they don't get snagged on anything.
The Finished Halloween Dog Collar
Doesn't he look handsome?
Be sure to check out the rest of the Monster Mash Blog Tour!
Ready to join us? Don't miss a single stop on our October Tour!
October 1st: Sewing By Ti Intro Monday, October 2nd: Sewing Blue 3rd: That's Sew Lily 4th: Hazelnut Handmade 5th: Seams Sew Lo 6th: Sewing By Ti
Monday, October 9th: That's Sew Amy 10th: Stitched By Jennie 11th: Hazelnut Handmade 12th: Seams Sew Lo Friday the 13th!: Crafty Like a Rox
Sunday, October 15th: Mermaids Den 16th: Very Blissful 17th: Robynne and the Bobbin 18th: Sewing By Ti 19th: Octaves of Color 20th: Tenille's Thread
Tuesday, October 24th: Adventures with Bubba and Bug 25th: My Heart Will Sew On 26th: Ma Moose Handmade 27th: EYMM 28th: Mermaid Mama Designs 29th: The Fairy Dust Bin
Monday, October 30th: Doctora Botones Happy Halloween, October 31st: Sew Like a Sloth


