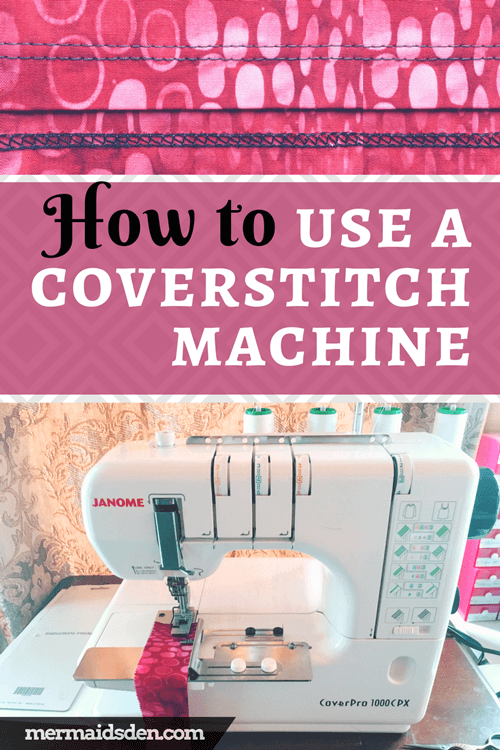
How to Use a Coverstitch Machine
A couple of years ago, I was watching the Great British Sewing Bee, and they were making swimwear. I was familiar with the regular sewing machines and sergers the contestants used, but suddenly, there was a new machine in the mix. It looked like a serger, but also made rows of straight stitching. I started to see evidence of coverstitching everywhere. Hems on shirts, pants, sleeves, underwear, and especially on stretchy fabrics. I started to covet a coverstitch machine. It would be so much easier than serging the edge of my fabric, folding it up, and then sewing over it!
In this post, I'll show you how to use a coverstitch machine, specifically the Janome 1000CPX. I'll also go over the differences between the 1000CPX, 900CPX, and 2000CPX. You'll be up and running with your coverstitch machine in no time!
Disclosure: This post contains affiliate links, which means I may receive a percentage if you make a purchase using these links. This won’t cost anything extra to you. I only link to things I like and use, and the proceeds help me to run this blog. Thank you for supporting me!
Materials:
- Janome Coverpro 1000CPX: this one comes with two bonus elastic gathering attachments.
- Janome Coverpro 1000CPX: this one comes with a bonus adjustable seam guide.
- Hem guide attachment: helps you sew right on the edge of your fabric to encase the raw edge of your hem with the looper stitch.
- Needles: this links to a search for EL x705 needles on Amazon, including regular and ball point.
What is a Coverstitch Machine?
Well, it's basically a specialized serger that sews 2-3 parallel rows of normal stitching on one side of your fabric and a serged stitch on the opposite side. Look at the hem on any t-shirt you own--it will almost certainly be coverstitched.
This allows you to have a nice straight-stitched hem on the outside of your project, yet still cover the raw edge on the inside of the project, so that it doesn't unravel.

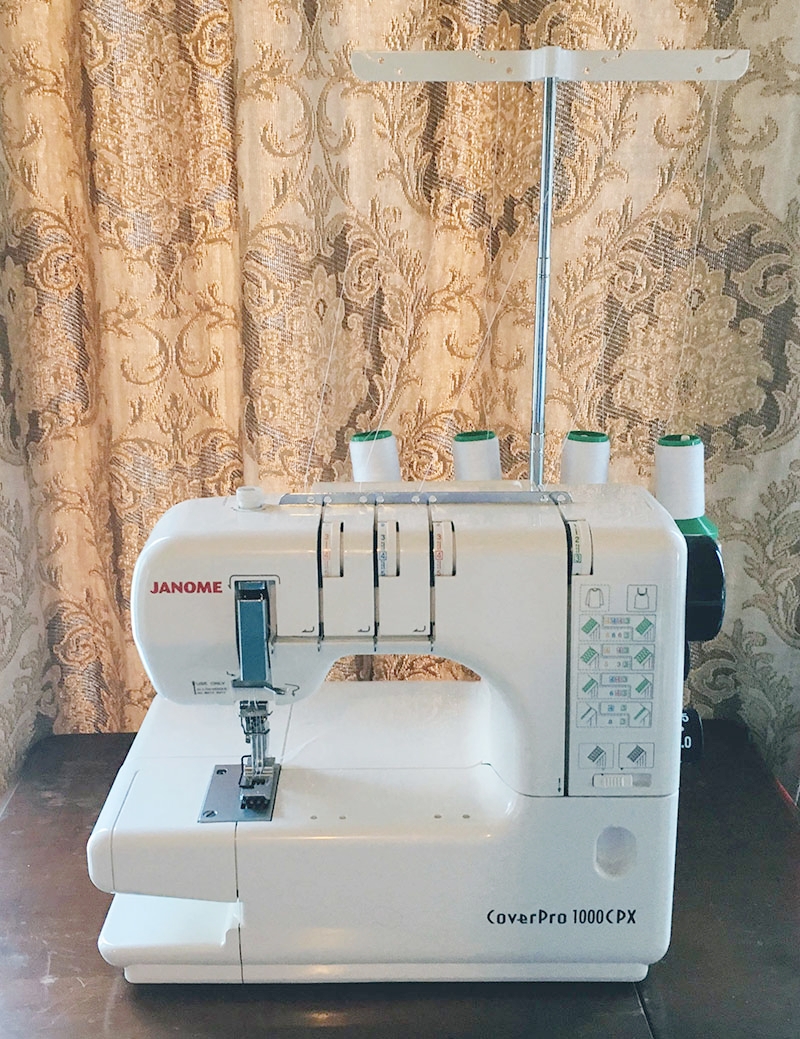
Janome Coverpro 1000CPX
It comes threaded, which is nice, so you can study the thread paths before you have to thread it yourself.
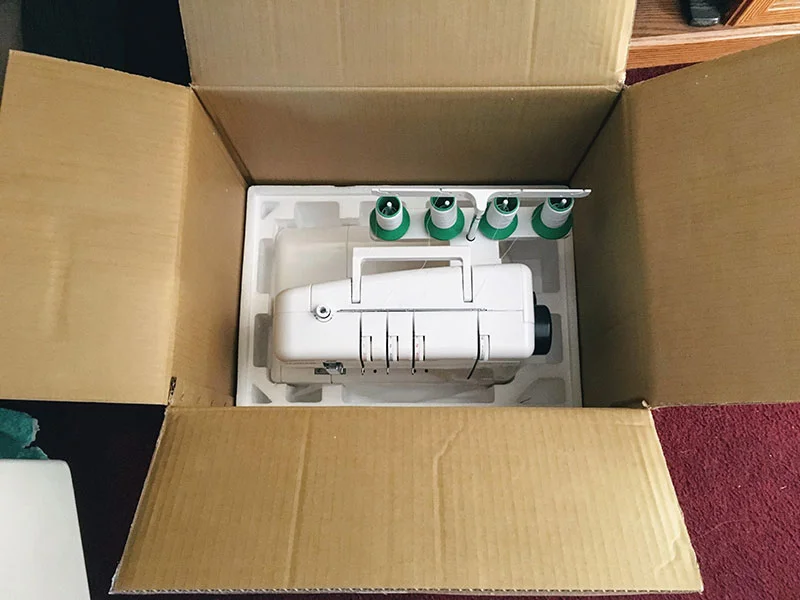
The Coverpro comes with the manual, an instructional dvd, foot pedal/power cord, machine cover, and white accessories box with tweezers, needles, threader, lint brush, screwdrivers, and nets for holding thread cones in place. Mine came with two extra elastic gathering feet as well.

Coverstitching Tips
Threading
There's no particular order to the threading, which is refreshing after following very specific guidelines for order on my serger. The threads are numbered below, but you don't have to follow this particular order. This image is from the manual, where you can find full threading instructions and illustrations.

When you re-thread the looper, you can just leave the thread hanging out the top of the door to the looper compartment.
There's a little white knob at the bottom of the looper panel that you can pull out to make the looper more accessible for threading, which is so convenient! When I was first checking out all of the features on the machine, however, I forgot to put the looper back into its correct position, and then I (briefly) couldn't figure out why my machine wasn't working!
Below, you'll see that the looper (that little upside-down shaped L) is off to the right, and it is not underneath the needle plate.
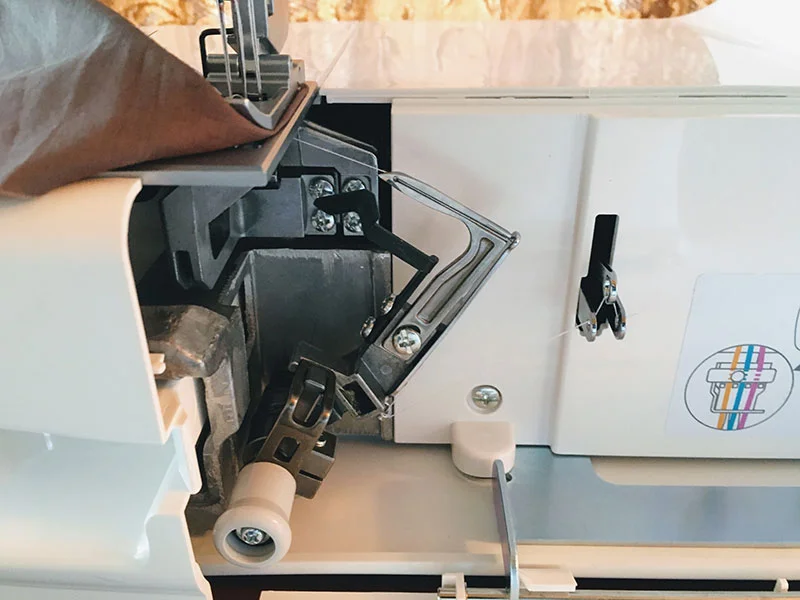
Be sure to push it back into place before sewing.

Needles
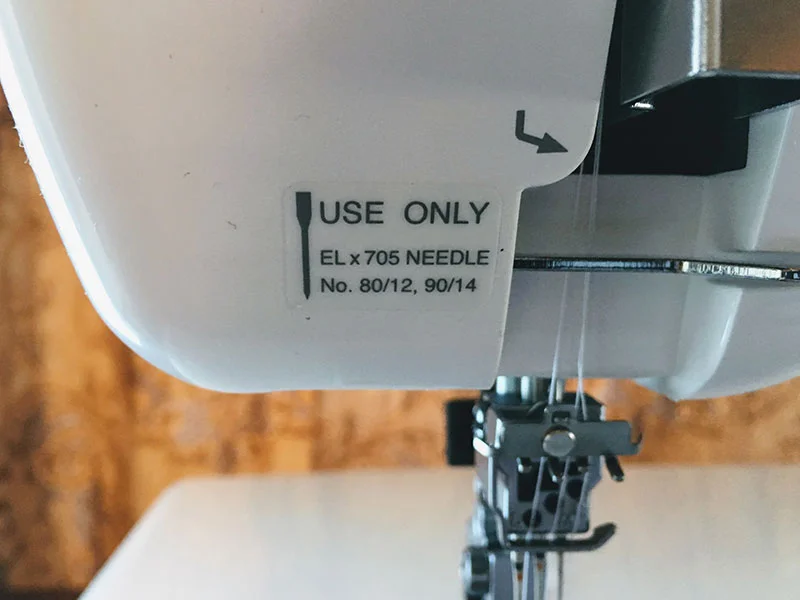
The Coverpro takes EL x 705 needles only. See the Materials list above for links to buy regular and ballpoint needles for the your machine.
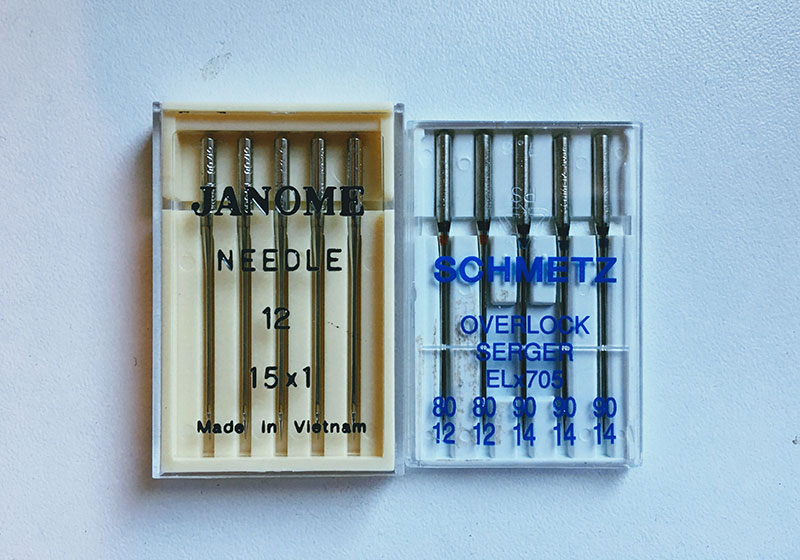
The machine I got came with one package of EL x 705 needles and one package of regular 15 x 1 sewing machine needles. I can use the regular needles in my sewing machine, but be careful of this--these should not be used in the Janome 1000CPX. I'm not sure why the seller included them.
Coverstitching
You won't chain off the way you would with a serger, so you'll want to hold your thread tails at the beginning of each seam, just to make sure they don't get sucked back down into the machine. Similarly, you can't sew off the edge of the fabric like you can with a serger. You need to stop sewing at the edge of the fabric.
Removing your fabric is a little more difficult than with a regular sewing machine or serger. First, lift your presser foot, and then sweep underneath it with a pair of scissors, tweezers, or whatever works for you. Pull the two needle threads forward--they'll be looped around your scissors or whatever tool you used. Now cut through the loop you just made.

Pull the fabric toward the back of the machine, which will draw the looper thread out. Cut that thread, too. Knot your threads to secure them.

The illustration on the side of the machine is a little bit confusing. The settings for tension on each needle differ for heavyweight vs. lightweight fabrics, which is illustrated by longsleeves (heavyweight) vs. tank tops (lightweight).

You'll see a white slider right below the tension illustrations. Keep the slider to the right for normal sewing. You'd only set it to the left if you wanted to tighten the looper thread tension for sewing on heavy weight fabrics, in which case you'd also adjust the needle tension accordingly. The looper tension dial should always be set to 3, and tension can be adjusted via the slider. Be sure the looper slider is always to the right for threading.
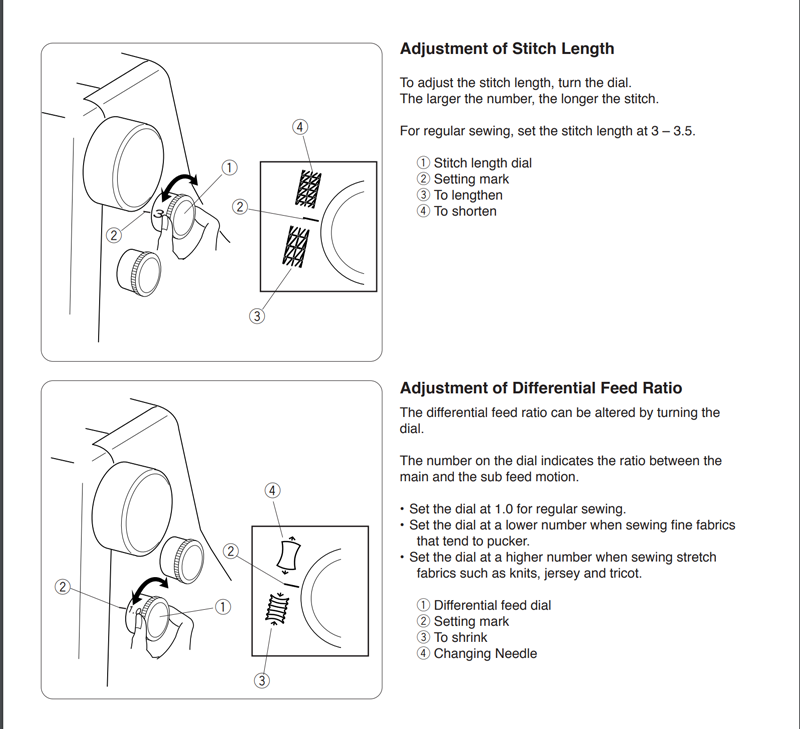
When using differential feed, set it to 1.0 for regular sewing. Lower it for fine fabrics and set it higher for stretch fabrics.
Set stitch length to 3-3.5mm for regular sewing. The higher the number, the longer the stitch.
This coverstitch machine also has a removable plate, which gives you a free arm option. This is helpful for sleeves, collars, pants, bags, etc.

Types of Stitches
You can use between 1-3 needles. You can produce a 2-3 needle coverstitch or a 1 needle chainstitch, which is nice for jeans or other thick fabric. I have other machines that will do a 1 thread chainstitch, but this one is much sturdier because it consists of the needle thread and looper thread, so it doesn't unravel easily, like most chainstitches do. You can also vary the position of the needles (see diagram below).

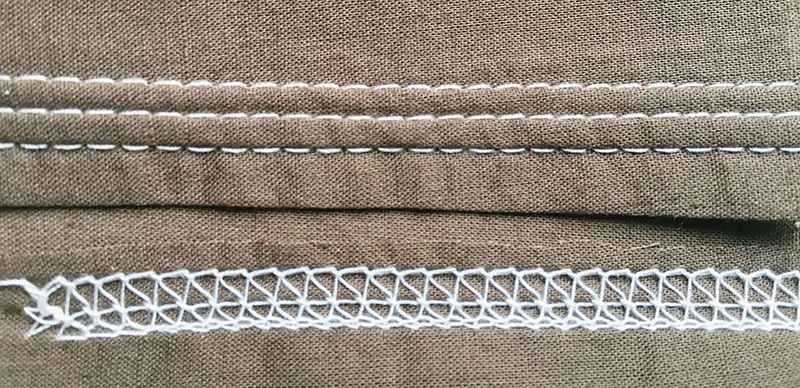
Here are some examples of the kind of stitching this machine produces.


For hemming, the manual notes that you can draw a line to mark the seam. Ideally, you want the looper stitches to fall just on the edge of the hem on the inside, but it's tough to sew along just the right spot, since you can only see the top of the fabric. I bought a hem guide attachment, which is very useful, but kind of expensive. I've covered the hem guide attachment in more detail in this post.

What Kind of Thread Should You Use
I couldn't find a lot of information on what kind of thread to use, but it looks like you can use both standard and serger thread in this machine. I found that the Maxi-lock I already had for my serger worked well, and that it produced a nicer stitch than the thread the machine came with.
One reviewer on Amazon recommended Gutermann's Bulky Nylon thread for sewing with knits. I think Wooly Nylon would probably also work well.
Maintenance
According to the manual, it does not require oiling. When you open up the sliding door, you can see that the looper's moving parts are greased already. It needs to be swept clean of fuzz and dust every so often, but not as often as a serger because there is no blade cutting the fabric.
Pros
Easier to thread than a serger. I couldn't believe how easy it was when I went to re-thread it.
Easy to use, especially if you've used a serger before, but it's not too difficult for someone who has only used a sewing machine either.
Beautiful hems! And you can sew them quickly!
Great for stretchy fabrics.
The built-in seam tightening system automatically reduces slack in the looper thread to help regulate your tension.
Has a free arm, which most other coverstich machines do not.
Large bed space.
Adjustable presser foot pressure via knob on top of the machine.
Cons
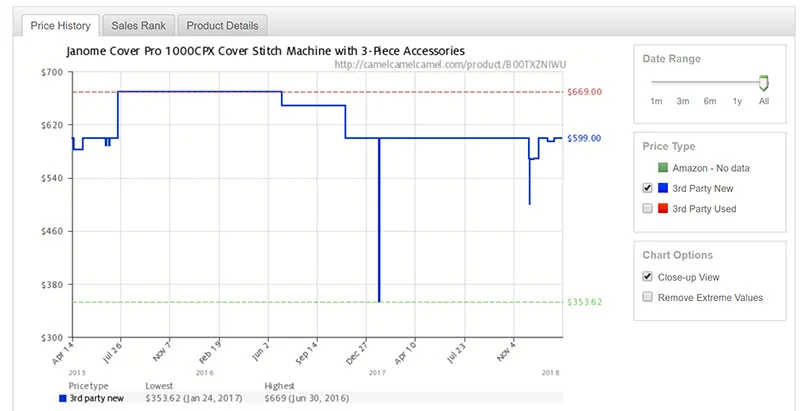
Expensive, though see you can use Camel Camel Camel to set up a price alert. This machine had been hovering around $600 for a year, but as soon as it hit $500, I was ready to strike. It was once as low as $350, but that was at the end of 2016, and it hasn't gone that low again. Still, it seems to have a seasonal dip in December.
Presser feet and accessories are expensive. I think it should come with the seam guide attachment, since that is what most people want to use the machine for.
It takes non-standard needles.
Janome Coverpro 1000CPX vs 900CPX and 2000CPX
The 900CPX is about $200 cheaper than the 1000CPX, but it can only do a two threaded coverstitch, rather than three. Be careful when buying presser feet for either machine, as the presser feet are different sizes for the 900CPX vs. the 1000CPX. The feet for the 900CPX are a little cheaper, since they're smaller.
The 2000CPX seems to be a slightly updated version of the 1000CPX, but doesn't seem as widely available to purchase online. See this reviewer's assessment of the 1000CPX vs. the 2000CPX.
Other Options if You Don't Want the Coverpro 1000CPX
- Brother 2340CV Cover Stitch: no free arm, but has pretty good reviews. It was about $400 at the time of writing this post. Only does a two needle stitch. See an in-depth review here.
- Janome Coverpro 9000CPX: has a free arm and pretty good reviews. Price was about $400 at the time of writing this post. Functions the same as the 1000CPX, but can only take up to two needles instead of three. Has the same seam-tightening system as the 1000/2000 CPX.
There are some sergers that also do coverstitching, but from what I've heard, it's kind of a pain to convert them from serging to coverstitching, and you don't get as much bed/harp space as you do with a dedicated coverstitch machine. I was initially surprised at how much bigger the coverstitch machine was compared to my serger.
Further Reading/Watching
See:
My Serger and Coverstitch board on Pinterest for more coverstitching tutorials and tips.
Pink Castle Fabrics' video review of the Janome Coverpro 1000CPX
This youtube video, which contains the content of the dvd that came with the Coverpro 1000CPX.
Final Thoughts
Overall, I'm really happy with the Janome Coverpro 1000CPX. It lived up to my expectations, and it should make my sewing workflow go much faster.
Do you have a coverstitch machine? Are you thinking of getting one? Let me know in the comments!