Everyday Mending: Fix a Broken Zipper in a Bag
In this post, I’ll show you how to fix the zipper on a bag when it has started to detach itself from the zipper tape that holds it. It’s a relatively simple fix that only takes a few minutes of sewing by hand, and it extends the life of your bag, keeping it functional and safe to use!
I love this messenger bag. I’ve had it for around a decade, and I’ve gotten a couple of versions of it from Baba Studio World over that time. I love the fairy tale illustrator Arthur Rackham, so this bag has a special place in my heart. I like how it’s all fabric, so I can just throw it in the wash when it’s dirty, too. It’s a pretty sturdy bag, but, like most things that get used a lot, it has started to show some signs of age.
This post is part of my everyday mending series to help you fix things instead of getting rid of them. See my other posts on mending a rip in a cotton blouse, fixing tears in leggings, and replacing a zipper in a jacket.
The Problem with the Zipper
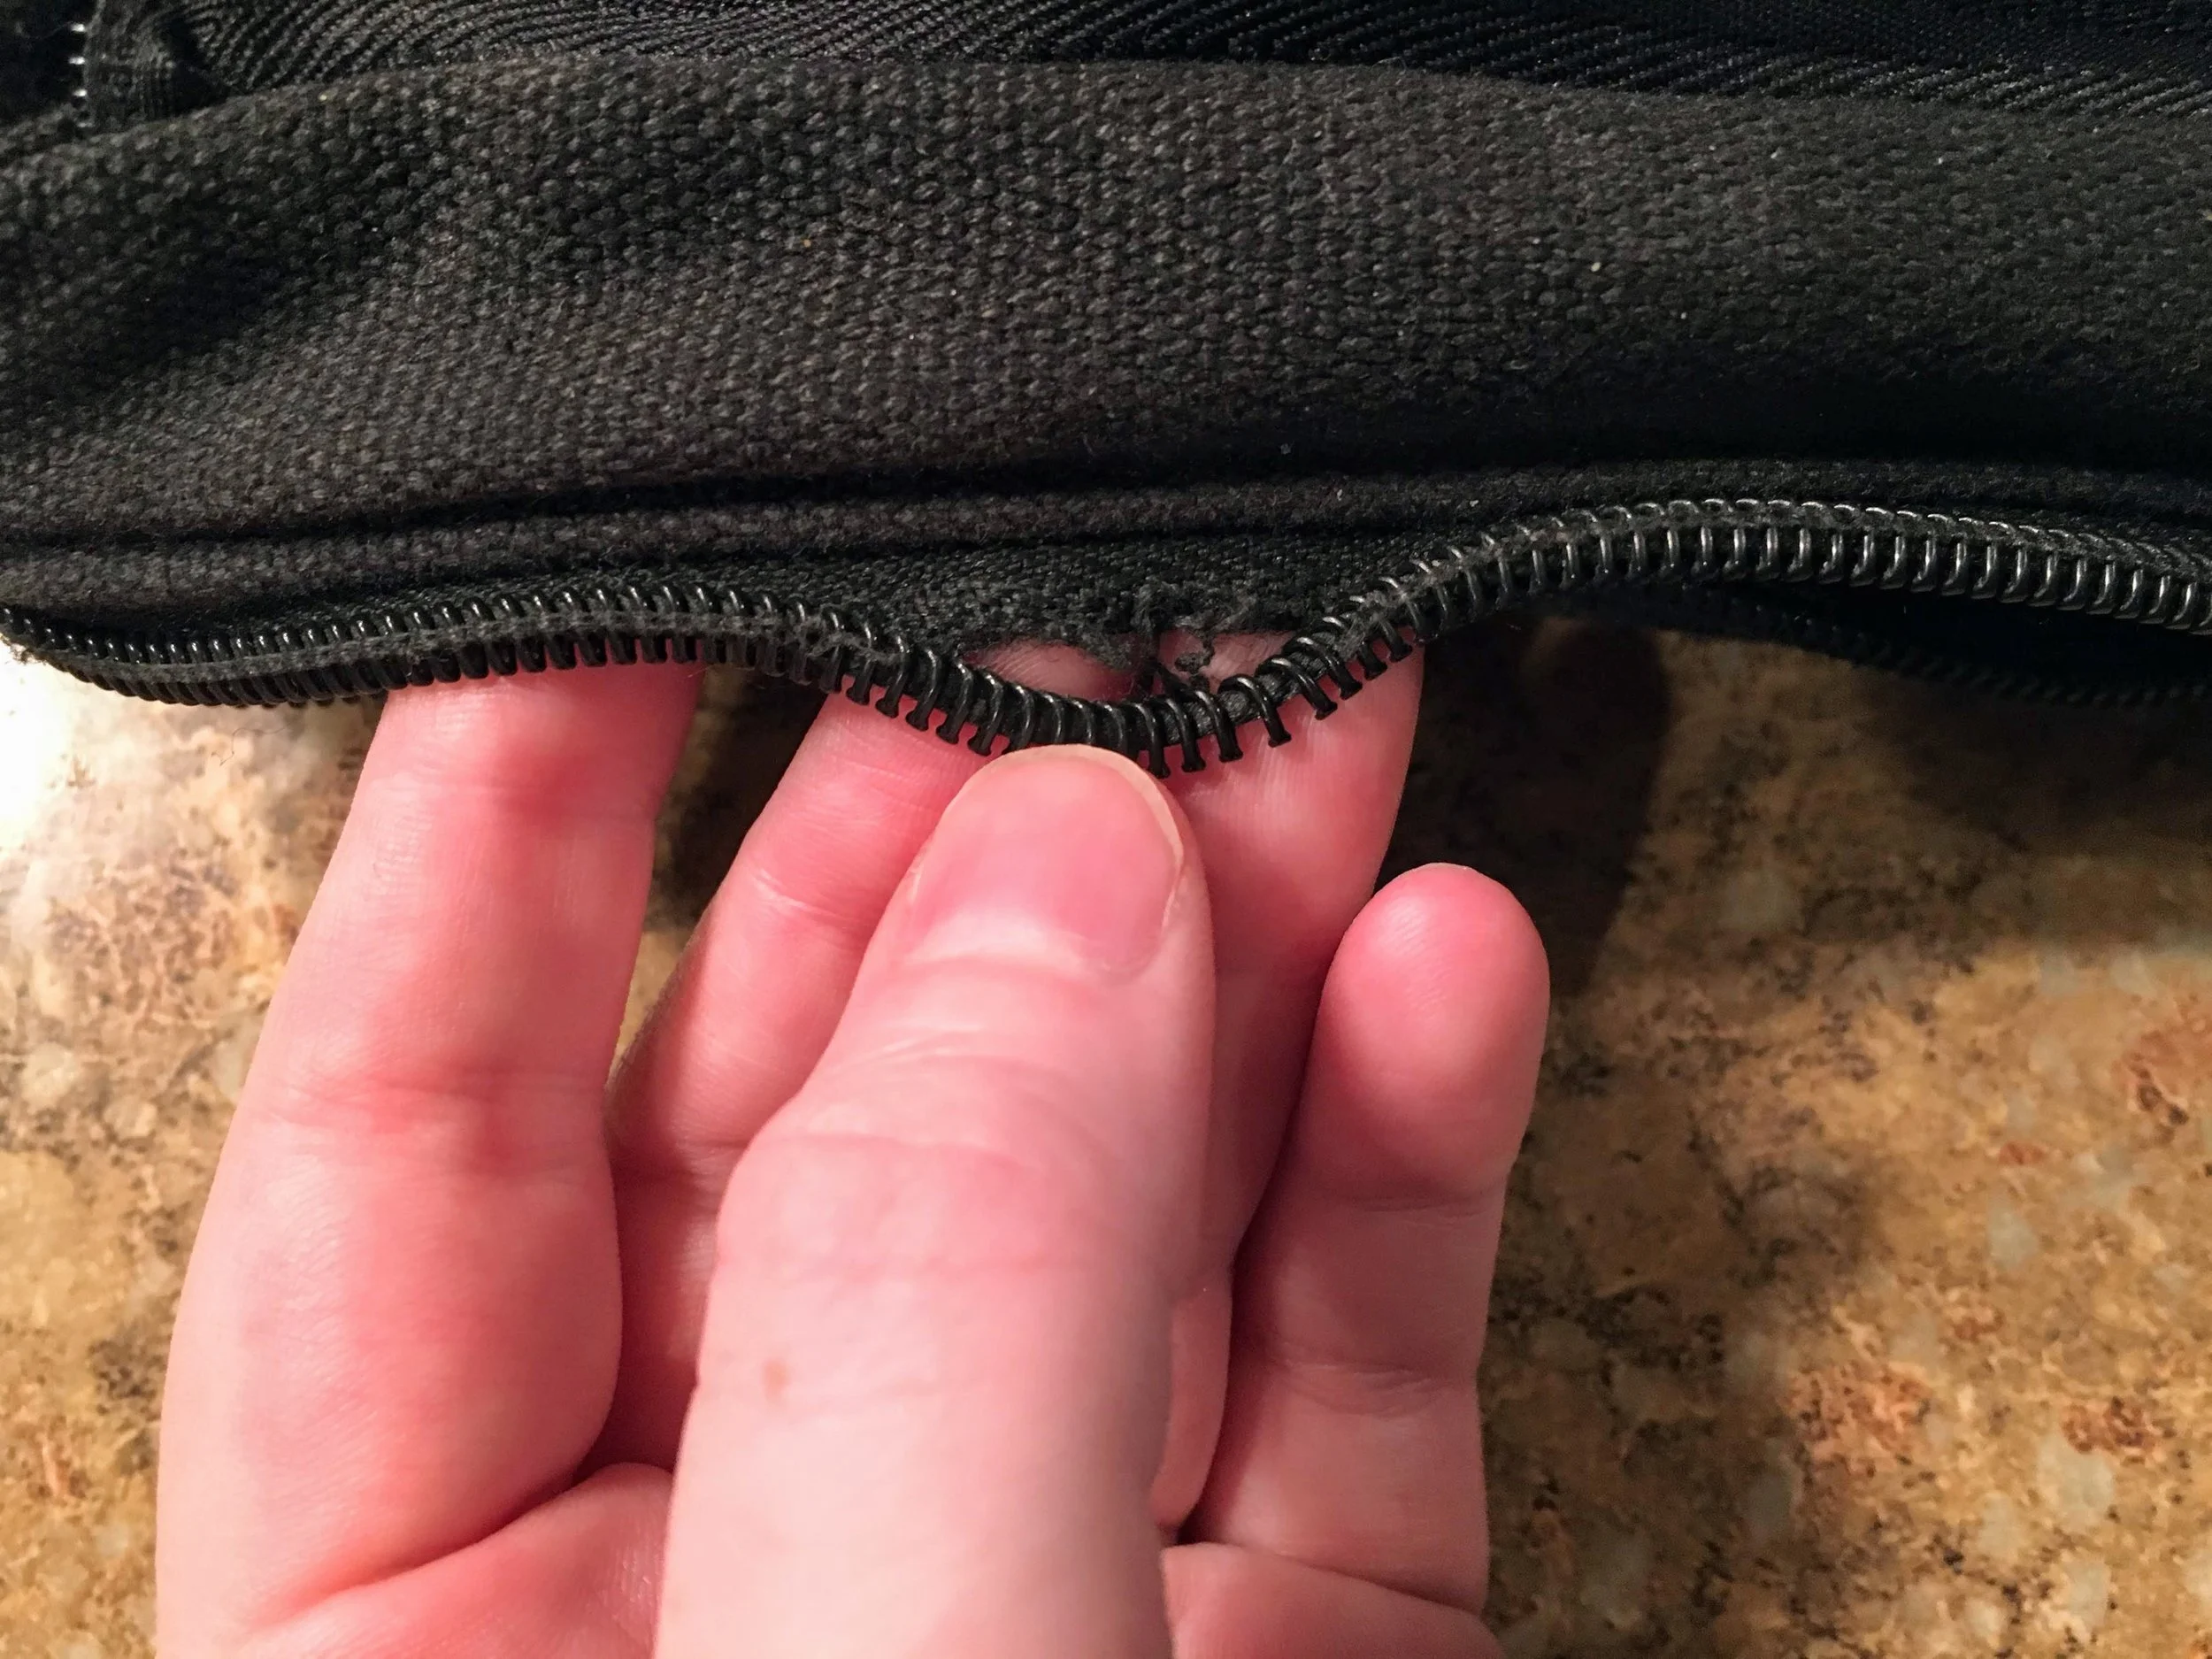
At first, I assumed that this zipper needed to be replaced entirely, which would have required deconstructing the bag, as the zipper is sewn into the lining. I put it off for months because I didn't want to do it. I became accustomed to only closing my bag 3/4 of the way, although I made a few mistakes in the beginning and zipped over the detached part of the zipper, which didn't go well. I think I might have stretched and distorted the loose part of the zipper by doing this.
However, when I took a closer look at it, I realized I could probably just sew the plastic zipper teeth back onto the zipper ribbon, where it had become detached. You can see that this is how the zipper is attached to the ribbon in the first place. Some of the stitches just let go, allowing the zipper teeth to come away.
I decided to hand sew this because it required a bit of finesse, and I wasn’t sure if my sewing machine would get jammed up on the zipper teeth. Also see my tutorial on how to make a felt flower pincushion if you want one of these to hold your own pins and needles for hand sewing!
There’s some backing material attached to the zipper teeth, which was then sewn onto the zipper tape. I removed the loose thread and stitches that had come out, so they wouldn’t catch in the zipper once it was fixed. Then I started about 1/2” from the detached part of the zipper, and started sewing up and down between the zipper teeth.
Here’s a clearer shot of what I’m talking about. I just held the zipper and zipper tape in place, trying to keep the teeth even with the previous ones, and trying to flatten the distorted teeth back into place.
The Finished Zipper
Here it is all sewn up! You can see a slight upward curve where the teeth were reattached. Some of the teeth came slightly out of alignment when I zipped over the loose zipper teeth previously. The spacing of the teeth is a little bit off now.
But the bag zips and unzips just fine now, despite these small problems. I wish I’d thought to do this fix sooner—it probably would have worked even more smoothly!
Here’s how it looks from the other side.
And here’s how it looks closed. My stitching looks a little more bumpy than the other stitching, just because I went over it a few times to make sure it would really hold.
The Messenger Bag Back in Use
Here’s the bag back in use after I fixed the zipper. You can see the padded case for reusable straws that I posted about earlier—make your own if you want to carry reusable straws in style. I also keep my reusable shopping tote in there, for which you can also find a free pattern and tutorial.
From afar, the zipper looks completely normal.
Here’s the full bag. You can see why it’s worth fixing! The image is by Arthur Rackham from the fairy tale Undine. See a free version of the book on Archive.org. All of the illustrations are stunning.
And I have a few other interchangeable flaps for the bag that can be attached and detached depending on what I feel like. All of the illustrations are by Arthur Rackham from different fairy tales.
Want More Projects?
See my Pinterest board on Eco-Friendly Crafting:
And see this project from All Free Sewing on Clothing Repair 101.


