


Using a Schacht Flip Loom: Rigid Heddle Weaving for Beginners

In this post, I'll show you how to set up your Schacht Flip Loom for the first time, warp it, and weave some simple dish towels on your rigid heddle loom. I'll go over rigid heddle loom basics, discuss helpful books/resources related to rigid heddle loom weaving, and tell you how to avoid common errors on your first woven project.
Disclosure: This post contains affiliate links, which means I may receive a percentage if you make a purchase using these links. This won’t cost anything extra to you. I only link to things I like and use, and the proceeds help me to run this blog. Thank you for supporting me!
Materials used:
- Schacht Flip Loom (I bought my loom from The Spinnery on Etsy. The shop owner was helpful and informative when I had questions, and everything shipped quickly and was packaged very securely.)
- Extra heddles for the Schacht Flip Loom
- Looms and Weaving Accessories from The Spinnery
- Inventive Weaving on a Little Loom: Discover the Full Potential of the Rigid-Heddle Loom, for Beginners and Beyond
- The Weaver's Idea Book: Creative Cloth on a Rigid Heddle Loom
- Yarn. I used big cones of cotton Lily Sugar 'N Cream yarn.
- Brown craft paper
Why the Schacht Flip Loom? A Comparison of Rigid Heddle Looms
I wanted a relatively small loom to weave on, so I figured a rigid heddle loom would be a good place to start. First, I read a lot of reviews on rigid heddle looms. The main brands you'll see are: Ashford, Schacht, Kromski, Glimakra, and LeClerc.
People seem to have very strong opinions about their looms, and each brand has those who absolutely love it vs. those who hate it. The Ashford and Schacht looms seemed to be slightly more popular than the other brands, and it seemed like there were more online shops where you could buy extra heddles and parts for each of these brands. I narrowed my search down to those two brands.
Ashford Rigid Heddle Looms
Ashford has two kinds of rigid heddle looms: the Knitters Loom, which comes assembled and finished, and their regular rigid heddle looms, which do not come assembled or finished, but are cheaper. The Knitters Loom can also fold up for easy transportation (though you'll lose your warp tension and have to readjust it when you set up again). I didn't want to have to assemble my loom or finish the wood, so that knocked the regular rigid heddle out of the running for me.
I almost got a Knitters Loom, but unless you get a stand to go with it, you have to lean the loom against a table or other surface and hold it in place with your hips. Personally, this did not sounded very comfortable, although there are those who say it's not a big deal. You can't simply place your Knitters Loom on a table and use it because you won't have enough room for your downward shed (the opening through which you throw your shuttle).
The Schacht Flip Rigid Heddle Loom
The Schacht Flip Loom, in comparison, can be placed on a table. You can also buy a standing frame for it, but those are $100-200 for all looms. The loom itself costs a couple hundred bucks, and I didn't want to go crazy with expensive accessories until I was sure I liked it. The Schacht Flip also folds up for easier storage/transportation. It comes assembled and finished. You have to attach the apron rods to the front and back, but that's fairly simple to do.
In the two books that I linked to above, both authors either used or recommended the Schacht Flip loom. The Schacht Flip also has room for three heddles (the reed-like "combs" that separate your warp yarn), which means you can weave more complex patterns. For other looms, you'd have to buy an extra heddle block and install it (at least $50). The Schacht Flip is the only loom that comes with room for extra heddles, and it's the only one that allows room for three heddles.
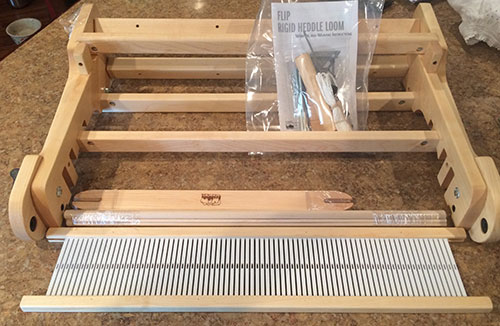
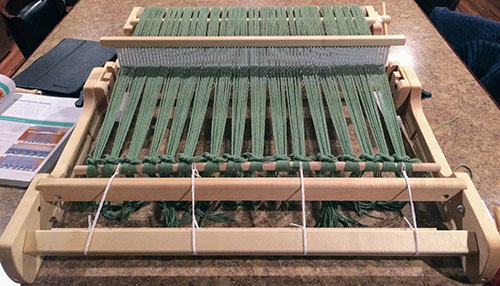
Schacht Flip Loom Out of the Box
I got a 20" Schacht Flip loom because I wanted to be able to make wider pieces, but I didn't want to have to struggle to get my shuttle across the loom. The 20" size seemed like a good choice for a beginner. One note: the loom itself is wider than 20"--the fabric it produces is 20" wide. The loom itself is about 24" wide.
This is what the loom looked like right out of the box. As you can see, it looks nearly ready to go. It's folded up, so it take up less space during shipping and also to protect the loom. It came with a heddle, two shuttles, a hook to help you thread your heddle, clamps to hold the loom to a table, a warping peg, and your apron rods/strings. I chose an 8 dent heddle, which is the right size for worsted weight yarn. You can see a guide to different heddle sizes here.
This is what the loom looks like once unfolded.
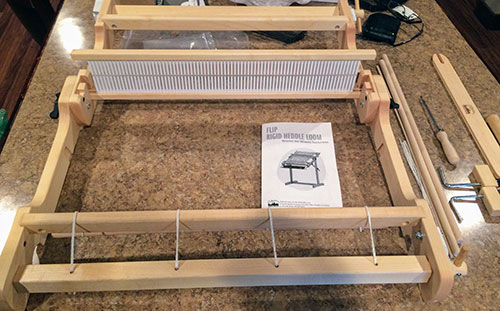
First, you need to attach the apron rods to the front and back of the loom with the included strings. You can see how to do this in the manual for the Schacht Flip loom.

Can You Use Ashford Heddles on the Schacht Flip Loom?
One blogger mentioned that Ashford heddles will fit Schacht looms, so I decided to test this out. Ashford heddles are cheaper than Schacht heddles, so I was really hoping this would be true. I have the 20" Schacht Flip loom, so I decided to test out a heddle for the 20" Ashford Knitters loom.
They were not the same size. The Ashford heddle (bottom) was about an inch shorter than the Schacht heddle (top). Not only that, but they're shaped differently. On the Schacht loom, the top and bottom wood component are the same length, but on the Ashford heddle, one of the wood components is longer than the other. It may be that another size of Ashford heddle is right for my loom, but I think I'm just going to stick with Schacht heddles from now on.

Warping Your Loom
Direct Peg Warping
There are a couple of different methods for warping, but direct peg warping is easiest for a beginner. I used this video from Ashford and this book, Inventive Weaving on a Little Loom. The video gives a great overview, but I liked having the step-by-step instructions from the book to check as I was warping. You can see the book on the table next to my loom through this whole process!

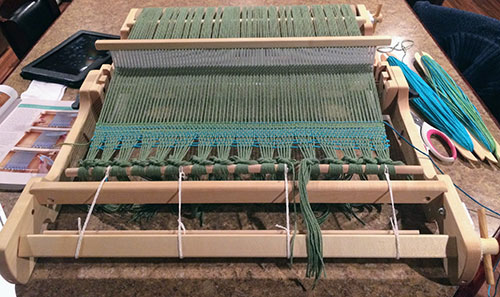
Here's a loom's eye view of the warping. Your woven piece will be slightly shorter than the length of your table, as you will have a small amount of loom waste on either end, plus it will shrink a bit once you wash it.
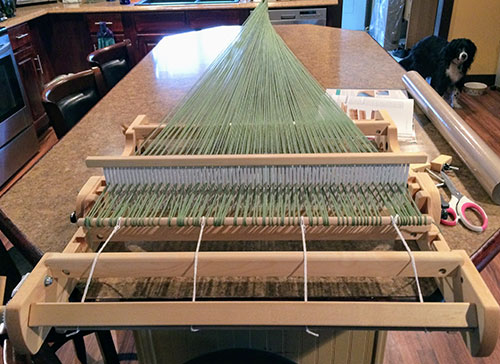
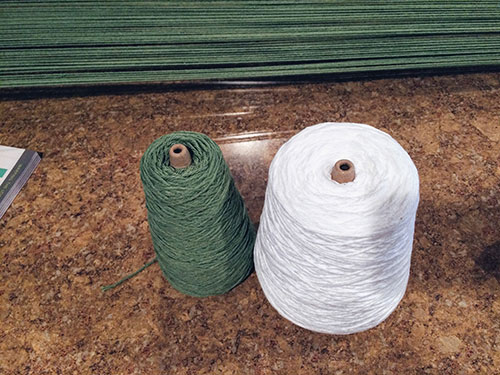
I warped my loom with a green cone of cotton Lily Sugar 'N Cream yarn. I'm showing it next to an unused white cone to give you an idea of how much yarn is needed for warping.
Winding On
Here you can see I've wound the warp onto the back of my loom and tied it off on the front apron bar. You'll see slightly different methods for how to do this, but I used the knotting method recommended in Inventive Weaving on a Little Loom.
When you wind your warp onto the back beam, make sure you use a warp separator, or your threads will get tangled up. I used a roll of brown craft paper, which my husband cut to the right size with our table saw. You can use individual pieces of cardboard to separate each turn of the warp, but I found it was easier to just roll the paper onto the back beam along with the warp.
Separating the Warp
To separate the warp at the front of the loom and even out the spacing of the threads, you can weave a few rows of another yarn. Again, I used the method recommended by Inventive Weaving on a Little Loom.
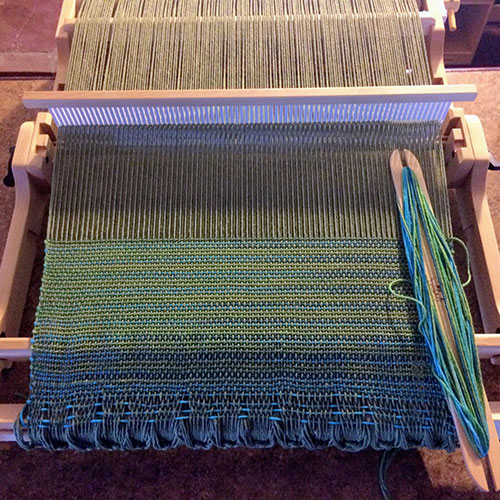
Weaving on the Schacht Flip Loom
I'll admit it, warping took me several days to do. I'm sure once I get used to the process, it'll go much faster, but warping was definitely an ordeal for me. However, once I got started weaving, it was so easy and fast! It felt like I was at the end of my warp in no time at all.
I just did plain weave here, although there are all sorts of fancy things you can try to make your weaving more intricate. The Weaver's Idea Book: Creative Cloth on a Rigid Heddle Loom has some great ideas that I'll have to try out next time.
The Up Shed and Down Shed
Basically, in order to weave, you'll alternate up sheds and down sheds with your heddle. A shed is the space between your warp threads through which you throw your shuttle. Each shed lets a different set of warp threads up, so your weft thread ends up under and over these sets of warp threads.
In the picture below, my heddle is in a neutral shed, so all of the warp threads are at the same level. The slot in front of my heddle is the up shed. The down shed doesn't have a specific slot. You just move your heddle downward until it's underneath the heddle block, which will hold it in place.
Common Problems to Avoid
After each row, you'll beat your yarn with your heddle. Even though it's called beating, you don't want to apply too much pressure. It's normal for the weave to be a little loose. Once you wash it, the weave will become more dense.
Be careful of how much tension you use on the edges of your weaving. I used the "bubbling" method recommended by the author of Inventive Weaving on a Little Loom. Basically, you angle your yarn upward at the beginning of each row and leave a little extra yarn on the end of the row, so that, when you beat your yarn with the heddle, you've left a little extra room for the yarn to settle in on the end. This will keep your selvedges (the edges of your weaving) from being pulled too tight.

Here's the full length of the weaving once I removed it from the loom.

Here you can see the unwashed version (left) vs. the washed version (right). The yarn has fluffed up to fill those empty spaces!

A Sewing Project for Your First Weaving: Dish Towels
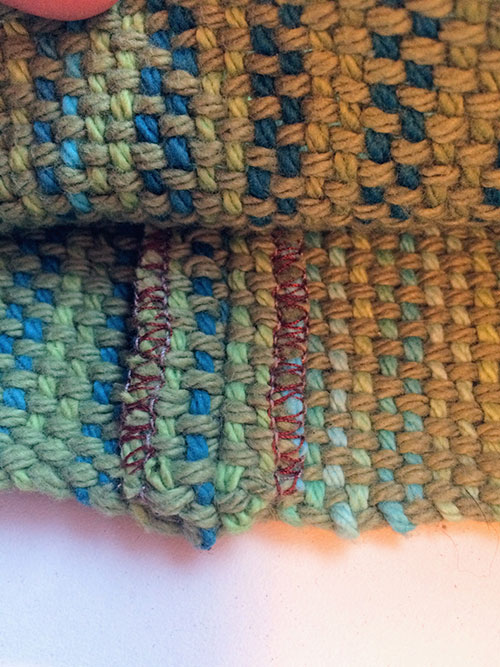
I used this pattern from Kleio's Belly for the fabric component at the top. It's not easy to cut woven fabric without having it unravel, so I used my serger. I cut my fabric into three components across the width of the fabric. The selvedge runs along the top and bottom of each towel.
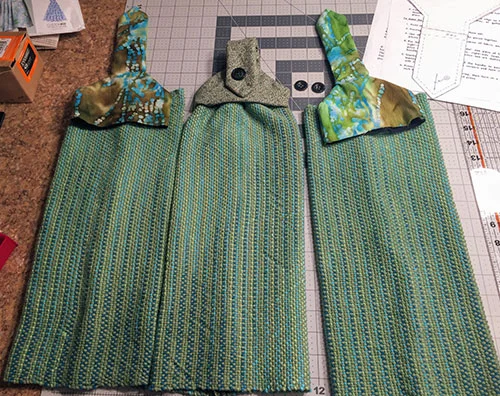

Then I sewed each towel into a tube. Now you can follow the rest of the instructions from the pattern I linked above.
I also tacked up the very end of each seam and sewed it in place, so that the serged edges wouldn't poke out at the bottom of the towel.
And here are the finished towels!

Next Steps on the Schacht Flip Loom
This first project was so fun, I know I'll be making more woven pieces. I just need to steel myself for the next warping!
Follow my weaving board on Pinterest for more weaving tips, tutorials, inspiration, and ideas.


