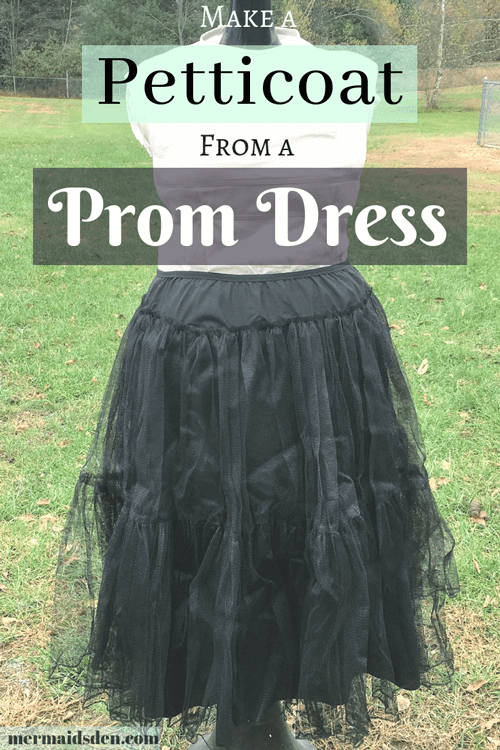
Make Your Own Petticoat from a Prom Dress
In this post, I’ll show you how to refashion a thrifted prom dress to make your own petticoat or crinoline. If you have a circle skirt or a full skirt with lots of fabric, a petticoat is helpful to give it some shape. This is a quick and easy project, and most thrift stores have a selection of old prom dresses, so it’s easy to find the materials. I bought a dress that was several sizes too small for me, but the tulle part of the skirt, which started further down from the waist, was just right for my petticoat. You could also buy a dress that was too big and just gather the tulle fabric more or cut out some of the excess fabric.
Disclosure: This post contains affiliate links, which means I may receive a percentage if you make a purchase using these links. This won’t cost anything extra to you. See my privacy policy for more details.
Materials Used
- Old prom dress: I found mine on sale for $10 at a thrift store
- Foldover elastic : I used this because I didn't want any extra bulkiness at the waistband, but if you want a wider waistband, you could use 2" waistband elastic
- Olfa rotary cutter
- Fiskars self-healing cutting mat
- Fiskars acrylic ruler
The Original Prom Dress
Here’s the prom dress I found on clearance at a thrift shop. I’ll probably try to do something with the beadwork as well, since it has a nice look to it. The black, satin fabric to the dress felt kind of polyester-ish and plastic-y, though, so I don’t think it was a huge loss to cut up this prom dress. It had clearly been sitting on the rack for awhile before I bought it.
Cutting up the Skirt
The tulle for the crinoline or petticoat started partway down the skirt. I think that, technically, the term crinoline is more correct than petticoat, but it seems like a lot of people also call them petticoats. Anyway, I wanted to remove the tulle part that poofs out your skirt.
I held it up to my waist to see if it would fit and it did. I folded over the outer part of the dress to expose the crinoline section.
I cut off the underskirt with scissors, since the whole dress was a little too big and heavy to fit on my cutting table. I think the part with beadwork would have pulled it off the table. Still, this left me with an uneven waistline.
I evened it up with my quilting ruler and cutting mat afterward.
This gave me a nice straight waistline to add the elastic waistband to.
Adding an Elastic Waistband
The petticoat from the prom dress needed to be gathered a bit to fit my waist, so I added an elastic waistband using foldover elastic. Foldover elastic is great because it’s quick and easy to add, plus it encases the raw edge of your skirt. I cut a length of elastic to fit snugly around my waist, and then I sewed the two edges of the elastic together to make a big loop for the waistband.
Then I divided the skirt into quarters and the waistband into quarters. You can see these marked by the clips on each. Then, match each one up and clip them together. I ended up switching to pins to hold them together, so that I could match up the line of the skirt fabric with the mid-point of the foldover elastic (see next photo for an illustration of what I mean).
Foldover elastic has a clear crease in the middle, where it can be folded over to enclose the raw edge of the skirt. Sew the skirt to the lower half of the elastic, making sure that the raw edge of the skirt matches up to or is slightly below this crease. I used a three-step zigzag stitch on my sewing machine to let the elastic stretch. You could use a regular zigzag stitch as well, if you don’t have a three-step zigzag.
Stretch the elastic as you go, so that it matches the length of the skirt. Once it’s all sewn together, the skirt fabric will be gathered, and the elastic will return to its normal size.
Once you’ve sewn the skirt to one side of the foldover elastic, fold the elastic down and sew through everything again, stretching it as you go.
Here’s what the finished waistband looks like from the outside. It’s a fairly thin, lightweight waistband, similar to what you’d find on a half slip. I think this works well, since it’s going to be worn underneath another skirt. If you want a thicker waistband, though, you can use the 2” waistband elastic listed in the Materials section.
And here’s what it looks like on the inside.
The Refashioned Petticoat
And here’s the finished crinoline/petticoat! It’s just the right length for most circle skirts or tea-length dresses.
I made it to go with my DIY “poodle” skirt, and it did a great job of giving that skirt more shape, so that the dog applique was visible and not just lost in the folds of the skirt.
Want More Refashioning Projects?
Check out my Refashioning Ideas and Projects board on Pinterest.
See also this cool project from All Free Sewing on how to turn an old prom dress into a pleated skirt.


