How to Make Your Own Leggings from an Existing Pair
Don't buy a pattern for leggings--it's easy to make your own pattern from an existing pair of leggings. You'll have to cut your existing pair of leggings in half to make this pattern, so choose an old, worn out pair. In this tutorial, I'll walk you through the process of making your own pattern and sewing the perfect pair of leggings with an easy yoga waistband, so you don't have to fuss with any elastic or casing.
Disclosure: This post contains affiliate links, which means I may receive a percentage if you make a purchase using these links. I only link to things I like and use!
Materials used:
- 28mm Olfa Rotary Cutter
- Swedish Tracing Paper
(or any other large piece of paper)
- Washers
to use as pattern weights
- Quilt clips
- 1-2 yards of knit fabric with a two way stretch (with optional contrasting fabric for the waistband)
- Existing pair of leggings (that you don't mind cutting in half)
Making Your Leggings
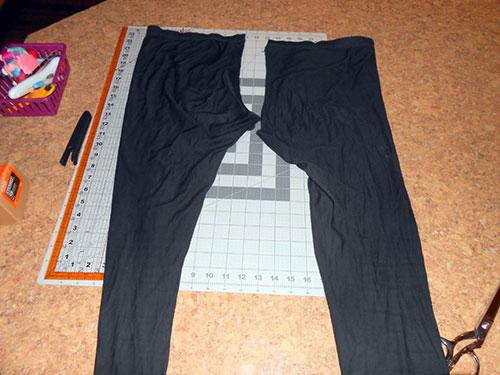
First, take an existing pair of leggings that you don't mind cutting in half. Cut them down the center, being careful to follow the existing line of stitching. Cut them so that one side has all of the stitching and seam allowance on it.
Use the side with the seam allowance, so you don't have to add a seam allowance. Lay it out flat on your tracing paper. I like Swedish tracing paper because it feels like fabric, but you can use any big roll of paper (or even paper grocery bags taped together). Use your pattern weights (I used washers) to keep the leggings on the tracing paper. You'll notice that the front and back have different curves/angles. The left side is the front of the leggings and the right side is the back (you need a little more room in the derriere, so there's more fabric here). This is why it won't work to just lay the leggings flat and trace them--you need to have both sides.
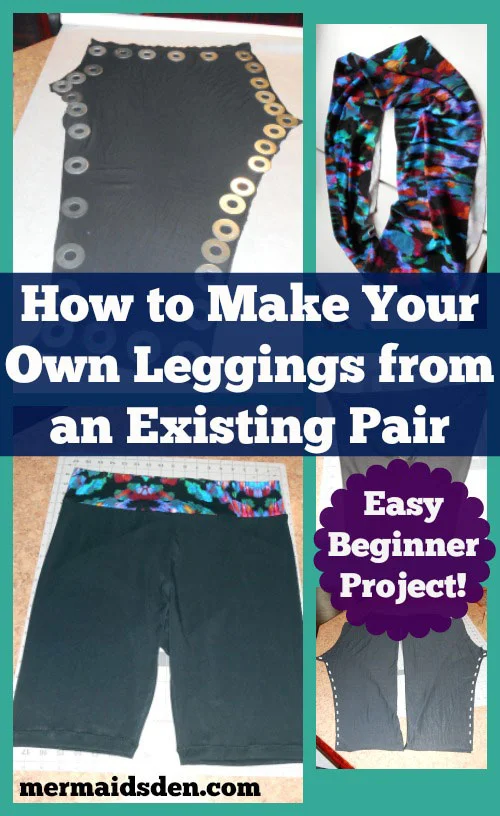
Here's the pattern I traced from my leggings.
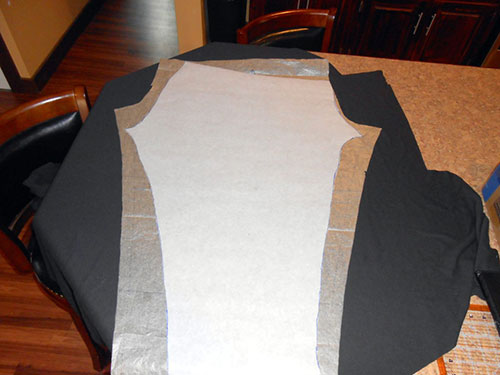
And here's how it looked when cut out.
At this point, I compared my pattern to a commercially bought pattern for leggings, and you can see how different they are! I went by my measurements and cut out the XL size from the pattern I bought, but when I made them, the legs were way too big, and the posterior was too tight. The pattern I made from my own leggings tapered quite a bit more in the legs, and allowed more room in the seat. My own pattern led to a much better fit.
Make sure you get a two way stretch fabric for your leggings. Pull on your fabric both vertically and horizontally, making sure it's got a good amount of stretch both ways. Now cut out your pattern twice. I recommend using a 28mm Olfa Rotary Cutter for this. Previously, I used a 45mm rotary cutter, but the 28mm rotary cutter allows much greater precision when cutting something with a lot of curves. Stretch fabric tends to slide around and move while you're cutting, so pinning it to the pattern and using scissors doesn't always give you two identical pieces. You want the fabric to stay in place while cutting, and the rotary cutter accomplishes this nicely
Lay out your pattern pieces so that you have two mirror images. Sew up the side of each piece. I used my serger, but see my post on how to "serge" with your sewing machine. You can also use a zigzag stitch with your sewing machine. Be sure to use a stretch stitch because a straight stitch will just pop out when the fabric stretches.
Now turn one of your pieces right side out. Put that piece inside of the other piece, right sides together. It should look like this:
Your seams should look like this--on opposite sides from each other. I'm emphasizing this because I've sewn a few pairs of leggings inside out!
Now sew both pieces together from front to back, in a big U shape. (Ignore my stitches on the waistband--you don't need to sew there just yet.) Now pull your leggings right side out. Almost done!
I decided to make a yoga waistband because it's more comfortable, and it means you don't have to create a casing for an elastic waistband. Test out your fabric to see how much it stretches. Wrap it around your waist until it's comfortably snug, and then cut that length of fabric. You'll be folding your waistband in half, so double the width you want. Mine was 8" initially, but it ended up being a little too tall, so I recut it to be 5".
Right sides together, sew up the ends so that you end up with a tube of fabric.
Fold it in half to form your yoga waistband.
Now, with your leggings right side out, divide both the leggings and your yoga waistband into quarters. Match up the quarter marks on each one. Put the waistband on the outside, with the leggings on the inside. Your yoga waistband should be slightly smaller than your leggings. You'll stretch the waistband to fit the leggings as you sew around.
Match up the seam of your yoga waistband with the back seam of the leggings. This will make it easy to identify the back of your leggings.
If you have a free arm sewing machine, remove the plate so that you can easily sew in the round. Sew your waistband to your leggings, stretching the waistband to fit each quarter of the leggings.
If you have a serger, use it to finish the leg holes. If not, see below.
Fold up your hem on the leggings and zigzag over it to hold it in place.
Enjoy your new pair of leggings!


