


Free Sewing Pattern and Tutorial: Flower Pincushion

In this post, I'll show you how to make a simple felt flower pincushion while showing off some fancy embellished stitches your sewing machine can do! This post contains a free sewing pattern and step-by-step tutorial for a flower pincushion made out of felt. This is the first pdf pattern I ever created, so I wanted to start with something simple and useful!
Disclosure: This post contains affiliate links, which means I may receive a percentage if you make a purchase using these links. This won’t cost anything extra to you. I only link to things I like and use, and the proceeds help me to run this blog. Thank you for supporting me!
Materials used:
- Three pieces of felt (Amazon has a nice assortment pack)
- Medium weight interfacing
- Embroidery floss
- Tapestry needle
- Button with a shank
- Regular sewing thread in matching colors (I used this set from Gutermann)
- Metallic/Rayon thread in coordinating colors (I used thread by Sulky)
- Quilt clips
- Markers
- Polyfill
- Fray check
Flower Pincushion Pattern:
Get your free printable pdf pattern here: The Mermaids Den Flower Pincushion Pattern
Prepare Your Materials for Your Flower Pincushion
Below is everything you need to make this pincushion. I used felt for this project. Felt is great because it doesn't unravel, so you don't have to worry about finishing the edges.
I found my regular sewing pens had trouble marking up the felt, so I used markers instead. I chose coordinating colors for tracing my pattern on each piece, and once I cut them out, I put the marked sides facing in, so it didn't show on the outside.
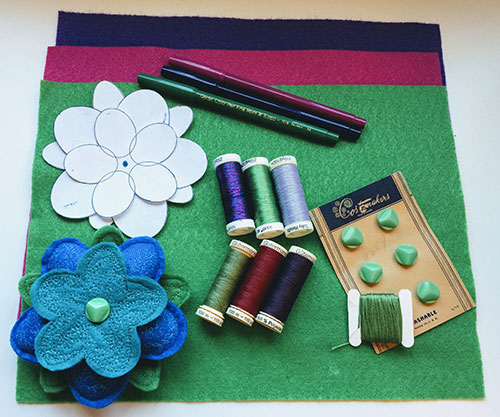
Here are all of the individual pieces. For the leaves, cut a piece of interfacing, and then trim it about 1/4" smaller than the pattern piece. This doesn't have to be really precise.

I punched out the center mark on each paper pattern piece with a stitch ripper, and then I marked the center point on each piece of felt with my markers. You want the center mark to show on the outside of each piece. You'll be using this center mark as a guide to sew through each layer and add the button at the top.
Sewing Tutorial for Your Flower Pincushion
Leaves
For the leaves, layer your two pieces of felt with the interfacing sandwiched in the middle.

I used quilt clips to hold the edges of each leaf together. The curves on this pincushion are pretty sharp, especially on the leaves, so don't worry if your stitching isn't perfect. Just do your best. Go slowly, stop and re-position the piece as needed, and use your handwheel on the sharp curves. You can cover up any uneven stitching with your fancy stitching later!

If your pieces don't match up exactly once you've sewn them together, just cut off the excess felt. No one will ever know!

Now you can decide which fancy stitch you want to use on your leaves. I used my stitch book to get ideas for which stitches to use. See my previous post on How to Make a Stitch Sample Book for Your Sewing Machine.

Test out your fancy stitches on a scrap of felt to get a sense of how it will look. Remember to loosen your thread tension. The felt is thick and the fancy stitches need room to breathe.

Here are my finished leaves:

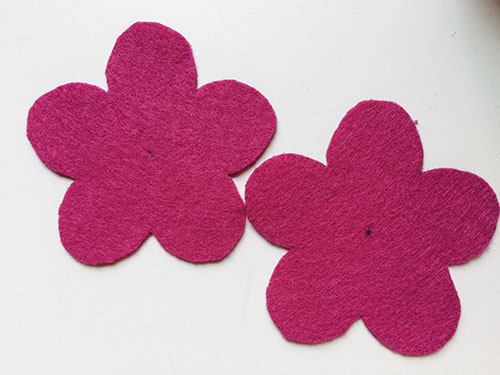
Top Petals
I sewed around the edge carefully here, but still missed catching the bottom piece on one petal. It's okay if this happens on the leaves or the top petals. You're going to go back and sew through both layers again with your fancy stitching, so don't worry about small openings.

Again, I used my stitch book to decide which stitch to use on this piece.

This piece is going to be the top of the pincushion, and I stitched it very densely so it would look nice.

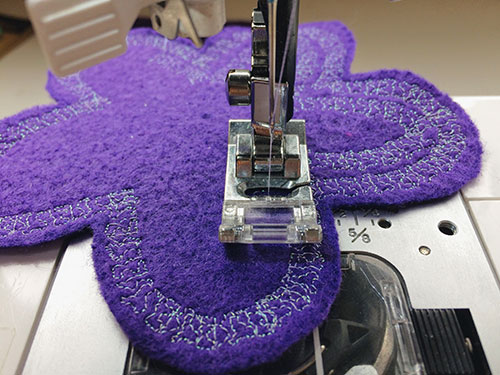
Middle Petals
For this set of petals, you'll need to do your fancy stitching on one piece of felt before joining the two sides together. When using fancy stitches, I just went around the leaves/petals concentrically, but you could also go back and forth across each piece. For each successive row of stitching, I tried to keep the previous row of stitches visible just along the edge of the opening on my presser foot. This helps to keep your stitches close together and evenly spaced.
Once you've filled in the top layer as much as you want, join the two pieces of felt together.

Leave an opening of about 1/2" along the edge, so you can fill your pincushion with polyfill. The final piece will be pretty bulky, so you'll need to hand sew this section closed.

Putting it All Together
Now you that you've finished all three pieces, it's time to put everything together.

First, cut about 12" of embroidery floss and thread it onto a needle. Tie a knot at the end.

Using the center points that you marked on each piece, sew up through the leaves.

Then sew up through the middle petals.

Then sew through the top petals, through your button, and then back down through the whole stack.

It will look like this. To tighten up your layers, go through it all again.

Sew back up through all three layers, through the button, and back down again. If you have trouble getting your needle through, use pliers to get a better grip on it.

Tie a knot at the bottom. Use your needle to snug it in as close to the bottom of the pincushion as you can. This will hold the button on securely.

Add a drop of Fray Check to the knots on the bottom of your pincushion to keep them from unraveling.

And you're done! Enjoy your new pincushion!

Other Options for Your Flower Pincushion
If you wanted a taller pincushion, you could fill both layers of petals with polyfill.
You can also layer the petals on top of each other or stagger them, and you can rotate them after sewing on the button if you decide you like one way better than the other. I tried both ways with the purple/pink pincushion, and I like them staggered.
I used plain felt for my pincushions, but I was at Joann Fabric the other day, and they had a bunch of new printed and textured felts! See all of their felt options here. I bought a bunch of them and I'm excited to use them for future projects!

Did you try out this flower pincushion pattern? How did it go? Let me know in the comments!


