Singer 281-1 Restoration: Cleaning, Adjusting, and Replacing Parts
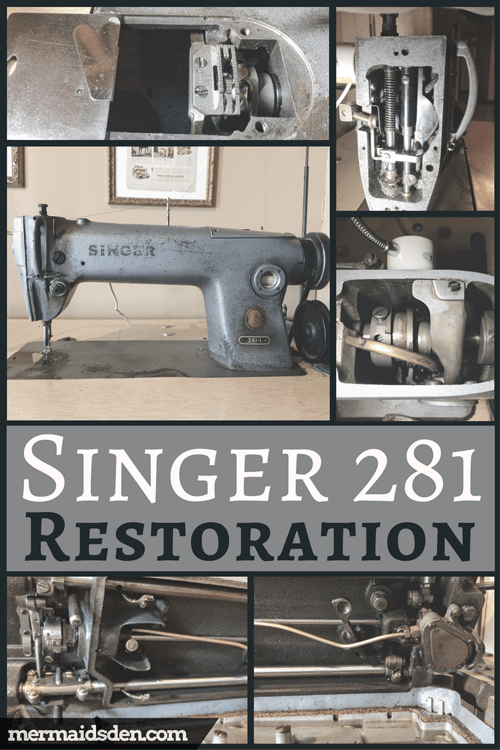
In this post, I'll show you how to restore a vintage Singer 281-1 industrial sewing machine. These sewing machines were often used in factories, and there are a lot of them still in circulation. They are heavy duty machines and can be used for light to medium-heavy fabrics, including leather and home decor fabrics. They are sturdy mechanical sewing machines, and with the right care, should last a long time.
Disclosure: This post contains affiliate links, which means I may receive a percentage if you make a purchase using these links. This won’t cost anything extra to you. I only link to things I like and use, and the proceeds help me to run this blog. Thank you for supporting me!
Materials used:
- Lily white sewing machine oil: 1 gallon
- Magnetic gooseneck sewing machine lamp
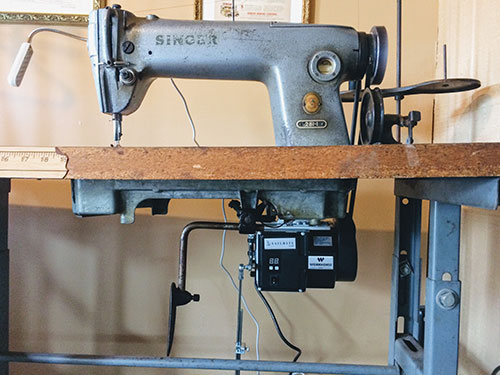
- Sailrite workhorse industrial sewing machine servo motor
- Hinge pins
- Bead reamer
- Dremel
- Brush wheel
- Various-sized needles (#1955)
- Bobbins
- All parts compatible with Singer 281-1 (Sewing Parts Online has a great feature where you can search for all compatible parts for a certain sewing machine)
Why a Singer 281-1?
I've been trying to sew some heavier fabrics lately, including upholstery leather and heavier home decor fabrics. My domestic sewing machine wasn't cutting it, but I also wasn't ready to invest in an expensive, brand new industrial sewing machine.
Below, I'm linking to a couple of Leatherworker Forum threads on this machine and similar ones. The consensus is that this machine is somewhat limited for sewing thick leather or many layers of leather. However, even my regular sewing machine was able to sew through three layers of the upholstery leather, so I think this machine will work for my needs.
One other consideration is that the motor on this machine is rated for a higher voltage than most homes can handle. See my previous post on replacing the motor.
Helpful Information on the Singer 281-1
- Service manual
- Parts list and exploded diagram
- Information from the maker's space, Artisan Asylum, which has a 281-1
- Four part Youtube video series on the 281-1
- Information from Leatherworker Forum on Singer 281s
- Oil regulation and other considerations for the Singer 281-22
- Suitability for sewing leather
- How to wind a bobbin on an industrial sewing machine
Cleaning a Singer 281-1
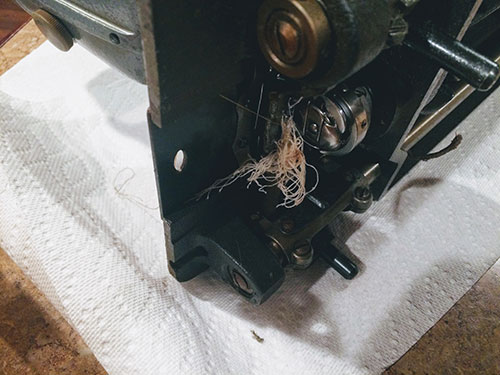
It's fairly easy to access the areas you need to clean on this machine. All you need are a couple of flat head screwdrivers. Tilt the machine back to get to the bobbin area. This one had a tangle of thread (or bobbin bird's nest). When you start sewing with this machine, be sure to hold onto the threads for the first couple of stitches, or you'll end up with a thread nest, too.
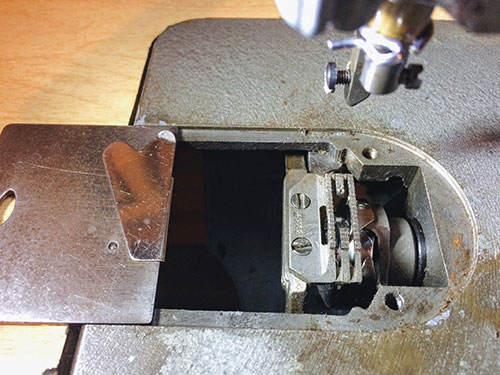
Then open up the slide plate and remove the needle, presser foot, and needle plate, so you can clean out this area. You can also remove the feed dogs by taking out those two screws to the left of the feed dogs. This area wasn't too dusty/fuzzy on my machine.
Here's what it looks like with the feed dogs removed:

Next, open up the face plate on the front and clean out this area. Normally I'd use a little lint brush for this, but this machine uses a wick system and oil pump to let oil flow to all areas of the machine automatically. Although it had a lot of build-up, this area was pretty slimy, so I used q-tips and paper towels to clean it out.

Cleaning out the area behind the faceplate: before (left) and after (right). You can see that there's a braided coil around the presser bar, which I left intact. This appears to be part of the wick system, which allows oil to circulate around the machine.

Likewise, you can see a protrusion in the picture below near the needle bar; this also appears to be part of the wick system, so be careful not to pull these bits out, thinking that they're accumulations of fuzz.

Remove the panel on the top of the machine by the handwheel. Make sure your gasket is still in good shape. Mine was a little oily and discolored, but otherwise seemed all right. There's a paper gasket in the face plate as well, and a cork gasket between the sewing machine and the oil pan. If you need to replace any of these, check out all parts compatible with Singer 281-1 from Sewing Parts Online. They have replacement gaskets.
There wasn't much that needed to be cleaned up in here, but I removed some oily black residue.

Again, be mindful of the wick system running through the machine. The blobby bit here seems to be part of the wick network.

This spool pin on the top of the machine was a little bent, but I just used pliers to bend it back into shape.

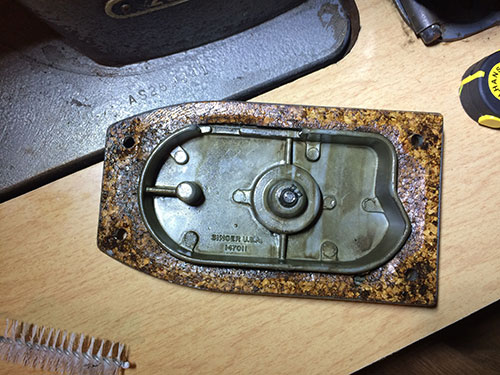
Removing Rust on a Singer 281-1
There was some rust on the body of the machine, slide plate, bobbin winder, and the spool pin. The rust on the spool pin was causing my thread to catch, so I sanded it down with a bead reamer, which worked well on the holes in the spool pin.
For the rest of the rust, I followed the procedure outlined in my previous post on removing rust. I used my dremel with the brush wheel
attachment. The rust on the slide plate and bobbin winder came off smoothly, but the rust on the body of the machine was a bit trickier. It came off, but some of the paint on the machine also started flaking off. I only removed rust on the bed of the machine to make sure that my fabric wouldn't be covered in any residue when coming into contact with the machine.

I left the rest of the machine as is. The inside looks to be rust free, and I think the outside of the machine would probably need to be repainted entirely if I tried to remove all of the rust/pitting.
Replacing Parts on a Singer 281-1
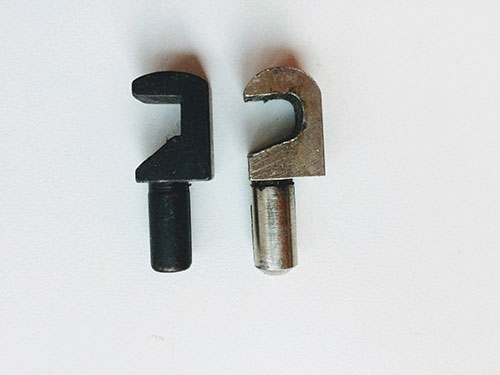
My Singer 281-1 only came with one hinge pin to attach it to the table (right), so I had to find another one (left). It's not a perfect match, but it does work. You have to be a little careful when resettling the machine after tilting it up because the black hinge pin doesn't turn as smoothly as the silver one. I bought this set of hinge pins.
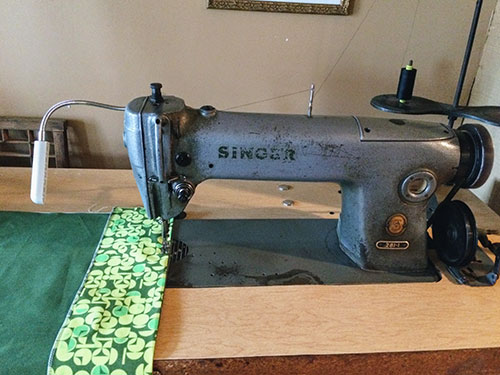
There's no light on this sewing machine, so I bought a magnetic gooseneck sewing machine lamp. It really helps to illuminate what you're working on.

As I noted earlier, I've already written about replacing the motor on this machine. I used a Sailrite workhorse industrial sewing machine servo motor.
Oil Regulation on a Singer 281-1
Most people recommend Lily white sewing machine oil for industrial sewing machines, and several online stores recommended it for vintage Singer industrial sewing machines as well. It seems to be working well in my machine. I bought a gallon and I have plenty left over after filling the oil pan.
Be sure to fill the oil pan up to the High mark. Check it periodically and add more oil as necessary. You don't want to run this machine dry.

On the underside of the machine, you can see the oil pump (far right--it's the triangular mesh covered piece).

In the front, you can see two oil wicks that hang down into the oil pan. Between the two oil wicks is a silver knob. This is the oil flow regulator. It's hard to see here, but there's a plus sign and a minus sign on the knob to indicate which way to turn it to get more or less oil flow.

You should see a steady drip of oil through this little window while you're sewing. It won't flow as quickly/regularly if you're sewing at a slower speed. This thread on a leatherworker forum has some really helpful information on oil regulation. Initially, the oil wasn't flowing in my machine, but it turned out that I just needed to run the machine at a faster speed for a few minutes to get it going. The manual notes that it's really bad to run the machine without oil flow, so I was hesitant to keep going at first, but it did eventually start working.

I also turned my oil regulator knob way up to try to get the oil flowing, and had to dial it back down. I ended up with a big oil puddle on my slide plate the next time I sat down at my machine. The oil was leaking down from the face plate. Turning down the oil regulator seemed to help--I haven't found any more puddles!
Changing the Stitch Length on a Singer 281-1
Below are the instructions from the manual for changing the stitch length. I struggled to do this the first couple of times because it seems like a couple of steps are missing.
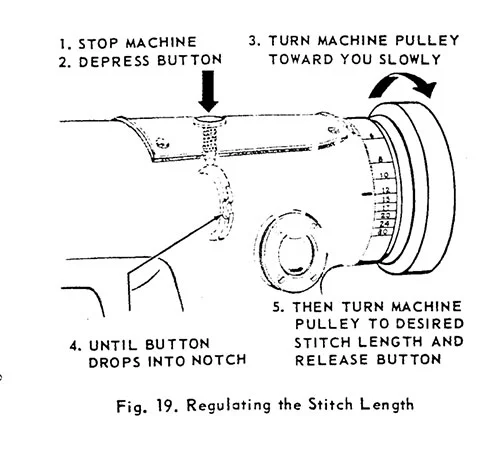
First, unthread your needle, or your bobbin thread will get caught when you do this. Turn the motor off. Turn the hand wheel toward you until button clicks, then lighten pressure slightly and turn wheel away from you until it clicks into place on the new setting you want. This is what worked for me. The wheel tends to get "stuck" unless you let up on the pressure on the button, and I can't get the wheel to keep turning toward me.
I'm not 100% sure that I'm correct about how to do this, I just know that it worked for me.
Adjusting the Bobbin Tension
The bobbin tension was set very high on my machine, and I couldn't get the right thread tension by adjusting the top thread. In the manual, it shows that you can adjust the bobbin tension by turning the regulating screw on the bobbin case.

Turn the bigger screw shown on the left to adjust the bobbin tension. Once you get the bobbin tension set where you want it, you probably won't need to adjust it that often. Usually, you can just adjust the top tension.

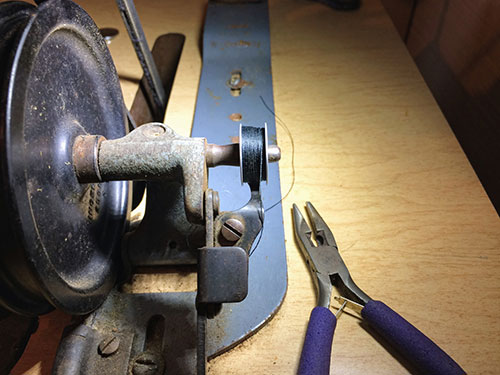
Adjusting the Bobbin Winder on a Singer 281-1
I had never used an industrial bobbin winder before, so I found this video helpful: How to wind a bobbin on an industrial sewing machine.
Initially, I could not get my bobbin onto the spool pin. In the image below, you can see that the bobbin should be centered over the little arm below it, which will disengage the bobbin winder when the bobbin is full, but instead my bobbin is off to the side.

I removed a layer of rust from the bobbin winder and used some pliers to gently squeeze the two sides of the spool pin together.

And now the bobbin fits the way it should!
Sewing with a Singer 281-1
I won't cover threading and other basic adjustments because the manual does a good job with those topics. Make sure you have the right size needles and bobbins. As noted earlier, I had to play around with the bobbin tension to get an even stitch, but it just took a little experimentation to get things right.
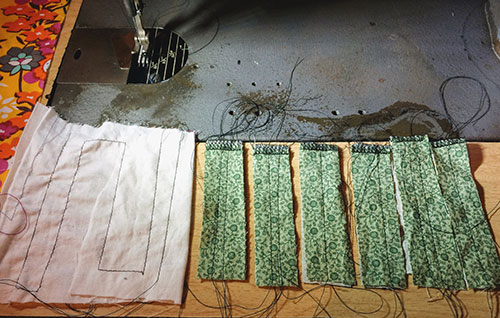
And now I'm happily sewing on my Singer 281-1!
Extras: Presser Feet for a Singer 281-1
I haven't had a chance to try out all of these just yet, but here are the presser feet I have collected so far to use with this sewing machine. There are a few that are supposed to work well with leather/vinyl, and I will test all of them out and write a post comparing all of them in the future.
- Non-stick presser foot (for sewing leather/vinyl)
- Roller foot attachment (with feed dogs and needle plate) (also for sewing leather/vinyl)
- Roller foot (another kind of roller foot. Also for sewing leather/vinyl)
- Elastic foot (1/2") (for applying elastic and holding the elastic under tension)
- Double fold binder attachment (with feed dogs, needle plate, and presser foot) (for folding and applying bias tape or binding)
- Top stitch guide foot (for keeping a specific seam allowance. I want to try quilting with this machine, since it has a nice big harp space.)