Reusable Shopping Bag Tutorial

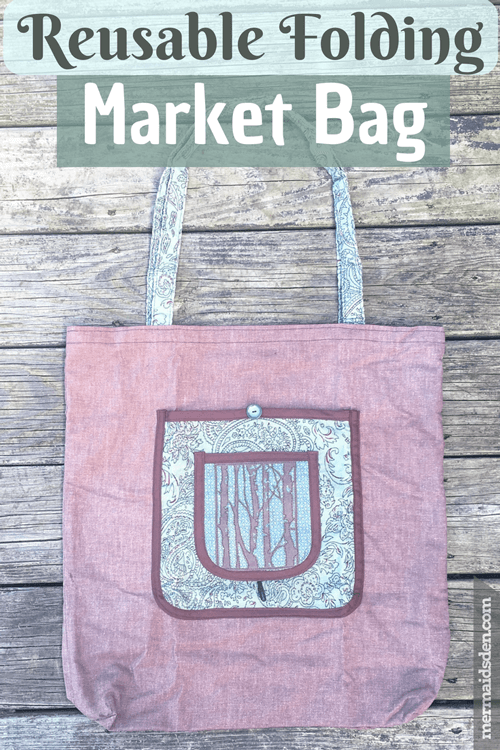
In this post, I'll show you how to make a reusable shopping bag. This tutorial includes a pattern and step by step instructions for making this eco-friendly market tote bag. This bag rolls up and buttons closed for easy storage when you're not using it. Make a couple of them to have plenty of room for your purchases!
Disclosure: This post contains affiliate links, which means I may receive a percentage if you make a purchase using these links. This won’t cost anything extra to you. I only link to things I like and use, and the proceeds help me to run this blog. Thank you for supporting me!
Materials
See the Pattern section lower down for cutting directions for each part of the bag.
- Kraftex brown fabric
- Birch tree die
- Sizzix Big Shot Cutting and Embossing Machine
- Fabric pencil
- Glue stick
- Set of presser feet, including embroidery foot
- Jean-a-ma-jig
- Dritz hem gauge
- Quilt clips
- Fat quarter for inner pocket
- Fat quarter for outer pocket
- 1 yard for main bag fabric
- 1 package of bias tape
- Button
- Ribbon or cording for loop
Prototype Bag
Awhile ago I found this sweet little tote bag at a thrift store.
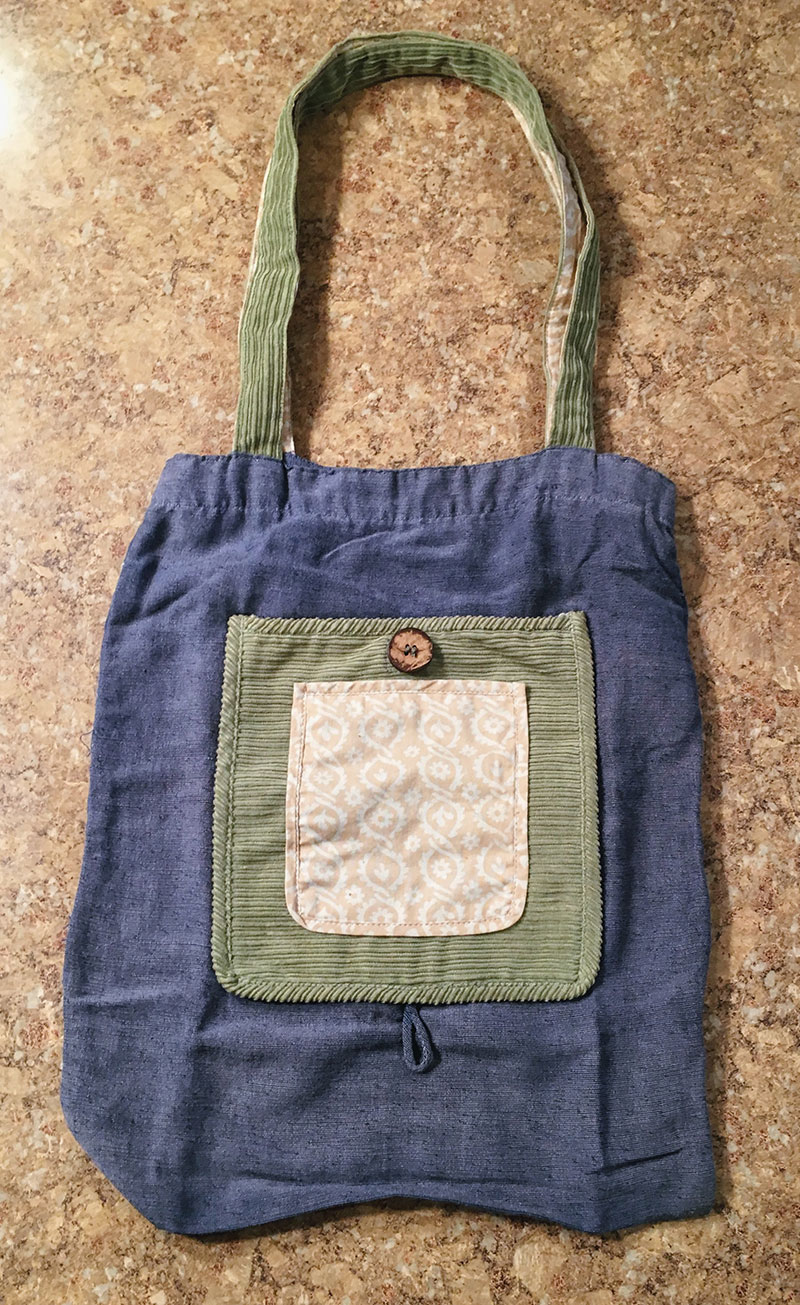
I realized that it could be rolled up and buttoned for easy storage.

I like to keep some reusable tote bags in my purse so that I don't have to take plastic bags when I'm out shopping, so this seemed like a great idea, but it was a little too small.
I sketched out the current bag in my notebook and scaled it up for what I needed.

The Pattern
Here's what you need to make the large version of this roll up tote bag.
Main body of bag: 44" x 18"
Handles: 4" x 32" (cut two)
Outer pocket panel: 10" x 10" (round off bottom corners)
Inner pocket panel: 6" x 6" (round off bottom corners)
Button
Ribbon or cording for loop
Tree panel die cut from Kraftex fabric
1 package of bias tape
The Tree Panel
I recently got a Sizzix Bigshot, and I'm in love with die cutting fabric. I decided to use Kraftex fabric here, which is kind of like faux leather. It feels a bit like paper, but you can sew through it, and it's completely washable. I cut out two panels with the birch tree die for two separate bags.

Next, I used glue to attach the tree panel to the inner pocket fabric. I wanted to make sure it stayed nice and flat on the fabric, and glue is a great way to make that happen.
Side note: when you cut out your pocket panels, you'll want to round the bottom corners. I did this by tracing around a large washer and then cutting along the curve. You can use a cup or any other round object to do this.

For the first panel, I decided to sew around each tree individually, using free motion embroidery. I wanted to make sure that the delicate branches and outlines of the trees wouldn't get ripped or snagged over time, since I plan to keep this tote in my purse.
Be sure to cover or drop your feed dogs for this and use an embroidery foot on your sewing machine.

While this looked good, it turned out to be quite time-consuming. I used the hand wheel a lot because it allowed for greater control. You could also use the foot pedal and just sew very slowly.

It took me almost a week to sew just this panel!

For the second panel, I decided to use a decorative leaf stitch over the whole thing instead. This went much quicker, and I think it looks just as nice.

Putting Together the Pocket
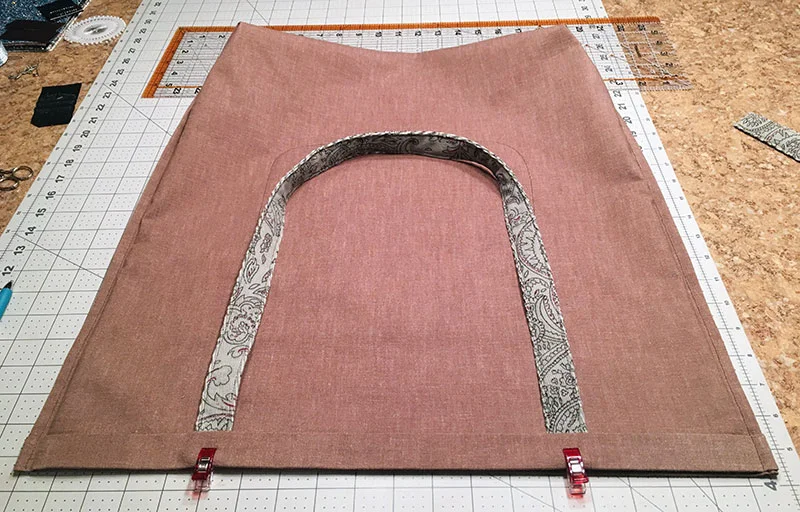
Once you've sewn the tree panel to the inner pocket fabric, you can add the bias tape. I started with the top of each pocket first and then added a separate piece for the sides and bottom.

I used this tutorial by Melly Sews for help shaping my bias tape before sewing it on. Basically, you should iron your bias tape into a curve ahead of time or it won't lay flat after sewing. I folded over the ends of the bias tape to secure it as well.
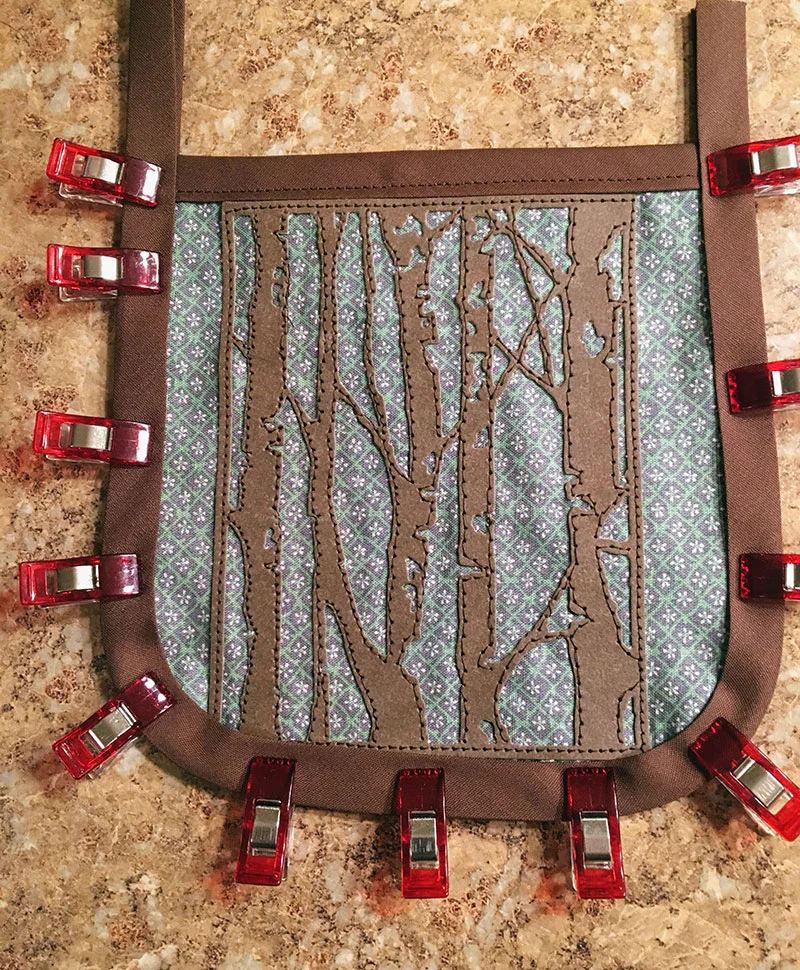
Here are the inner and outer pocket pieces with bias tape applied.

Before sewing the inner pocket piece to the outer pocket piece, cut a piece of ribbon or cording to fit around your button. Find the bottom center of your inner pocket piece, and add your loop there.

Now center your inner pocket piece on the outer pocket piece and sew all the way around. The inner pocket on my prototype bag was just decorative, so I decided to make this one decorative as well by sewing across the top.

Sew on a button centered above the inner pocket and in line with the loop on the bottom of the inner pocket.

Attaching the Pocket to the Main Bag
At the top and bottom of your main bag fabric, fold down your fabric 1/2" and iron.

Fold it down 1" and iron again. Now your raw edge is enclosed.

Center the pocket on the main part of the bag.

Pin it and sew around the sides and bottom, attaching it to the main body of the bag. Remember to leave the top open this time, so you can use the pocket.

Adding French Seams
To hide the raw edges on the bag, I decided to do a French seam. Wrong sides together, sew a scant 1/4" inch seam (slightly smaller than 1/4").

Now turn your bag inside out and press the first seam. Sew down the side again with a 3/8" seam. You could also trim down the original seam to 1/8" and then sew another 1/4" seam.

The inside of your bag should look like this now. Your raw edges are all enclosed.

Boxing the Corners
To give yourself a little more room inside the bag, add some boxed corners. As you can see, I used a 3 1/2" boxed corner here. I marked it with my pen on each side and then sewed back and forth across the line to reinforce it.

Here's what it looks like after boxing the corners.

I don't like to leave those corner points loose, so I hand tacked them to the side of the bag on either side. This isn't strictly necessary, but I think it looks nice.

You can see how the bottom of the bag has a little more room for storage now.

Making the Handles
Fold your handles in half lengthwise and iron.

Open up your fabric and press each side in against the center fold. Your raw edges will now be lined up with the center line from your previous fold.

Now fold it in half again so that all of the raw edges are hidden.

Sew down the long sides of your straps. I used a 1/8" seam allowance.

Attaching the Straps
Determine where you want the straps while the bag is right side out. I wanted my straps to line up with the pocket.

Now turn the bag inside out and tuck the ends of your straps under the folds you made earlier on. Use your measurement from the previous step to determine how far from the side seam you want your straps.
Sew around the lower edge of the fold. Go all the way around the bag to sew on both sets of straps. I used a 1/4" seam here.

Now fold your straps up and sew around the top edge of the bag. Again, I used a 1/4" seam.

When you're sewing around the bag, the side seams will be a little difficult to sew over, since they're so thick. Your sewing machine can have a little trouble climbing over these thicker sections, and you can end up with skipped stitches.

I like to use my jean-a-ma-jig for this. It's intended for sewing heavy fabrics, such as denim, but it works great for any thick seams.
As you approach the thick seam, raise your presser foot, and put the jean-a-ma-jig under it. Lower the presser foot and sew forward slowly.

Once you start sewing over the thick seam, transfer the jean-a-ma-jig to the front of your presser foot. Basically, you want to keep your presser foot level with the thick seam, so it doesn't have to work to climb up and down.
Once the whole presser foot is over the seam, remove the jean-a-ma-jig and keep sewing as normal.

It works great for sewing over the straps, too!

This is what it will look like when you're done.

Rolling It Up
Now you're ready to try rolling it up for storage. Fold in the sides of the bag and fold the straps down. Now roll it in from the top and the bottom until the loop and button meet.

Put the loop around the button and you're done!

The Finished Shopping Bag
Here's what it looks like unrolled and ready to hold your purchases:

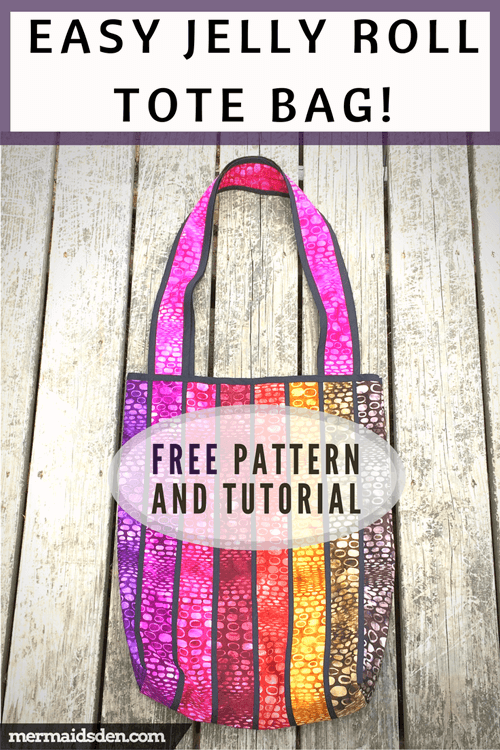
And here’s a second bag I made using different colors.