


Weaving for Beginners on a Leclerc Artisat Floor Loom
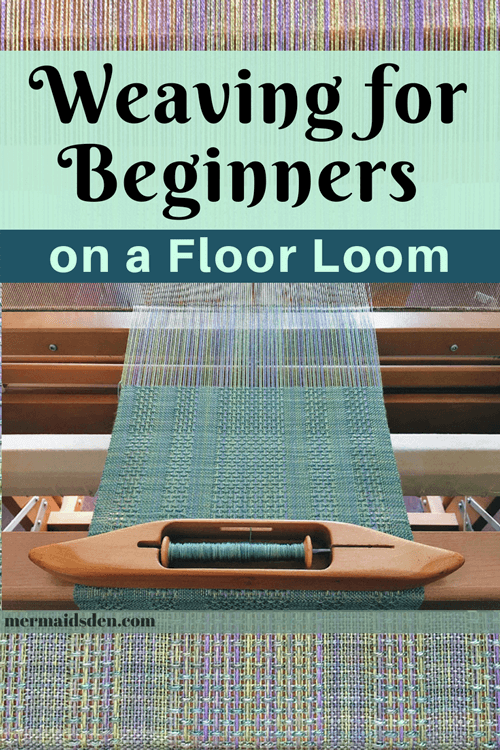
In this post, I'll go over how to use a Leclerc Artisat floor loom, and give some tips for buying a second-hand floor loom, setting it up, and starting to weave. Ever since I got my Schacht Flip Loom, I've been keeping an eye out for something bigger. I like my rigid heddle loom, but I wanted to be able to make bigger things, and to weave more complex patterns. I set up an alert on Craigslist for looms, so I had an idea of what used floor looms tend to sell for. I found this one in a local antique shop, along with a bunch of accessories, so I decided to go for it.
Disclosure: This post contains affiliate links, which means I may receive a percentage if you make a purchase using these links. This won’t cost anything extra to you. See my privacy policy for more details.
What Type of Floor Loom Is It?
You can quickly see how many shafts it has. If you have a rigid heddle loom, the shafts are recognizable as heddles that move up and down when you press on treadles below the loom. You're most likely to find something with four shafts, but there are looms with eight or more.
Then you'll need to know if it's a jack loom (shafts raise up when you press the treadles), countermarch loom, or counterbalance loom (both of the latter have shafts that raise and lower when you press the treadles). See this explanation from Madelyn van der Hoogt at Interweave for more info on the differences between each type of loom.
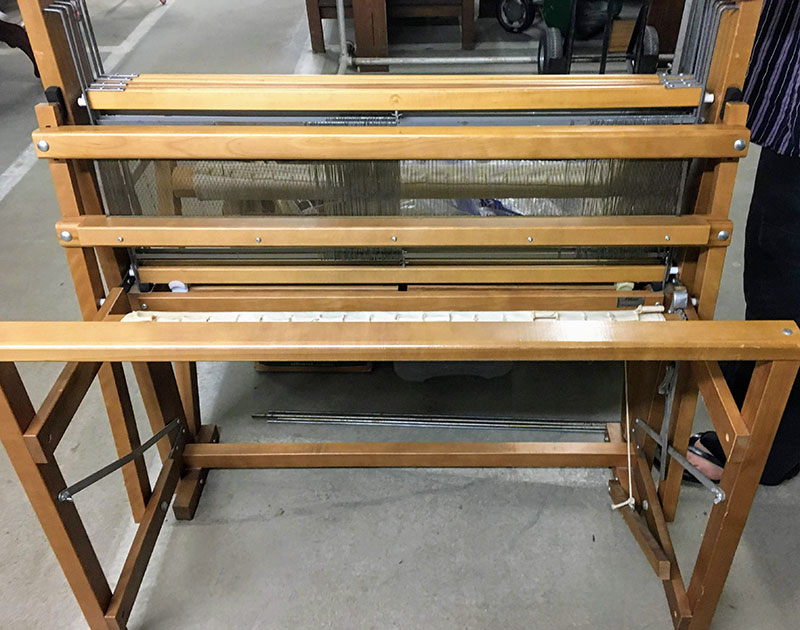
It will likely have four to six treadles. On the one I found, these were detached and in a box that went along with the loom. You can attach them to the shafts with knotted strings. The shafts have eyelets that correspond to the treadles (I'll show this later on).
With some looms, you'll have a direct tie up system where each treadle ties only to one shaft. Other looms will allow for multiple tie ups, which means multiple shafts can be lifted with one treadle. This one allows for multiple tie ups.

There were four apron rods as well. I wasn't sure why there were so many, but with this loom, you attach one to the cloth apron and then lash the second one to the first.

Does it Have All of Its Parts?
Look for a obviously missing or broken parts. The hand crank that beams on the warp at the back of the loom is often missing. Also check for broken brakes in the front and back. Make sure the shafts can be raised and lowered. Check the apron rods and aprons (if applicable).
This post has a good overview of what to look for in a used floor loom. Can you get more parts for it if something is missing or broken? Well, now you need to know exactly what kind of loom it is.
What Kind of Loom Is It?
When I first saw it, I had trouble identifying exactly what kind of loom it was. It said Leclerc, so that was a start.

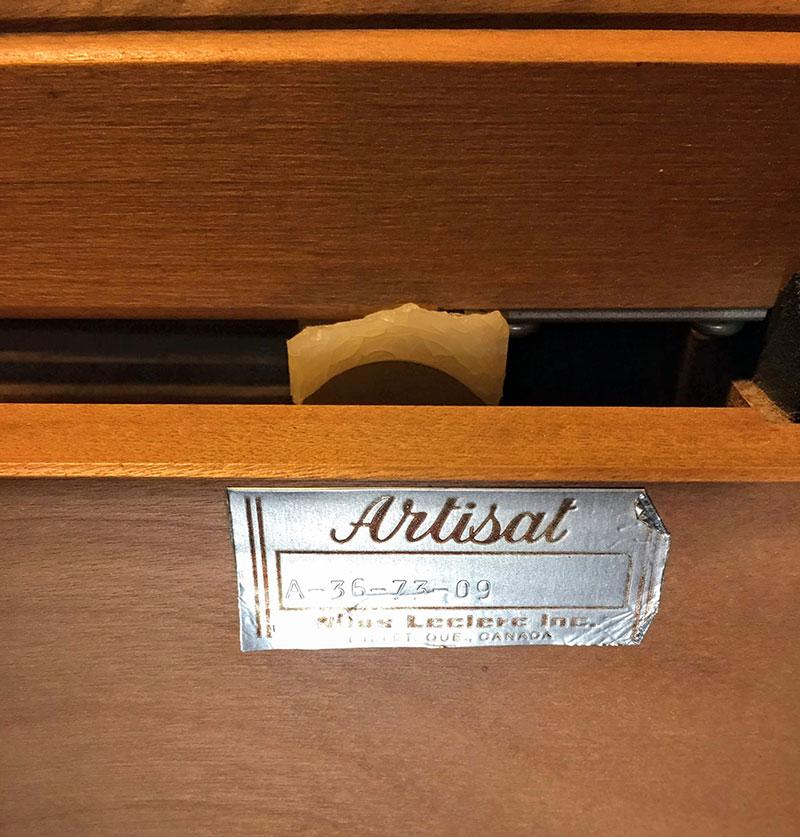
Then I found this sticker on the side, but it wasn't much help. The company Leclerc was formerly Nilus Leclerc, and confusingly, they also produced a loom called Nilus. Just because the loom says Nilus doesn't mean it's a loom from the Nilus line; it may just mean that the loom was produced back when Leclerc was still Nilus Leclerc.

Camilla Valley Farms has a handy guide to identifying your Leclerc loom with a lot of information and history on the different variations. Not all Leclerc looms have identifying information on them (or it may have worn off with age), but after reviewing this guide, I was reasonably certain that I had an Artisat.
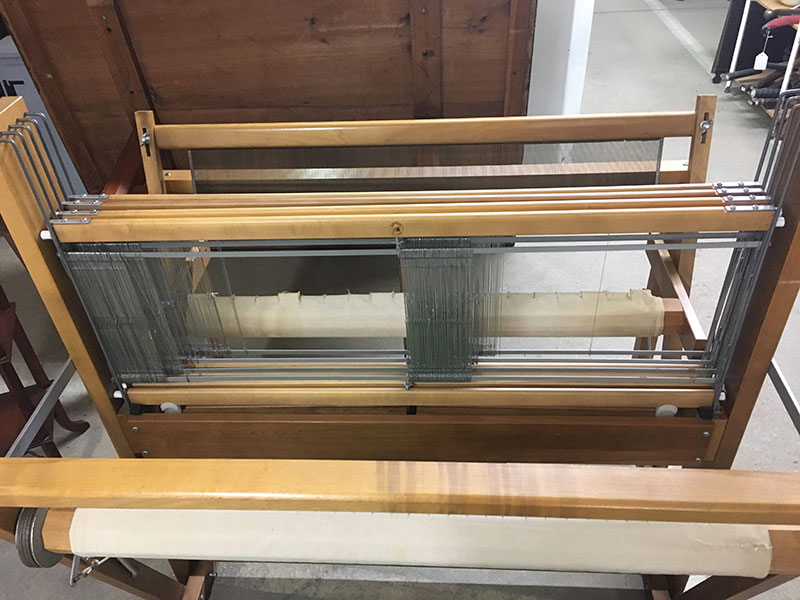
Later, I found a sticker that confirmed it, hidden on the wood bar below the shafts. (I also overlooked this cracked plastic piece that helps raise the first shaft. Luckily, it this piece still seems to function fine, but I'll have to watch it to see if it cracks further.)
Edited to add: a kind reader, Michelle R., wrote in and explained what this serial number means, “the serial number you showed means it was an Artisat (A) 36” (36), built in 1973 (73), the 9th one of that year (09).” This was exciting news to me, as I was wondering how old my loom was!
Leclerc Artisat Four Shaft Jack Loom
The Leclerc Artisat is a 36" jack loom with four shafts. The entire loom is wider than 36," but the reed itself is 36." You can find the manual here. The manual mainly shows how to put the loom together, rather than how to use it, but you can figure out how to use the loom with books and online resources and I'll mention some that I used below.
I have a slightly older version of the Artisat, but Leclerc still makes them, so you can easily find replacement parts. If you need anything, you can find a good selection of replacement parts here. The front and back of the Artisat can fold up for easy storage and transportation.
Camilla Valley Farms notes that the Artisat,
"First appeared in 1968 as a 4 shaft loom with a built-in bench and [was] the[n] re-introduced without the bench in 1969 as the 'Artisat IV'... By 1976 it was just referred to as the 'Artisat'. The 22 inch version was made some time after 1969 to 1975. We believe that sometime around 1976 Leclerc changed from using vertical metal rods on each side of the castle as shaft guides to the current nylon pegs (see pictures here)."
Mine has the metal rods, but the tag just says Artisat, so my initial guess was that it was from around 1976, but as noted above, a kind reader let me know that the serial number actually indicated that it was from 1973.
Warping Methods
All right, so you've figured out what kind of loom you have. Now you need to figure out how to weave on it. Luckily, this is fairly standard across most looms. My loom came with the book Learning to Weave by Deborah Chandler, which I would highly recommend for a new weaver.
I started watching some videos on Youtube to learn about warping a floor loom, but I found them confusing. There are lots of different ways to warp a loom, and I wasn't sure which one I should be using or why you would use one method over another.
This book explained everything. Every step, every question you might have, every variation you might encounter, every mistake you might make (and how to fix it), and everything else you might want to know as a beginner. It was really helpful to have this comprehensive guide on hand.
One of the questions I had was: can you use a warping peg with a floor loom? With my rigid heddle loom, that was how I had warped, so I was hoping I could just use the same method, so I wouldn't have to learn something new. According to Deborah Chandler, you can use a warping peg, but it's not the preferred method and it's more difficult to do than just using a warping board.
Using a Warping Board
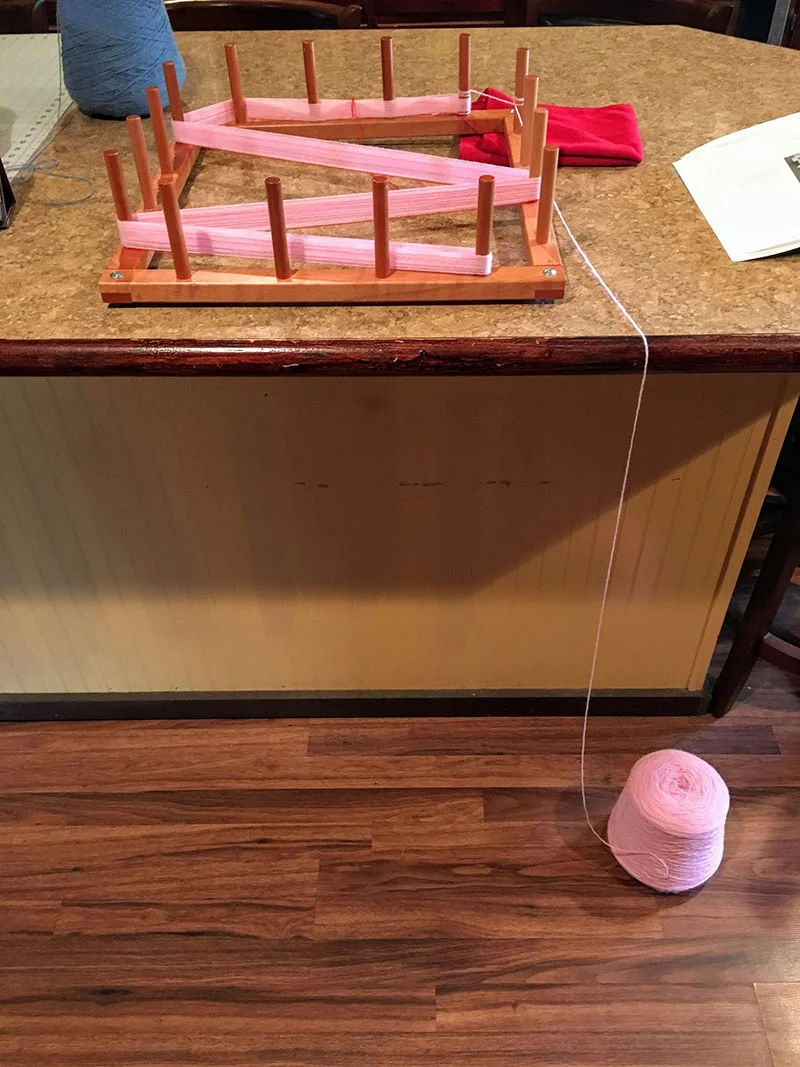
All right, then. Let's figure out how to use a warping board. Luckily, my loom came with one, but if you need one, I'd recommend Fiber Artist Supply Co's 4.5 yard warping board. I have some other weaving tools from them. Their quality is good and their prices are better than most. You can also make your own warping board.
My warping board was actually a bit warped (ha!), so I put a towel under it to help it stay level. I might try weighting it down at some point to see if I can re-level it. With the towel in place, it wasn't difficult to use. I might also add some felt or padding to the frame of the warping board, so I don't have to worry about shifting the towel out of place.

I found this video really helpful for learning the process of using a warping board. My loom also came with a couple of spools of yarn, so I decided to do my first project with those, following the first project laid out in Learning to Weave, which called for a two-color warp.

Don't forget to put your counting thread in! This will help you keep track of how many times you've gone around the warping board.

I just left my cone of yarn on the floor, which worked well. It unspooled just fine and didn't wander away. You might need to figure something else out if you have a ball or skein.
Winding Your Bobbins
One of the next steps is winding your bobbins. My loom came with a bobbin winder, two Leclerc boat shuttles, and a dozen bobbins. Again, the bobbin winder is by Fiber Artist Supply Co, and it's one of the more affordable ones out there.
You could also hand-wind your bobbins if you didn't want to invest in a bobbin winder. The bobbin winder makes it much faster, though.

You have to guide the yarn along back and forth in order to evenly fill the bobbin. Be sure not to overfill your bobbin or it won't turn freely in the shuttle. I may have slightly overfilled it here.

Here's what the bobbins look like in the shuttles. I wasn't sure which way to orient the bobbins. According to this site, the bobbin thread should unroll from underneath the bobbin.

Learning to Weave
I decided to use the beginner project in Deborah Chandler's Learning to Weave, which turned out to be a good idea. It's a 2 yard, 10" project.
I'm glad I started with something small; it seemed manageable and relatively quick to learn all of the steps involved in warping and weaving on my new loom. Left to my own devices, I probably would have tried to make something wider and longer.
I decided to warp from front to back, rather than back to front (or any of the other ways of warping) because Deborah Chandler recommended it, and because I didn't have a raddle for warping from back to front. (I have since bought a raddle from Handywoman on Etsy, though I haven't tried out back to front warping yet.)
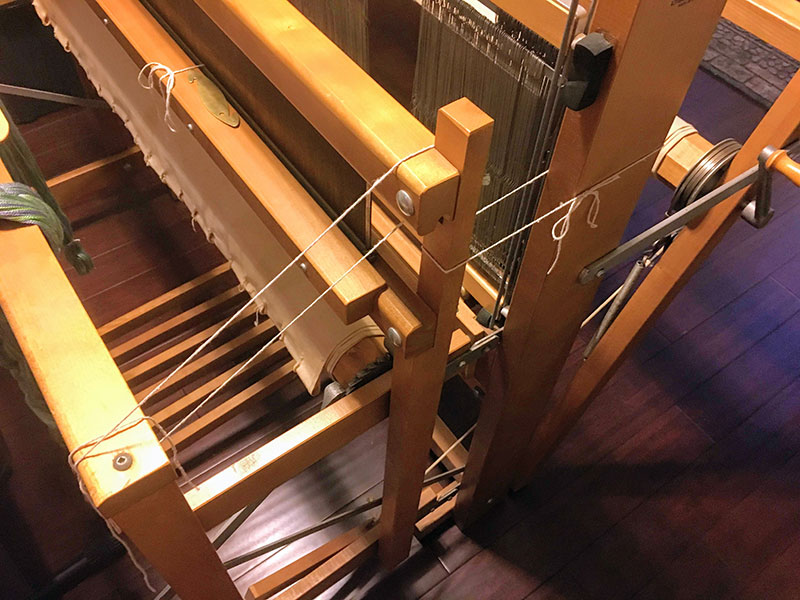
The book mentioned locking the beater in place for threading the reed, but I couldn't figure out how to do that, so I just draped my arm over it to hold it in place. It was a little awkward.
However, upon re-reading this chapter, I realized I could tie it in place (see below), which worked much better for my second project. I lashed it onto the front beam and then around the castle (the part that holds the shafts).
I started sleying the reed using the heddle hook from my rigid heddle loom. This worked fine, but I then got a proper sley hook, which fits in the hand a little more easily. Either one works, though.

Deborah Chandler said that you should sley all of the threads of one color, leaving spaces, before returning to sley the other color, but I was almost certain that I would miscount the spaces to leave empty, so I just switched back and forth. I held the crosses over my hand as Chandler suggested, but I have since purchased some lease sticks to hold the cross while threading the reed.

Here it is completely sleyed through the reed.

For threading the heddles, my book mentioned folding in the back beam. I tried to do this, but found that it doesn't stay balanced in place easily. As soon as I moved to the other side of the loom, it crashed to the floor. I think it's fine to leave the back beam on the floor for threading the heddles, but I was worried that it was putting too much pressure on the brake pedal, so I unhooked it.

I bought a padded musician's bench for sitting at the front of the loom (weaving benches are super expensive!), but it was too tall for threading the heddles, so I used a small footstool.

To distribute the heddles evenly on each shaft, you'll need to unhook the metal frame. There's a spring-loaded catch on the top and bottom of each shaft. You can leave these undone for the whole process of threading, but be sure to re-hook them before weaving, or you won't be able to raise and lower the shafts.

Here you can see that I've started to thread my heddles. The project called for a straight draw or one thread per shaft. You put one thread through a heddle from shaft one, then shaft two, then three, then four. And then you repeat.
I found it was easiest to pull out four heddles at a time, thread them, and then push them over. Be sure to have half of your project on one side of the spring hooks and half on the other, so your loom is balanced. In this case, I had 120 warp ends, so there were 60 on either side.

Here it is completely threaded. Double check everything at this point because it's easier to fix now rather than later.

My Artisat has cloth aprons, but my Deborah Chandler recommended lashing on a second apron rod about 3-4 inches away, just to make tying on easier, so you can space it out more easily. Otherwise, you have to tie the warp threads in the slits of the cloth apron only.
There were some knotted shoe strings in with my loom stuff, so I figured maybe that was what the previous owner used. I thought maybe the knots were meant to mark spacing or something, but they were haphazardly spaced, and only seemed to get in the way, so I un-knotted it all.
The shoe strings worked, but only for the small warp I had. I'll need something longer if I have a longer warp. I bought some cording, but it was too slippery to hold knots properly. (I ended up buying some texsolv cord from The Woolery for this, which worked well).

Here it is before beaming it onto the back beam. Deborah Chandler recommends not weighting the threads at all, but just allowing the weight of the beater bar and heddles to provide even tension on the loom. After a few turns, pull the warp threads to tighten them up. Do this every few turns of the hand crank.

Don't forget to use a warp separator to keep your threads from tangling. I used some brown packing paper.

Here it is tied onto the front apron rods after being wound onto the back. Learning to Weave has information on all of the knots to tie for the back and front apron rods, as well as different variations you can try. I balanced the book on my loom to refer to during warping.

My loom came with hooks to attach the treadles to the shafts, but a lot of them were badly bent. I'm not sure how this happened. There was also a pack of new hooks, for which I was grateful.
The old hooks came with pre-knotted cords to attach to the shafts, but the string was so thick that I could not fit it through the eyelets on the shafts, no matter how hard I tried. The new pack of hooks came with some thinner string, so I just knotted up some new cords. I attached one treadle to each shaft.

Weaving Your First Project
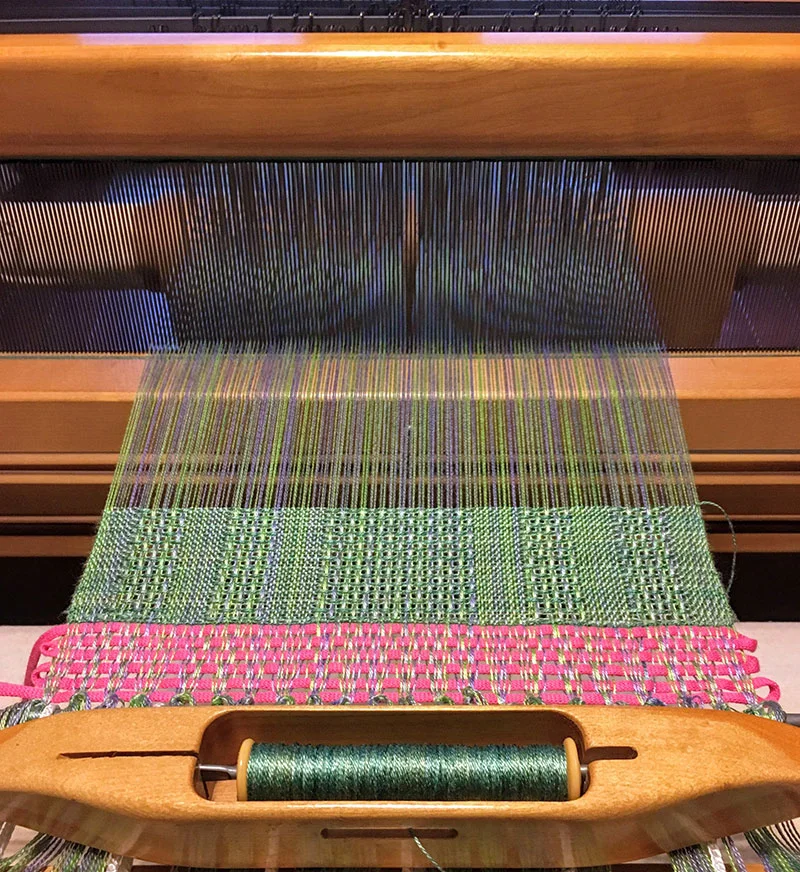
I started with some plain weave, which involves lifting shafts one and three simultaneously and then lifting shafts two and four. This gives you a simple plain weave.

It's a little hard to see in the previous picture, but I used some thicker yarn to spread the header. Once your warp is tied onto the front apron rod, there will be lots of spaces between the bundles of tied threads. You want the threads spread out evenly so you can weave without having clumps.
To spread out the warp, I used a thick ribbon yarn and raised shafts 1 & 3, 2 & 4, and 1 & 3. Don't beat until you've done three weft shots back and forth. Then beat and see where you're at. I did this twice for the project below, which spread out the warp threads nicely.
Remember to bubble or angle your weft threads. When you pack it in with the beater bar, you'll need a little extra weft to go under and over all of those warp threads. If you pull your weft tight, it will cause tension issues and compact the ends of your weaving.

Try to keep your selvege even at the edges of your weaving. It took a little practice to discover how tightly to pull the yarn at the end of each weft pick (a pick is a single shot of weft).

Eventually, I discovered the need for a floating selvege. In some patterns, the last thread on either side may be raised multiple times in a row, not allowing you to easily go around it, so you may end up missing it entirely, as I did below. A floating selvedge is threaded through your reed but not your heddles, so it's not part of your pattern, and you can go over and under it manually to add a selvedge to your weaving.

I tried out a few different straight draw patterns from Learning to Weave and Handweaver's Pattern Dictionary.

At one point, when I was advancing the warp, I rolled it too far forward. As you can see, my beater bar can no longer reach the weaving, so I had to release some fabric from the front cloth beam and roll it back.

Finishing Your Project
To finish the edges, I tried tying knots of different sizes along one side. I think the smaller knots with three to five threads look the nicest.
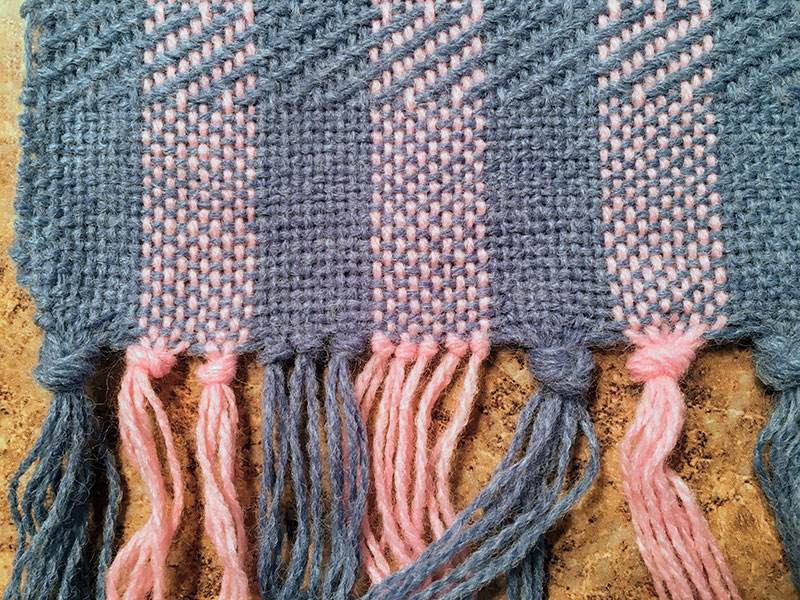
On the other side, I tried hemstitching, which gives it a nice even finish. It's less bumpy and doesn't distort the edges at all. I like the hemstitched side better.

For the first half of the warp, I tried different patterns and alternated between the blue and pink yarn.

For the second half of my warp, I tried out some different types of yarns and different patterns. You can see that some of these resulted in wider fabric and some made it thinner.
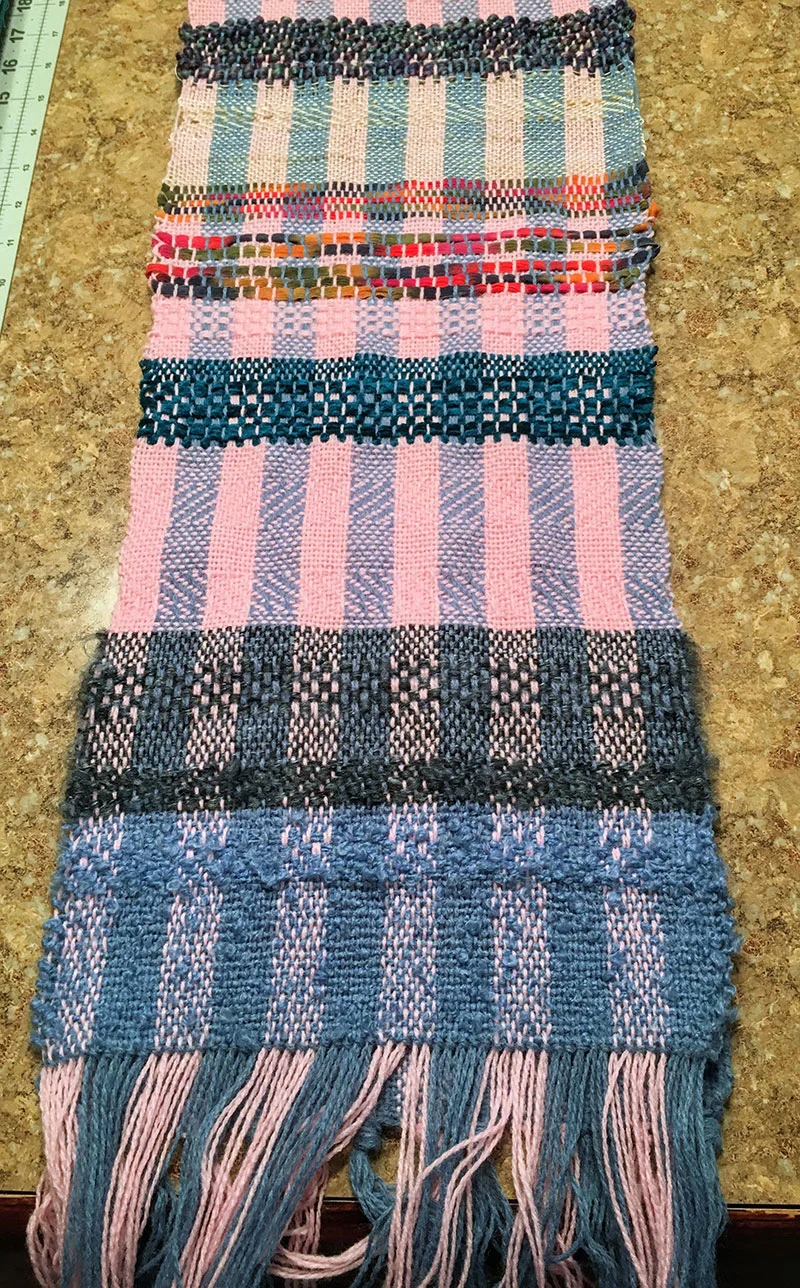
You have to wash your weaving to finish it, and the yarn will fluff up a bit, making the weaving more dense. I washed mine in the washing machine because it was acrylic yarn, but most people recommend hand washing.
I started with 72" of warp. I had 28" of loom waste, which is about typical. This is the part of your warp at the beginning and at the end that you're not able to weave.
The unwashed dimensions of my weaving were 9" (for the plain weave sections) by 44" once removed from the loom. The project was sett at 10", but it's normal to lose about 10% of your weaving width and length to draw-in, which is the way the threads pull together during the weaving. Once washed, it measured 8 3/4" by 41 1/2", so it lost more length than width.
I'm excited to try some new weaving projects on my loom now! I have a scarf on the loom currently, but I also want to make some dish towels and maybe a blanket.
More Weaving
See my Pinterest Weaving board for more projects and inspiration:
Need a project to make with your woven fabric? Check out this Winter Wool Cape from All Free Sewing. The project features only one cut, so you won't waste your lovely woven fabric!


