Sewing Tutorial: Make a Quick and Easy Silk Headband

Here's a quick and easy tutorial to show you how to make a silk headband. Awhile back, I bought some silk sari scraps, and I posted about how to make them into an infinity scarf. I still have a lot of silk sari scraps, so I decided to make some headbands. This project is simple and fast to make, so you can whip up a bunch of them for yourself and for your friends. The silk is very soft and breathable, so it's comfortable and fashionable for every day wear.
Disclosure: This post contains affiliate links, which means I may receive a percentage if you make a purchase using these links. I only link to things I like and use!
Materials used:
- I used silk sari pieces from eBay seller Vintage Fabrics Galore
. You could also use a couple of pretty silk scarves from a thrift store.
- 1" elastic
Cutting the fabric
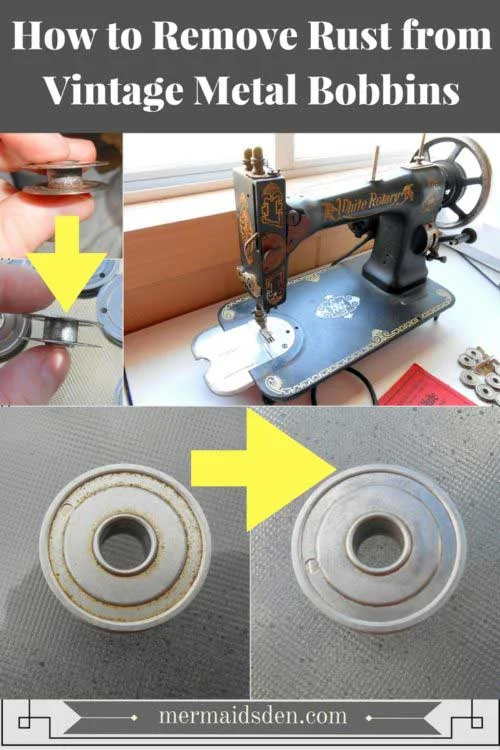
I had a silk headband that I already liked (top right), so I used that as a template. You'll need two pieces of silk for the top and bottom of the headband, plus the elastic. For the top, I cut my pieces 14" long by 8-9" wide. For the bottom, I cut the pieces 12" long by 3" wide. I cut the elastic about 14" long.

Sewing your silk headband
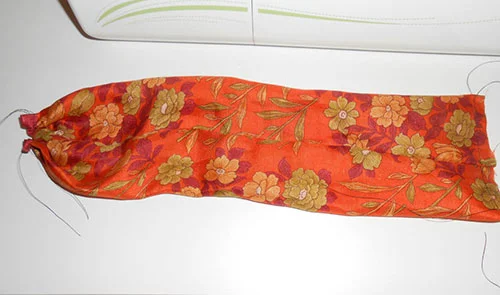
This piece will be the band for your headband. Sew a 1/4" hem on each side. (Ignore the serged edge. That was just to keep it from unraveling in the wash.)

Now fold it in half, right sides together, and sew 1/4" from the edge. Turn it right side out and put the elastic through. Your elastic is longer than the band you've sewn. Keep about 1" of elastic showing on either side.

Start sewing about 1/2" from the edge. Sew normally for a couple of stitches to let the thread get some purchase on the band/elastic. Now hold onto the extra elastic you left on either side of the band and pull while you sew down the middle of the band. Your band should scrunch up like this. Stop sewing about 1/2" from the edge. You'll still have some extra elastic poking out on either side of the band. Trim this down as short as you can without cutting your fabric.

Now take the fabric for the top of your headband. Fold it in half, right sides together, and sew down the long edge. Turn it, so that you have an enclosed tube of fabric. Now run a gathering stitch along each of the shorter edges, and pull up each edge as small as you can. To create a gathering stitch, set your stitch length as long as you can, and use a straight stitch. Don't back stitch to secure it--you want to be able to slide the fabric over the stitches. Now insert your gathered edge into the band. Remember that you left about 1/2" unsewn at the each side of the band. Sew the top and bottom of your headband together.
Enjoy your new headband!